Splunk On-CallのSlackインテグレーション 🔗
Splunk On-CallとSlackのインテグレーションは、エンジニア、開発者、IT管理者のコミュニケーションを一元化します。Slackとのインテグレーションは、オンコールでのインシデント対応と修復の間のコミュニケーションギャップを埋めることで、コラボレーションを改善し、MTTRを短縮します。
要件 🔗
このインテグレーションは以下のバージョンのSplunk On-Callと互換性があります:
Starter
Essential
エンタープライズ
このインテグレーションを設定するには、Slack管理者である必要があります。必要なSlackチャネルにSlack管理者がいない場合は、Slack Admin Service Userを作成してください。詳細は インテグレーションの所有権 を参照してください。
注意
Slackとのインテグレーションを有効にする前に、古いSlack(webhook)とのインテグレーションを無効にしてください。
このインテグレーションを設定および調整するには、Splunk On-Callでグローバル管理者またはアラート管理者のいずれかの権限が必要です。
Slackの設定 🔗
以下のセクションでは、このインテグレーションの設定方法について説明します。
インテグレーションの所有権 🔗
このインテグレーションを設定するには、Slackの管理者以上のアクセス許可が必要です。
Slack Admin Service Userを作成してこのインテグレーションを設定し、インテグレーションの機能が特定のユーザーに依存しないようにします。
Slackワークスペースの所有者または管理者でない場合は、Slack Admin Service Userの作成を依頼するか、Slack管理者にアクセス許可の追加を依頼してください。
注意
インテグレーションを設定したSlack管理者がSlackワークスペースを離れた場合は、Slackインテグレーションのサービス停止を避けるため、直ちにSplunkオンコールサポートに連絡してください。
インテグレーションを設定する 🔗
Splunk On-Call Webポータルから、Integrations、3rd Party Integrations、Slack に移動し、Enable Integration を選択します。
表示されたSlackの画面で、統合したいワークスペースを入力し、ログインします。そして、アプリケーションを認証します。
注釈
Splunk On-Callでは、デフォルトのSlackチャネルを選択する必要があります。すべてのオプションにチェックが入っていない場合、デフォルトのチャネルにはアクティビティが登録されません。
チャネルマッピングを追加する 🔗
Splunk On-CallのSlackインテグレーションページで、Add Mapping を選択します。
まず、インテグレーションのデフォルトチャネルを選択する必要があります。これは必須です。すべてのボックスをオフにすることで、このチャネルへのインシデントアクティビティおよび通知を防止できます。
マップしたいSplunk On-CallエスカレーションポリシーとSlackチャネルを選択し、Channel Settings セクションでSplunk On-CallがこのSlackチャネルに送信するメッセージタイプを選択します。ボックスのチェックを外すことで、ノイズを制限し、特定のチャネルへの情報フローを制御することができます。
プライベートチャネル 🔗
プライベートSlackチャネルにマッピングする場合、Splunk On-CallアプリにプライベートSlackチャネルへの投稿許可を与える必要があります。まず、エスカレーションポリシーをプライベートSlackチャネルにマッピングします。プライベートチャネルはパブリックチャネルの下に表示されます。
次に、プライベートSlackチャネルでSplunk On-Callについてメンションするか、Add an app を選択します。最後に、Invite Them を選択してアプリに許可を与えます。
注釈
プライベートチャネルの範囲は、Splunk On-CallをSlackに統合する担当者がアクセスできるチャネルに限定されます。すべてのプライベートチャネルをSplunk On-Callにマッピングしたい場合は、この用途のためにすべてのプライベートチャネルにアクセスできるサービスアカウントを作成してください。
Slackでの使用方法 🔗
トリガーされたSplunk On-Callインシデントは、前のステップで指定したエスカレーションポリシーに基づいて、指定したSlackチャネルにルーティングされます。Slackからは、Slackのインシデントカードのボタンを使用して、インシデントの確認、再ルーティング、解決、さらにはスヌーズを行うことができます。
Splunk On-Callで動作するSlackのスラッシュコマンドは3 つあります:
/victor-linkuser/victor-unlinkuser/victor-createincident
createincident コマンドを使用する際は、コマンドプレビューに表示されるように、括弧を含む完全な構文を使用してください。例えば、インシデントを作成するには:
/victor-createincident [this is an example message] for [victorops-username]
インシデントに関するコミュニケーションを1か所で管理するには、ハッシュタグとインシデント番号を使用してSlack内で特定のインシデントを参照します(例: #incident123 )。ハッシュタグを含むメッセージは、Splunk On-Call内の関連するインシデントのタイムラインに表示されます。
Webhooksを使った注釈の追加 🔗
カスタム発信Webhookを使ってSlackチャネルに注釈を送信できます。
以下のペイロードでは、title フィールドがクリッカブルリンクを持ち、image_url がルールエンジンで定義されたレンダリング画像です:
{ “channel”: “#general”, “username”: “Splunk On-Call”, “icon_url”:
“https://victorops.com/assets/img/branding/logo-yellow-mark.png”,
“attachments”: [ { “fallback”:“What this image is in case it does not
render”, “title”: “https://en.wikipedia.org/wiki/Australian_Cattle_Dog”,
“image_url”:
“http://i.dailymail.co.uk/i/newpix/2018/04/21/05/4B606CDA00000578-0-image-a-32_1524284530816.jpg”,
“color”: “danger” } ] }
Webhookを使ったSlackへのコンテンツやリンクの添付については、Slackの公式ドキュメントを参照してください。
Slackアプリを使ったマルチチャネル設定 🔗
マルチチャネル設定では、複数のSplunk On-Call組織を設定して単一のSlackワークスペースにメッセージを送信したり、単一のSplunk On-Call組織を設定して複数のSlack ワークスペースにメッセージを送信したりできます。この設定は、上記のSlackアプリ設定と組み合わせて使用できます。
注釈
このインテグレーションは双方向通信をサポートしていません。マルチチャネル設定はSplunk On-CallからSlackへのみです。
Splunk On-Callでマルチチャネルを設定するには、以下の手順が必要です:
SlackでのSplunk On-Call Enterpriseと管理者権限
カスタム発信Webhook。詳しくは Splunk On-CallのカスタムアウトバウンドWebhook を参照してください
Slackで設定する 🔗
Slackでマルチチャネルを設定するには、以下の手順に従ってください:
Slack’s Incoming Webhooks documentation に移動し、Create your Slack app を選択します。
次の画面でプロンプトが表示されたら、From scratch を選択します。
アプリの名前を入力し、アプリを開発するSlackワークスペースを選択し、Create App を選択します。
次の画面で、Add features and functionality の下で、Incoming Webhooks を選択します。
Activate Incoming Webhooks を On に切り替えます。
画面の下のほうで、Add New Webhook to Workspace を選択し、メッセージを投稿したいチャネルを選びます。
新しく生成されたWebhook URLをコピーし、Splunk On-Callに移動します。
Splunk On-Callで設定する 🔗
Splunk On-Callでマルチチャネルを設定するには、以下の手順に従います:
Splunk On-Callで、Integrations、Outgoing Webhooks の順に移動します。
Add Webhook を選択します。Event ドロップダウンメニューで、Incident-Triggered を選択します。
Method は POST のまま、Content Type は application/json のままにします。
前のセクションでコピーしたWebhook URLを To: ボックスに貼り付けます。
Webhookのペイロードセクションに、以下のアラートペイロードテンプレートを貼り付けます:
{
"text":"${{ALERT.entity_display_name}},${{ALERT.entity_id}},${{ALERT.state_message}}"
}
ユースケースに関連するフィールドを含めるために、このペイロードを自由にカスタマイズすることができます。Slack 側の主な制限は、これらのフィールドをすべてテキストフィールド内に含める必要があることです。Splunk On-CallアウトバウンドWebhookの詳細については、Splunk On-CallのカスタムアウトバウンドWebhook を参照してください。
特定のルーティングキー宛のインシデントに対してのみSlackメッセージを送信するオプション設定 🔗
いくつかの設定を調整することで、送信Webhookのスコープを縮小し、指定したルーティングキーがSplunk On-Callインシデントに存在する場合にのみSlackにメッセージを正常に投稿するようにできます。
以下の手順に従ってください:
Integrations、Outgoing Webhooks で作成した発信Webhookに戻り、Webhookを編集します。
To フィールドに移動し、最後の
/記号に続く部分をハイライトします。X8VM8fMXYoJYgEcupBWFmSD7のようなランダムな文字列になるはずです。このランダムな文字列をクリップボードにコピーし、${{ALERT.slackwebhook-field}}に置き換えます。完全なURLは次のようになるはずです。
https://hooks.slack.com/services/TCUG253D8/B07G6SF7X8P/${{ALERT.slackwebhook-field}}
変更を保存し、Settings、Alert Rules Engine の下にあるアラートルールエンジンに移動します。青色の「ルールを追加する」ボタンを選択します。
一番上の行で、Slackでメッセージをトリガーさせたいrouting_keyを指定します。次に、Transform these alert fields セクションまでスキップして、slackwebhook-fieldに先ほどコピーしたURLの部分を設定します。出来上がったルールは以下のようになります。
When routing_key matches test
Set slackwebhook-field to new value X8VM8fMXYoJYgEcupBWFmSD7
青い保存ボタンを選択してルールを保存します。これでこのオプション設定は完了です。
指定したルーティングキーがアラートに存在する場合、このアラートルールが適用され、貼り付けたURL部分の値を持つslackwebhook-fieldというフィールドが作成されます。このslackwebhook-fieldの値が送信Webhookに動的に取り込まれ、URLが完成し、有効な送信先が与えられます。このルーティングキーを含まないすべてのアラートでは、Webhookが試行され、https://hooks.slack.com/services/TCUG253D8/B07G6SF7X8P/${{ALERT.slackwebhook-field}} に送信されるため失敗します。
アラートのルーティングキーに基づき、通知を異なるSlackチャネルにセグメントするオプション設定 🔗
このセクションは、前のセクションをベースに、さらに一歩踏み込んで、複数のSlackアプリの作成について説明します。それぞれのアプリには異なるスペースに向ける独自のWebhookがあります。
以下の手順に従ってください:
この記事の」Slackでの設定」セクションに戻って、もう一度手順を実行してください。これで、別のSlackチャネルに向けた新しい着信Webhookを持つ新しいSlackアプリが作成されます。
新しいSlackアプリとIncoming Webhookが作成されたら、Splunk On-Callのアラートルールエンジンに戻ります。
以前に「特定のルーティングキーに向けられたインシデントに対してのみSlackメッセージを送信するオプション設定」セクションで作成したルールと非常によく似たアラートルールをもう1つ作成します。唯一の違いは、ルールがマッチングする
routing_key値とURL部分で、これは新しく生成された受信Webhook URLに対応します。
統合したいすべてのルーティングキーとSlackチャネルに対して、Slack Apps、Incoming Webhooks、Alert Rulesの作成を繰り返します。これにより、アラートの routing_key の値に基づいて、異なるSlack チャネルに通知が届くようになります。
レガシーSlackインテグレーションガイド 🔗
Slackでの所有権の移転 🔗
Slack環境の管理者権限を確認してください。Slackワークスペースのプライマリオーナーでない場合は、Splunk On-Callと統合するために所有権の移譲許可を求める必要があります。
In Splunk On-Call 🔗
Splunk On-Call Webポータルから Settings、Alert Behavior、Integrations を選択します。
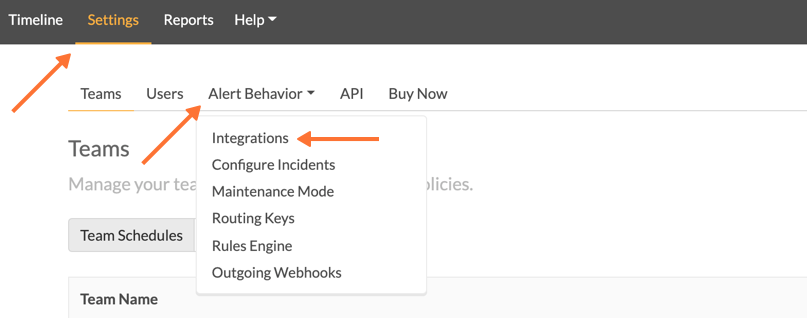
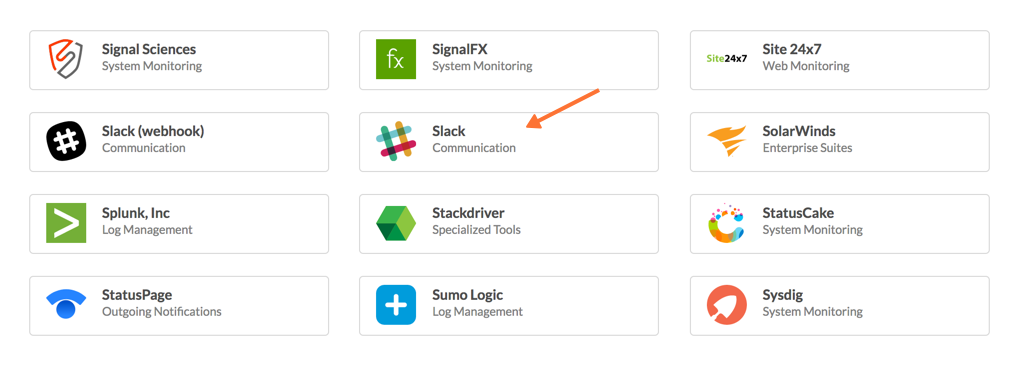
次に、Slackインテグレーションタイルを選択します。
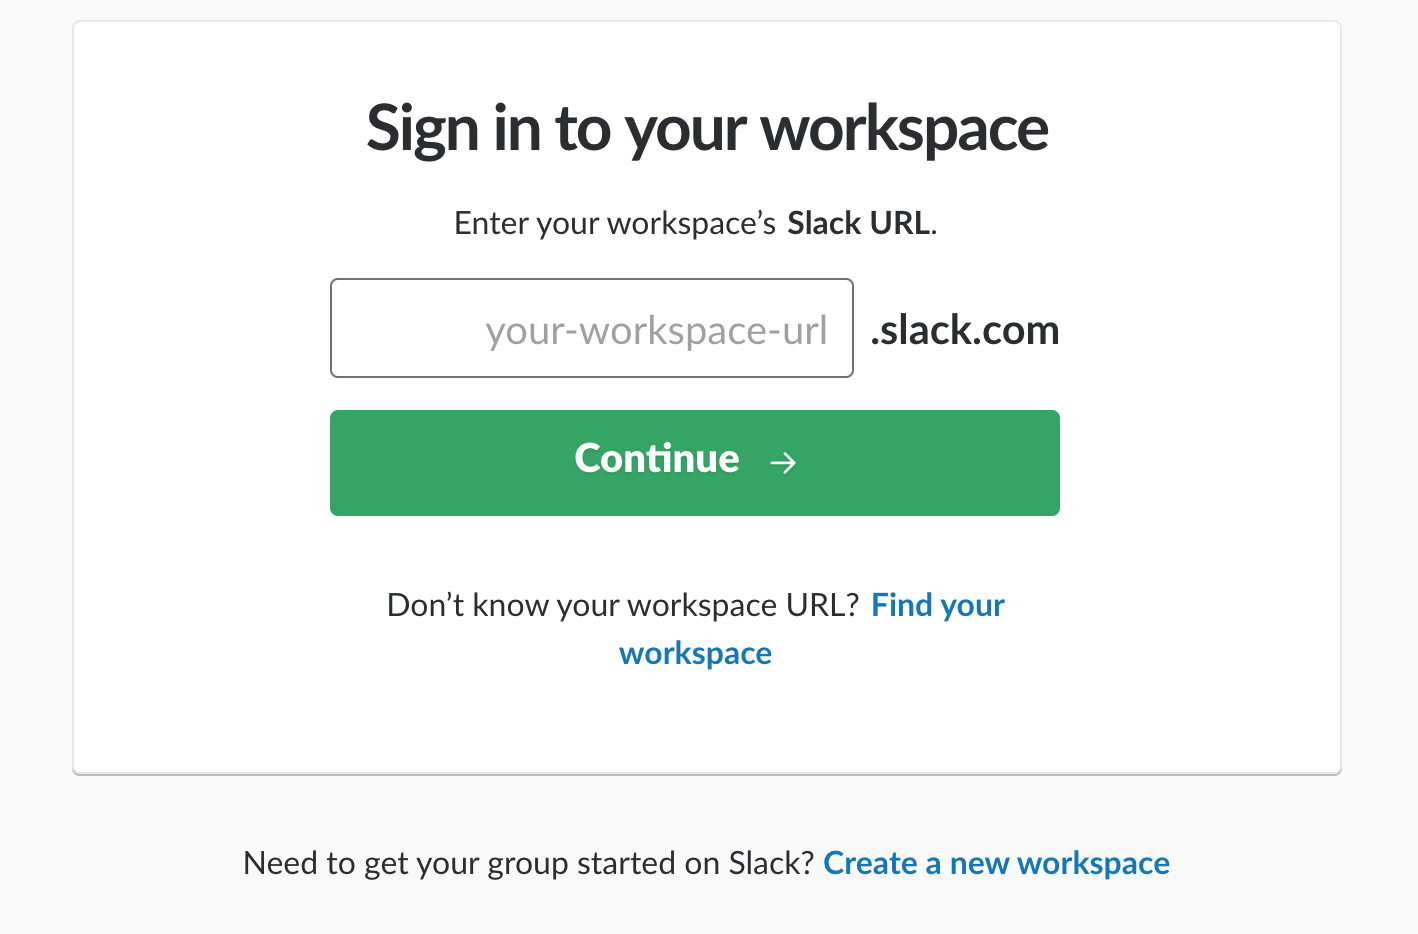
次に Enable Integration. を選択します。Slackの認証画面が表示されるので、まず統合したいチームを選び、ログインします。
次に、メールとパスワードを入力します。
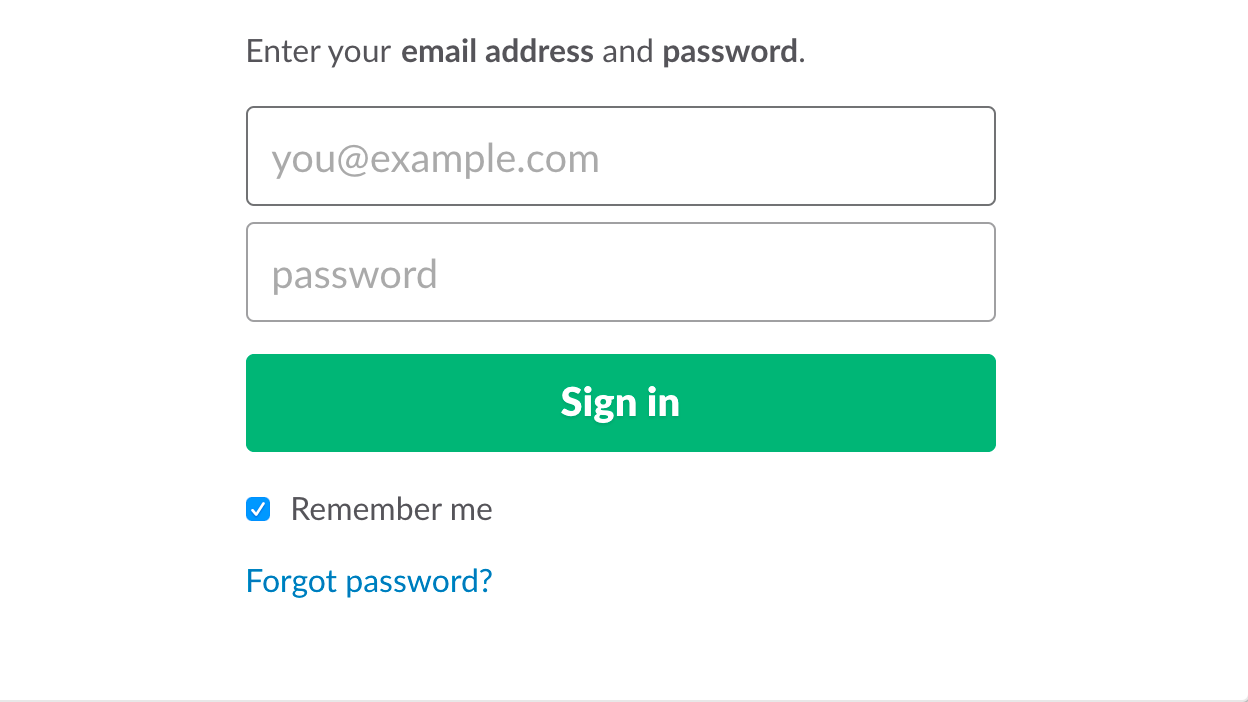
次に、アプリケーションを承認します。
認証されたら、Slackチャネルを選択します。
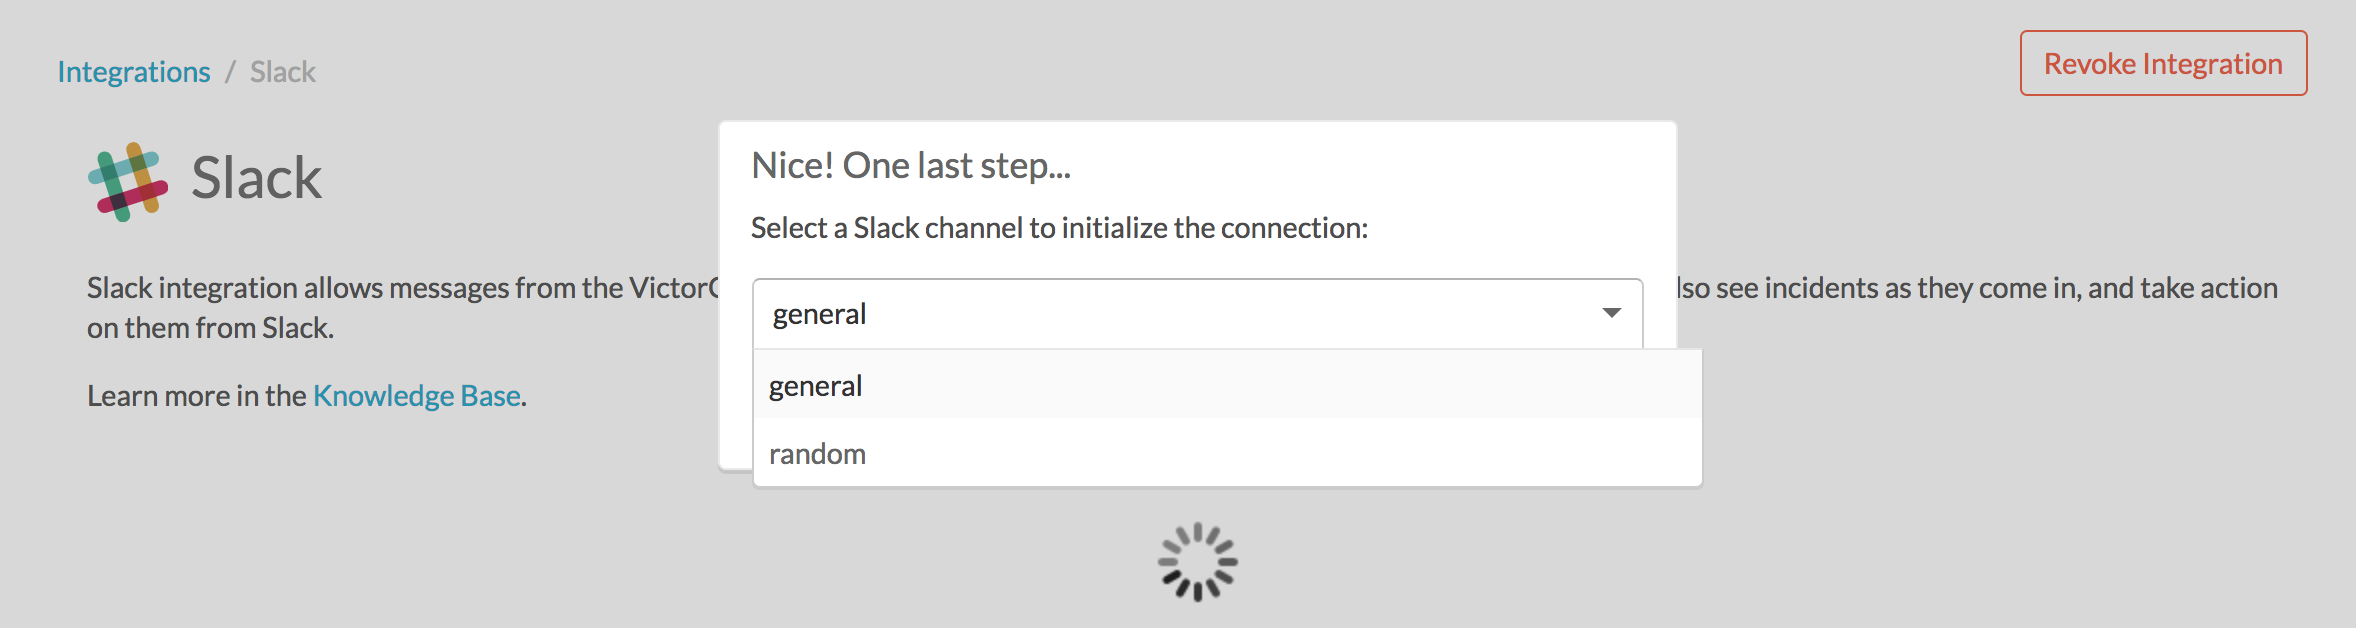
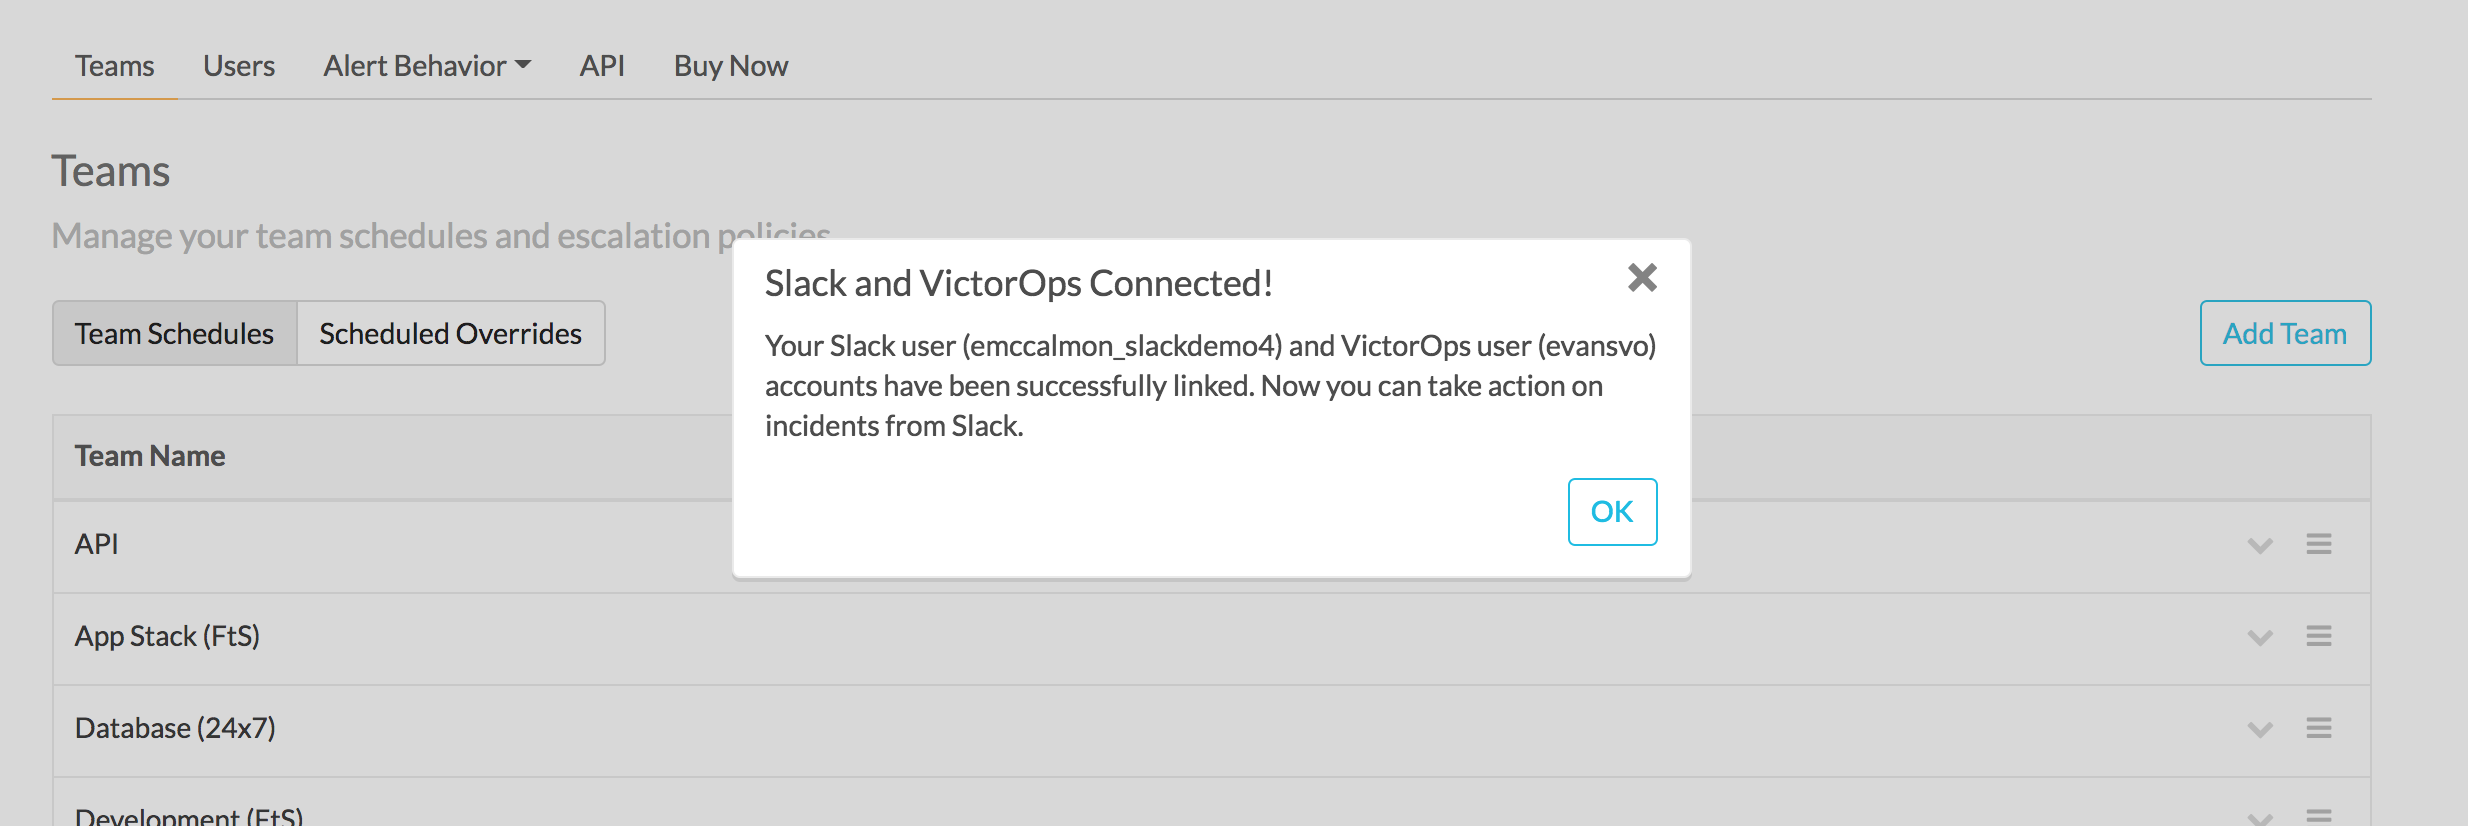
最後にSplunk On-Callにリダイレクトされ、認証が成功したことを示すメッセージが表示されます。
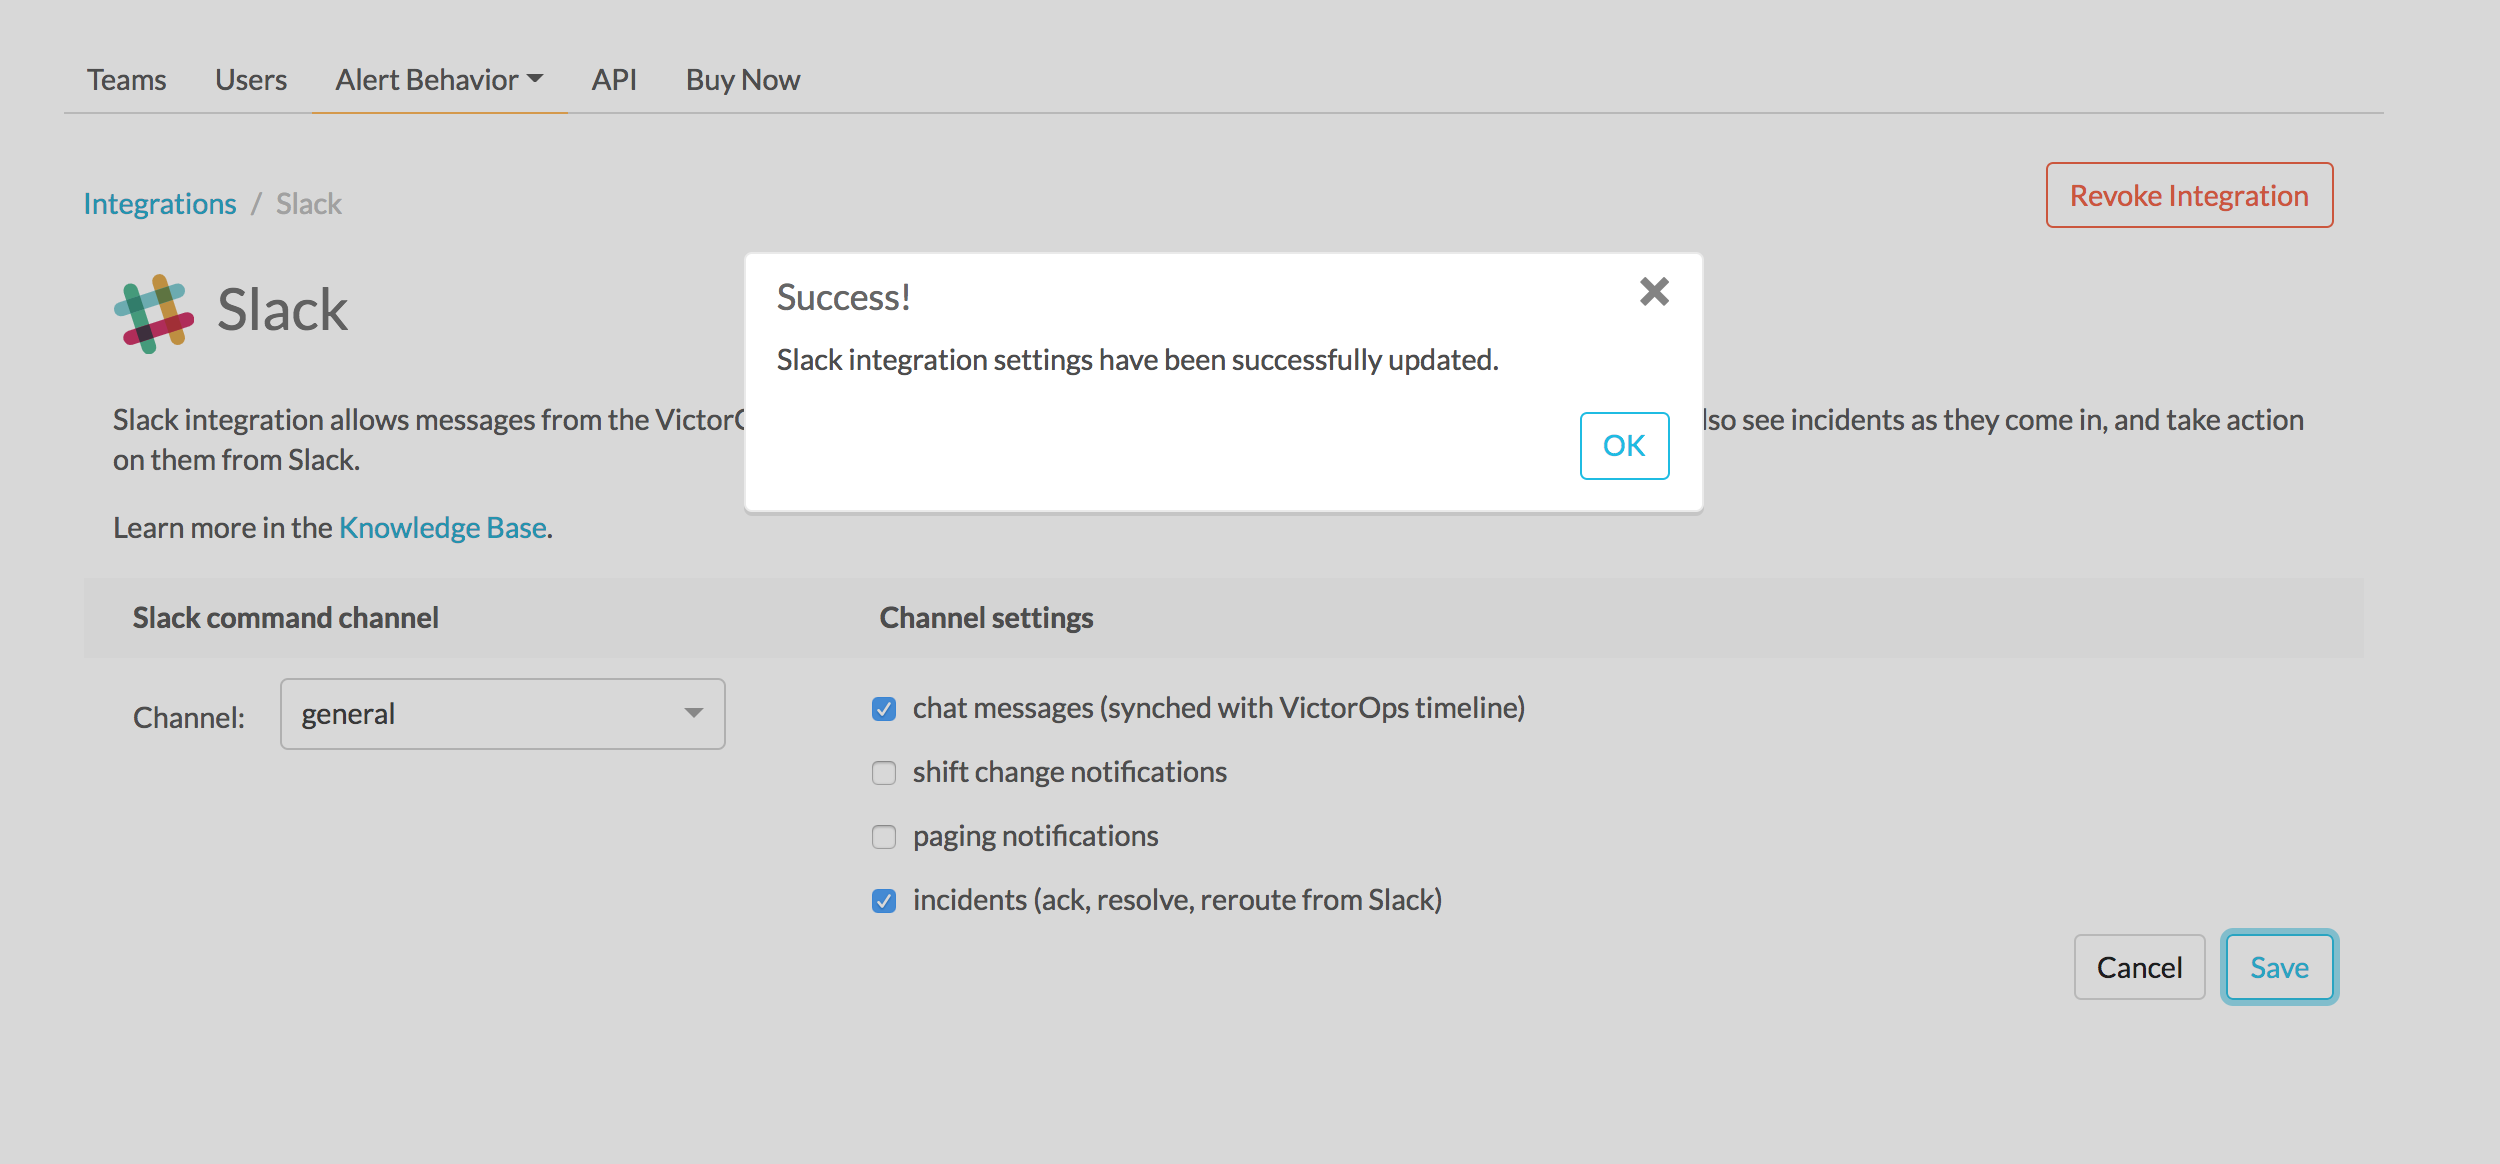
Splunk On-Call Webインターフェイスの設定 🔗
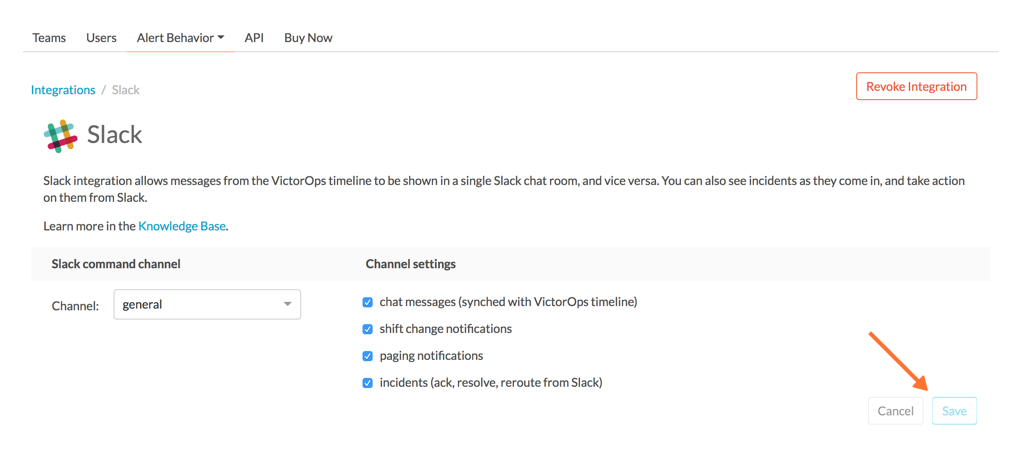
Web UIから、インテグレーションの側面を設定できます。例えば、インテグレーションしたいSlackチャネルを選択し、Splunk On-CallからSlackへのメッセージ通知を制御することができます。
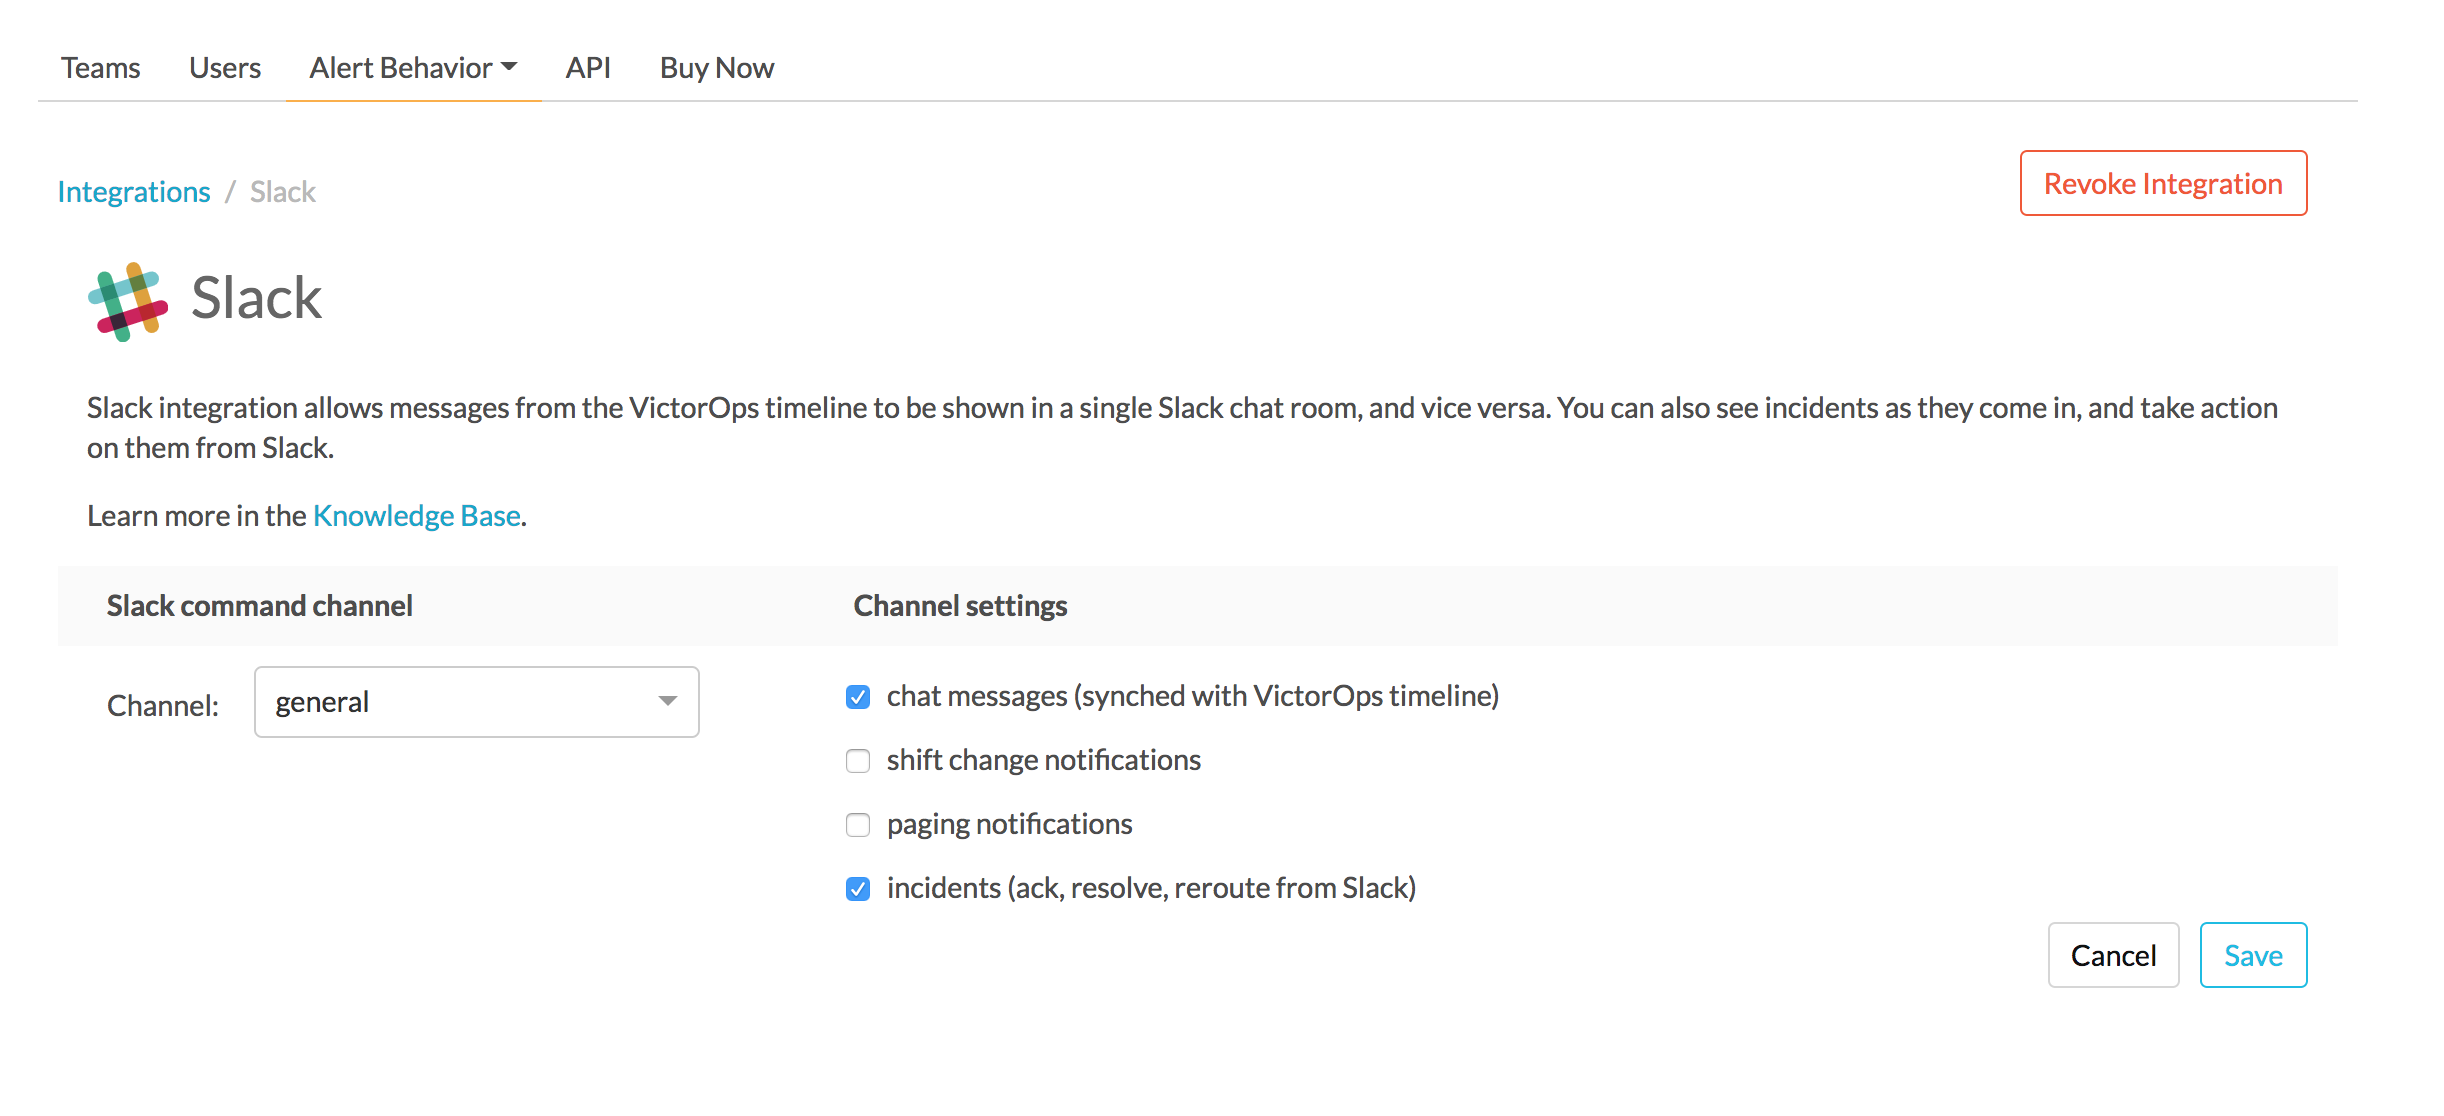
設定の構成が終わったら、保存します。
Splunk On-Call Botをチャネルに招待する 🔗
Slackで、@VictorOps のボットユーザーを紹介して、チャネルに追加してください。
SlackユーザーとSplunk On-Callユーザーをリンクする 🔗
SlackからSlashコマンド /linkuser、リンクプロセスを開始するリンクを生成することができます。
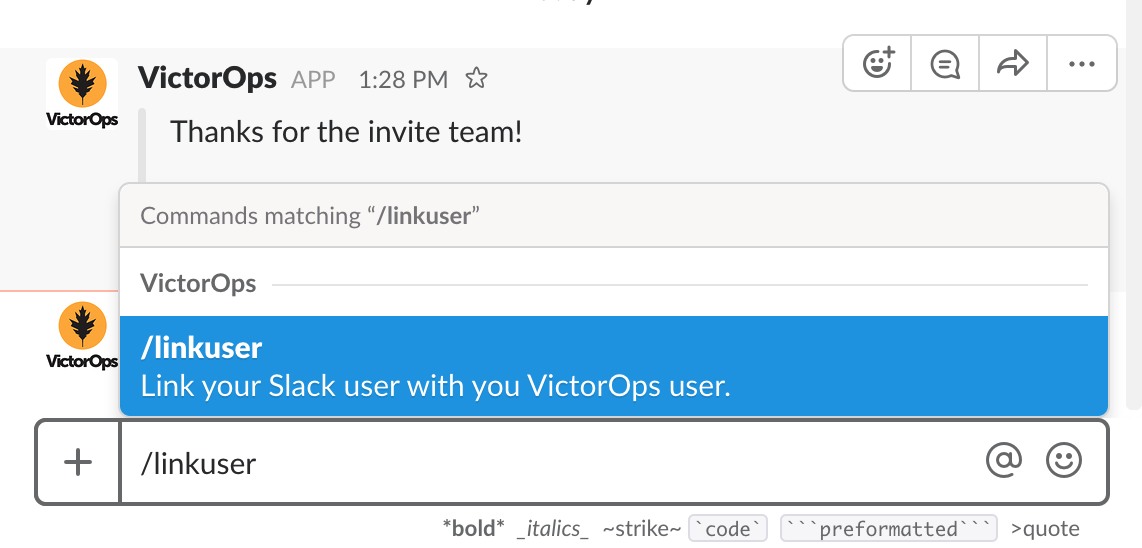
/linkuser コマンドを実行した後、Splunk On-Callアカウントにログインすると、ユーザーがリンクされたことが通知されます。
接続すると、Slackでインシデントを確認できます。ユーザーをリンクしていない場合、SlackでのインシデントアクションはSplunk On-Callに渡されません。
注釈
Splunk On-CallユーザーとSlackユーザーのリンクを解除する必要がある場合は、Splunk On-Callサポートにお問い合わせください。
Slackで認識および解決する 🔗
ユーザーがリンクされたことで、SlackチャネルからSplunk On-Callインシデントとやり取りできるようになりました。
Splunk On-Callタイムラインでは、Slackで発生した確認と解決アクションが通知されます。
レガシーSlack Webhookガイド 🔗
以下のガイドでは、Slack 2.xとSplunk On-Call Getting Started/EssentialsまたはEnterprise for Multi-Channel設定が必要です。Splunk On-Callの管理ユーザーである必要があります。
基本設定では、Splunk On-Callタイムラインを単一のSlackチャネルに双方向でリンクします。高度な設定は、いくつかの制限付きで複数のSlackチャネルへのリンクとルーティングを提供し、最初に基本設定が必要です。
Splunk On-Callタイムラインから Settings、Alert Behavior、Integrations を選択します。
下にスクロールし、Slack (webhook) インテグレーションボタンを選択します。インテグレーションが有効になっていない場合は、Enable Integration を選択します。
生成された Outgoing Webhook URL をコピーし、このページを開いておきます。
Slackアカウントから(管理者として)リンクしたいチャネルに移動し、設定アイコンを選択します。Add an app or integration を選択します。
検索機能で、
webhooksと入力し、Incoming WebHooks を選択します。Add Configuration を選択します。
Splunk On-Callタイムラインにリンクするチャネルを選択します。
WebhookのURLをクリップボードにコピーします。
一番下までスクロールし、Save Settings を選択します。
URLを Incoming Webhook URL セクションに貼り付けます。
Slackのインテグレーション検索機能に戻り、
webhooksと入力します。Outgoing WebHooks を選択します。Add Configuration を選択します。
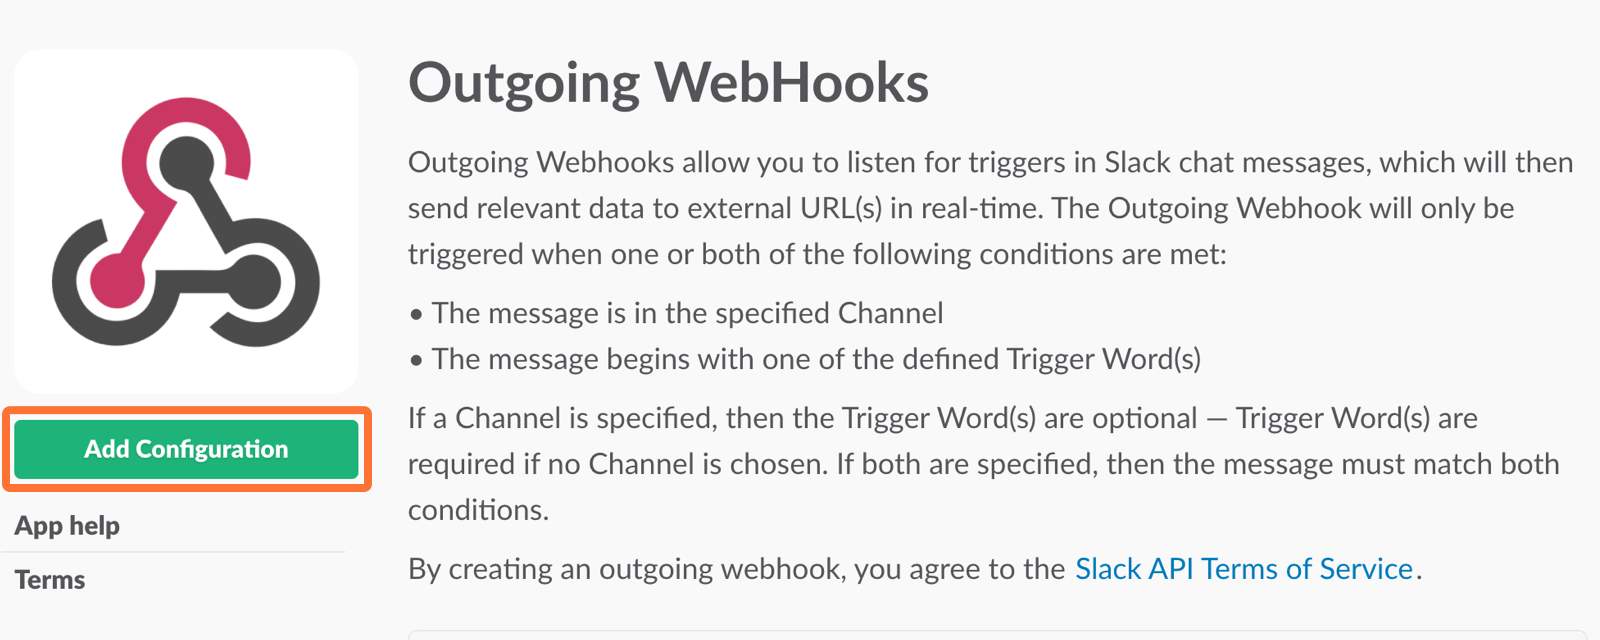
Add Outgoing WebHooks Integration を選択します。
Integration Settings セクションまでスクロールダウンします。Splunk On-Callとリンクしているチャネルを選択し、手順3でSplunk On-Callの Outgoing Webhooks URL セクションからコピーしたURLをSlackの URL(s) セクションに貼り付けます。
一番下までスクロールし、Save Changes を選択します。
Splunk On-CallのSlackインテグレーション設定に戻り、Slack Options セクションを読んでインテグレーションを微調整します。
#. Navigate to your main timeline in Splunk On-Call, and enter any text into one of the two chat bars and press the Enter or Return key. The chat appears in your Slack channel. Reply to the chat from within Slack and to see the response in the Splunk On-Call timeline.
