Splunk On-CallのWebex Teamsインテグレーション 🔗
Splunk On-CallとWebex Teamsのインテグレーションにより、Splunk On-CallアカウントのインシデントをWebex Teamsで表示できるようになり、すでに作業中の場所に通知して、緊急時のツール切り替えを減らすことができます。
要件 🔗
このインテグレーションは以下のバージョンのSplunk On-Callと互換性があります:
エンタープライズ
Webex Teamsアカウントとモデレーターのアクセス許可が必要です。
Webex Teamsの設定 🔗
以下の手順に従って、Webex Teamsとのインテグレーションを設定してください:
Webex App Hubの Incoming Webhooks アプリに移動し、Connect を選択します。
必要に応じて認証し、Accept を選択します。
Incoming Webhooksアプリタブに戻り、更新します。
プロンプトが表示されたら、Webhook名を入力し、Webhookのスペースを選択します。
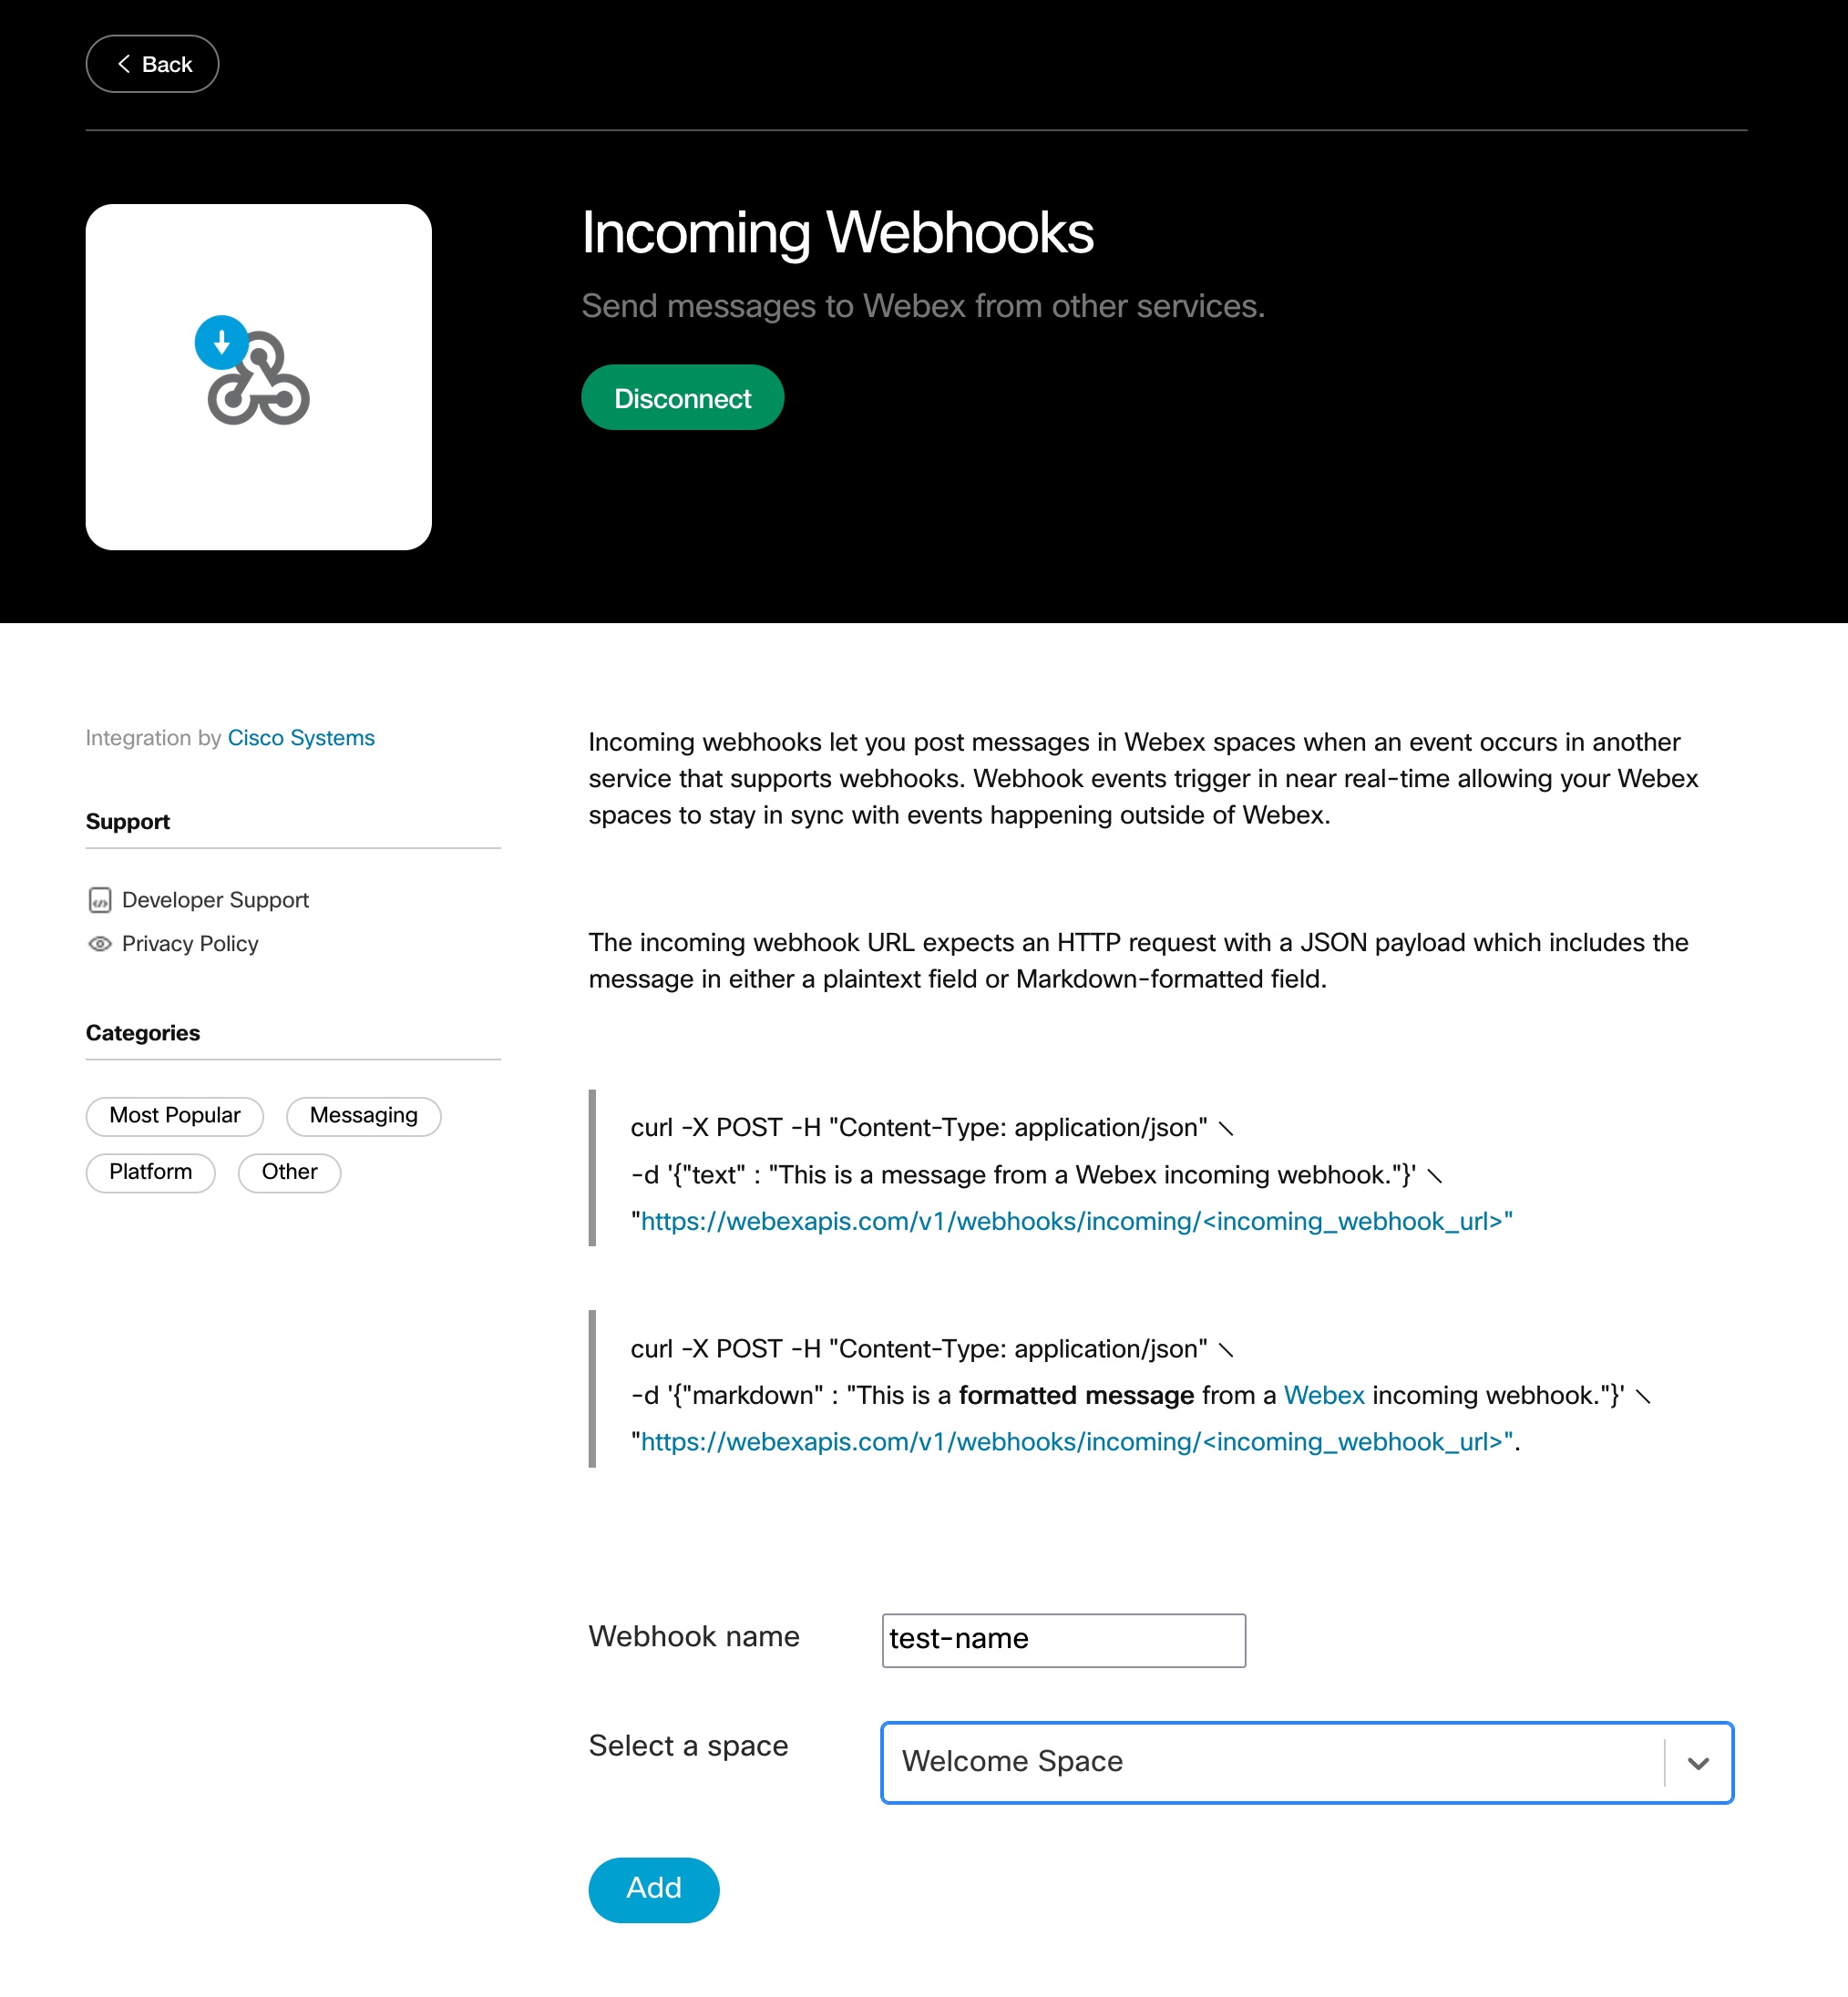
Add を選択し、WebhookのURLをクリップボードにコピーします。
Splunk On-Callの設定 🔗
以下の手順に従って、Webex Teamsとのインテグレーションを設定してください:
Integrations に移動し、guilabel:Outgoing Webhooks、Add Webhook を選択します。
新しいWebhookに以下の値を入力します:
Event: Incident-Triggered
Method: POST
Content Type: application/json
Custom Headers:なし
To:WebexからコピーしたWebhookのURL
Payload:
{ “markdown”:
“:math:`{{ALERT.entity\_display\_name}}<br>`\ {{ALERT.state_message}}” }
Save を選択します。
(オプション)特定のルーティングキーに向けられたアラートに対してのみ通知を送信します 🔗
送信Webhookの範囲を狭めて、指定したルーティングキーがSplunk On-Callインシデントに存在する場合にのみ、Webex Teamsにメッセージを投稿するようにできます。
そのためには、Integrations、Outgoing Webhooks で作成した発信Webhookに戻り、Webhookを編集します:
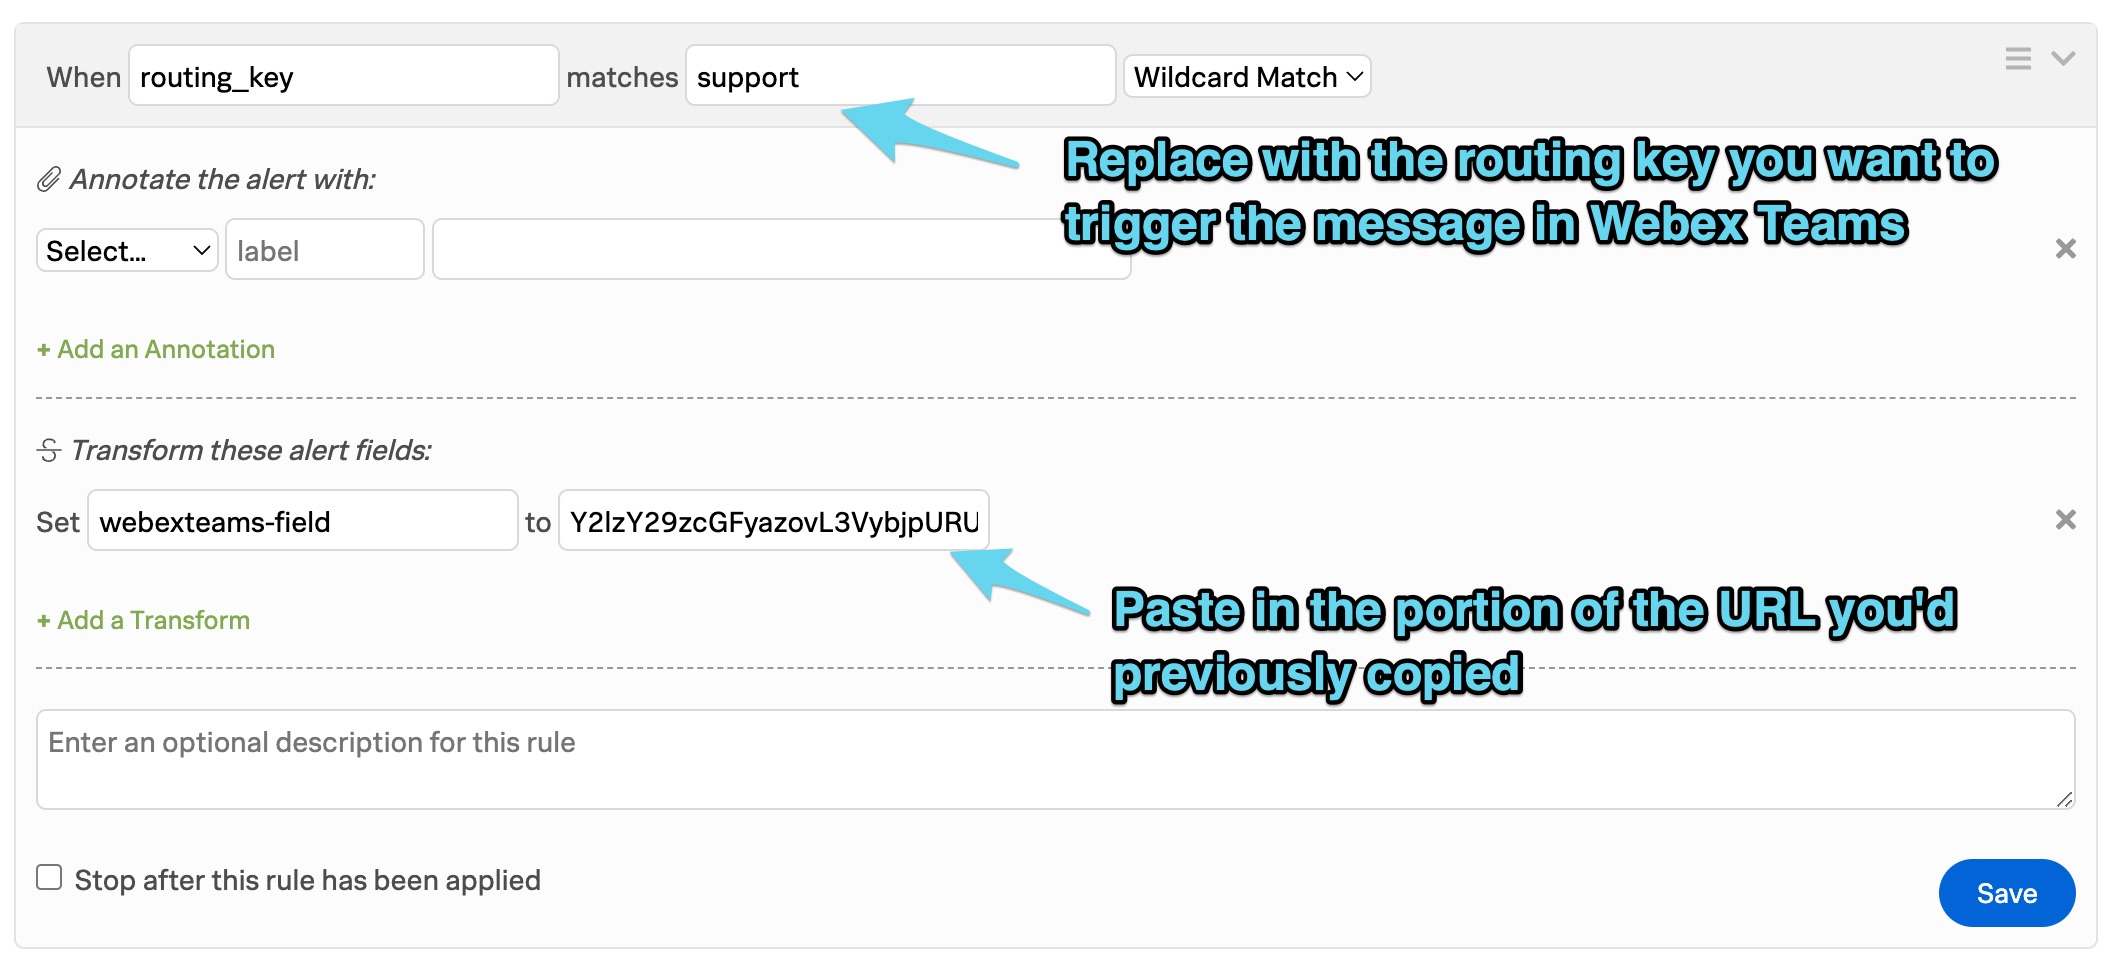
To フィールドに移動し、
https://webexapis.com/v1/webhooks/incoming/に続くランダムな文字列をハイライトします。ランダムな文字列をクリップボードにコピーし、
${{ALERT.webexteams-field}}に置き換えます。例:https://webexapis.com/v1/webhooks/incoming/${{ALERT.webexteams-field}}。変更を保存します。
Settings、Alert Rules Engine の下にあるアラートルールエンジンに移動し、Add Rule を選択します。
Webex Teamsでメッセージをトリガーさせたいrouting_keyを指定します。
#. Skip down to the Transform these alert fields section and set webexteams-field to the portion of the
URL you copied earlier. The following image shows a sample resulting URL:
ルールを保存します。
指定したルーティングキーがアラートに存在する場合、ルールが適用され、貼り付けたURL部分を値として webexteams-field というフィールドが作成されます。
(オプション) Webexチームごとに通知を分けます 🔗
アラートのルーティングキーに基づいて、異なるWebex Teamsスペースへの通知をセグメント化するには、次の手順に従います:
Webex App HubのIncoming Webhooksページに移動します。
新しいWebhook名を指定します。
通知を送信するスペースを指定します。
Add を選択します。
結果のWebhookURLをクリップボードにコピーします。
Webexスペースに送信する異なるルーティングキーを指定するために、前の説明セクションを続行します。統合したいすべてのルーティングキーとスペースについて、必要に応じてこれらの手順を繰り返します。