Splunk On-CallのDesk.comインテグレーション 🔗
Desk.comは、中小企業や急成長企業向けのオンラインカスタマーサービスソフトウェアおよびサポートチケットヘルプデスクアプリケーションです。以下のドキュメントでは、Desk.com内にカスタムSplunk On-Callアプリケーションを作成する手順を説明します。
要件 🔗
このインテグレーションは以下のバージョンのSplunk On-Callと互換性があります:
Starter
Growth
エンタープライズ
Splunk On-Callの設定 🔗
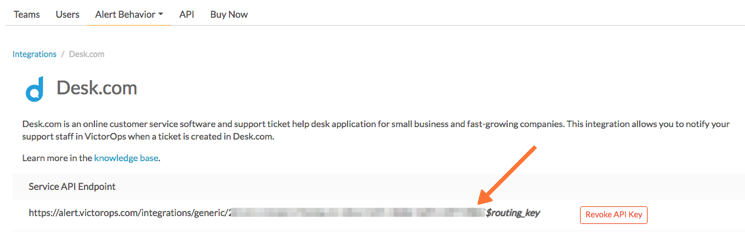
Splunk On-Callで、Integrations、Desk.com の順に選択します。
インテグレーションがアクティブでない場合は、Enable Integration を選択してエンドポイントURLを生成します。$routing_key セクションを使用するルーティングキーに置き換えてください。Splunk On-Callでルーティングキーを作成する を参照してください。
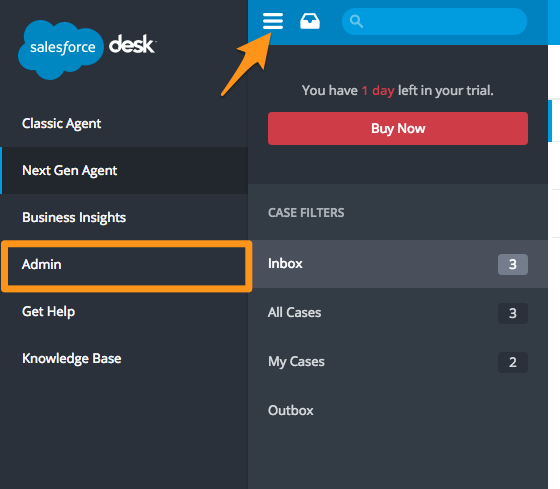
Desk.comの設定 🔗
メニューアイコン、Admin の順に選択します。
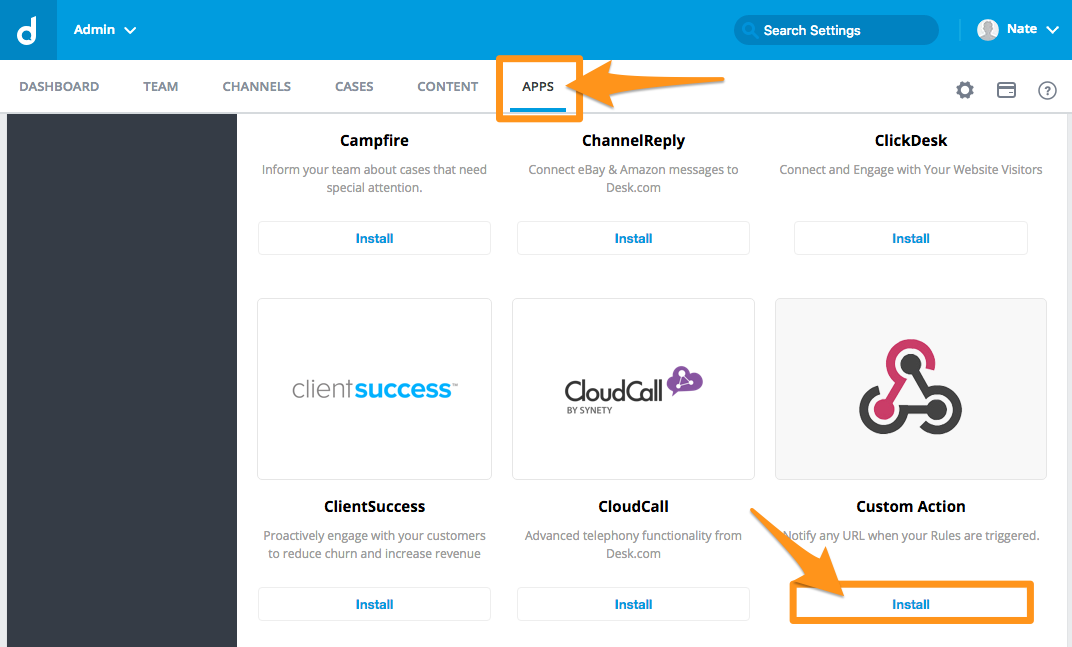
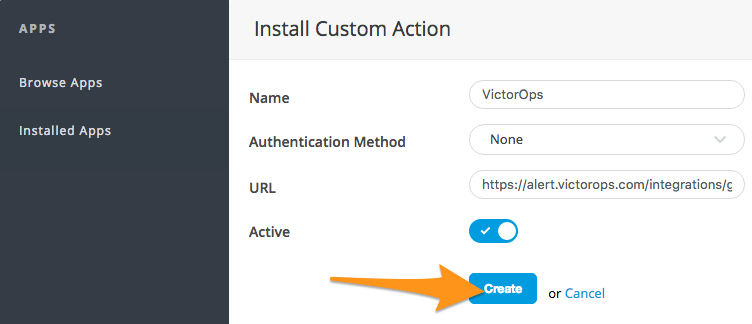
adminページで、Apps を選択し、Custom Action を見つけて、Install を選択します。
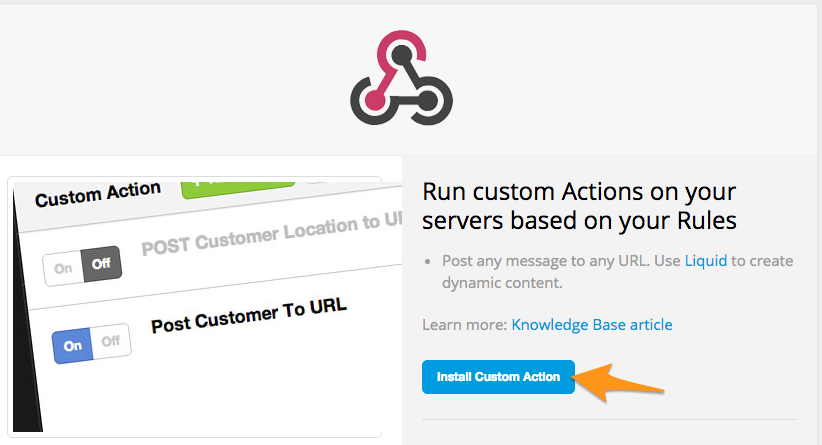
次に Install Custom Action を選択します。
規約に同意し、アクションに名前を付けます。認証方法を に設定し、最初のステップでSplunk On-CallからコピーしたPost URLを貼り付け、アクションが Active に設定されていることを確認します。Create を選択して完了します。
次の画面で、Add Action を選択します。
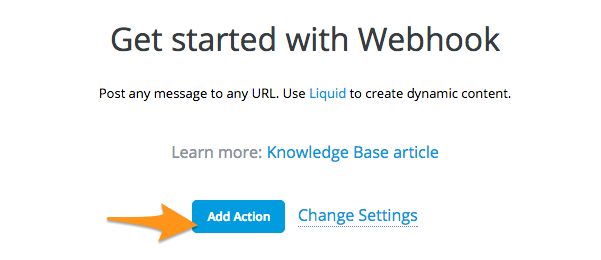
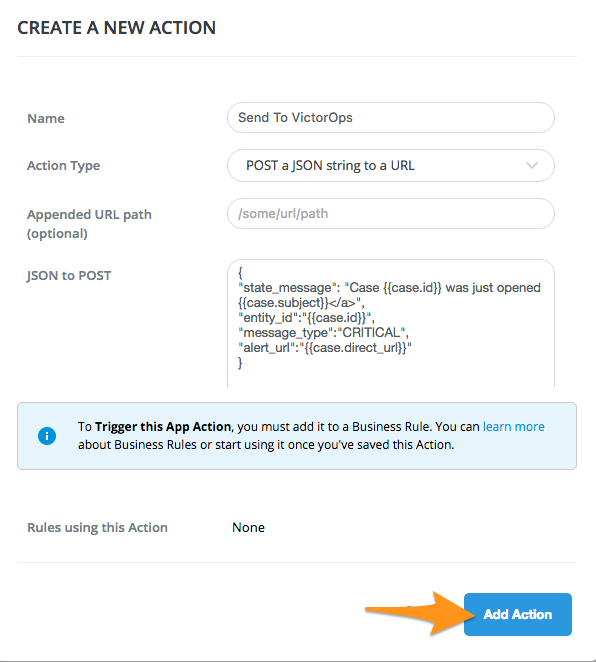
アクションに名前をつけます。アクションタイプとして を選択します。以下のJSONスニペットを貼り付けます:
`json
{ "entity_id":"{{case.id}}", "message_type":"CRITICAL", "state_message":"New Case: {{case.id}} about {{case.subject}}", "Case Description":"{{case.description}}", "Case Priority":"{{case.priority}}", "Customer":"{{case.customer}}", "Case Email":"{{case.emails}}", "alert_url":"{{case.direct_url}}" }
`
次に Add Action を選択します。
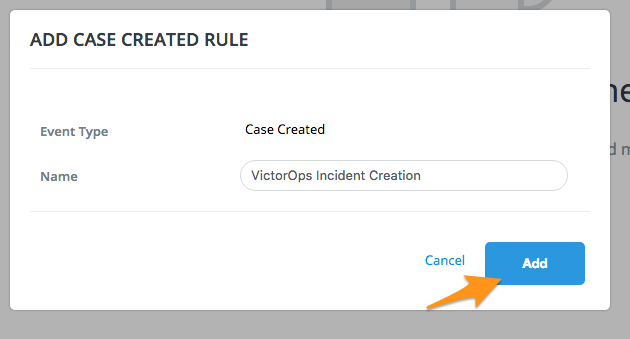
次に、 Case Created ルールにアクションを追加します。これを行うには、Cases を選択し、Rules の下で Case Created を選択し、最後に Add Rule を選択します。
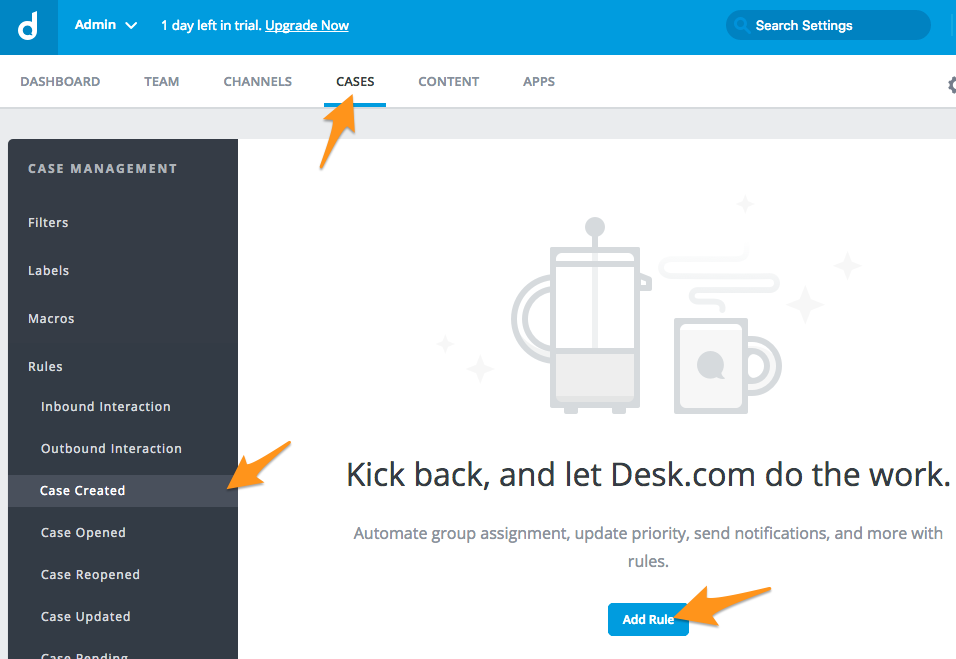
ルールに名前を付け、Add を選択します。
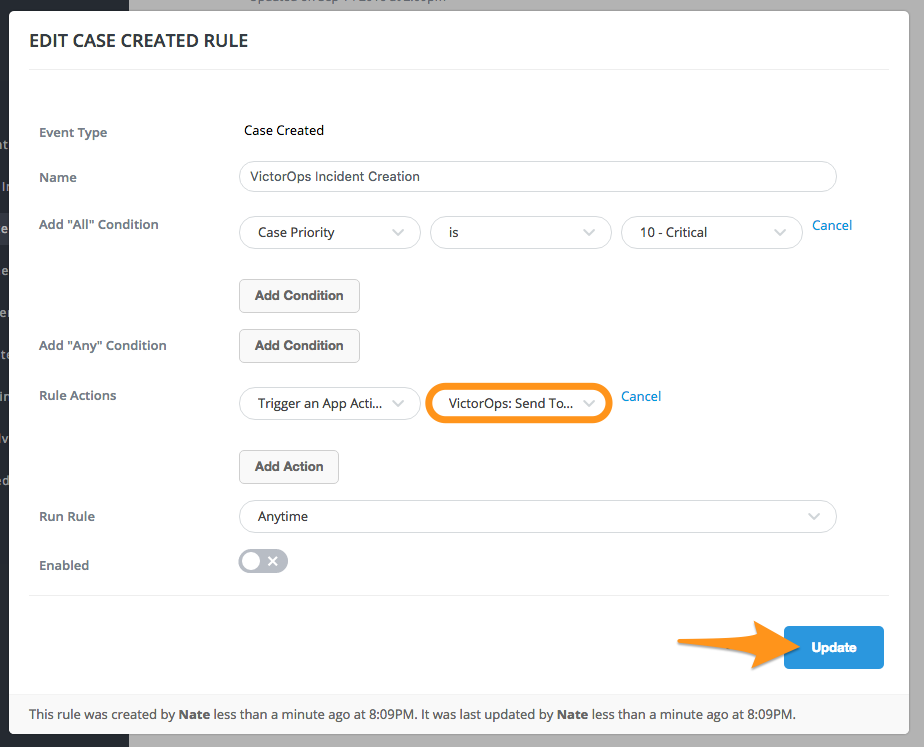
必要な条件を追加します。Rule Actions フィールドを Trigger an App Action に設定し、以前に作成したSplunk On-Callアクションを選択します。Update を選択します。
ケースがクローズまたは解決されたときのアクションとルールを作成したい場合は、前述の手順に従い、以下のJSONスニペットを使用します:
`json
{ "entity_id":"{{case.id}}", "message_type":"RECOVERY", "state_message":"New Case: {{case.id}} about {{case.subject}}", "Case Description":"{{case.description}}", "Case Priority":"{{case.priority}}", "Customer":"{{case.customer}}", "Case Email":"{{case.emails}}", "alert_url":"{{case.direct_url}}" }
`