Splunk On-CallのIcingaインテグレーション 🔗
IcingaでSplunk On-Callアラートを処理するには、Icingaの連絡先を連絡先グループ(多くの場合、管理者の連絡先グループですが、これは設定によって異なります)に追加します。Splunk On-Callコンタクトのコンタクトメカニズムは、アラートの詳細をディスク上のファイルにスプールするシンプルなシェルスクリプトです。アラートが発生し、Icingaがコンタクトスクリプトを呼び出すと、その詳細は/var/nagiosに保存されます。また、/var/nagiosに新しいファイルがないか監視し、そのファイルのデータをHTTPS経由でSplunk On-Callに投稿する、長時間実行される転送bashスクリプトもあります。Icingaはこの転送スクリプトを監視し、何らかの理由で停止した場合はIcingaのサービスチェックが再起動を試みます。この転送スクリプトが一時的にSplunk On-Callにアラートを正常に送信できない場合、アラートのメール送信にフォールバックします。
プラグインをインストールしない場合は、メールでIcingaのアラートを送信することもできます。Splunk On-Callのメールエンドポイントインテグレーション を参照してください。
要件 🔗
Icingaバージョン2.x以下
Splunk On-Callバージョン:はじめに、Essentials、フルスタック
インテグレーションをオンにしてAPIキーを生成する 🔗
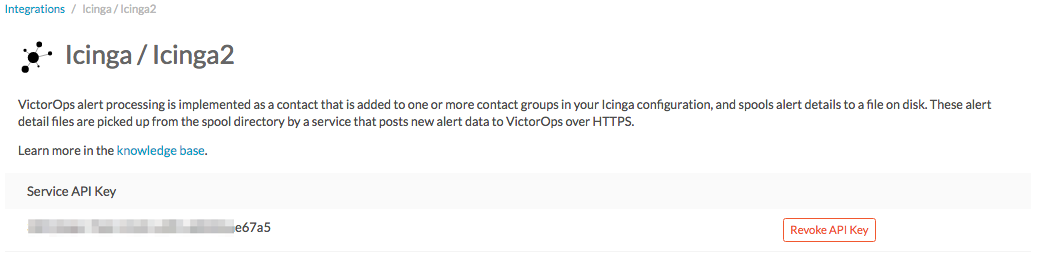
Settings、Alert Behavior、Integrations、Icinga の順に移動して、Enable Integration を選択し、Icinga用の設定値を生成します。インテグレーションをオンにした後に表示されるAPIキーは、後の設定ステップで使用します。
プラグインを設定する 🔗
プラグインファイルは/opt/victorops/nagios_pluginにあります。victorops.cfgというIcingaの設定ファイルが/opt/victorops/nagios_plugin/nagios_confにあります。この設定ファイルには、プラグインのすべての設定が含まれています。
victorops.cfgファイルを以下のようにカスタマイズします:
会社IDを追加します。
APIキーを追加します。
Icingaホスト名を追加します。
プラグインをインストールする 🔗
システムによっては、これらのコマンドでsudoを使う必要がある可能性があります。
以下のコマンドを実行します:
wget https://github.com/victorops/monitoring_tool_releases/releases/download/victorops-nagios-1.4.20/victorops-nagios_1.4.20_all.deb
以下のコマンドを実行します:
dpkg -i <path_to_file>
dpkgを使いたくない場合は、以下を実行することもできます。
sudo apt install <path_to_file>
以下のコマンドを実行します:
wget https://github.com/victorops/monitoring_tool_releases/releases/download/victorops-nagios-1.4.20/victorops-nagios-1.4.20-1.noarch.rpm
以下のコマンドを実行します。
rpm -i <path_to_file>
DEBまたはRPMパッケージからインストールする場合、インストーラはプラグインファイルを/opt/victorops/nagios_pluginに置き、ロギングとアラートディレクトリを作成します。
Nagios設定ファイルを変更する 🔗
このプラグインは、Nagios/Icinga環境マクロを必要とするシェルスクリプトでSplunk On-Callにアラートを送信します。
このIcingaの機能をオンにするには、/etc/nagios/nagios.cfg (またはicinga.cfg。実際のパスは異なる可能性があります)を開きます。
enable_environment_macrosディレクティブを見つけ、それを1:
enable_environment_macros=1に等しく設定します。enable_environtment_macrosディレクティブが存在しない場合は、設定ファイルに追加してください。nagios.cfgファイルに、IcingaにSplunk On-Call設定ファイルの場所を指示するディレクティブを追加します。例えば、以下のディレクティブを独自のファイルパスを使用するように調整します:
cfg_file=/usr/local/nagios/etc/victorops.cfg.
VictorOpsの設定ファイルを変更する 🔗
VictorOpsの設定ファイルは、Icingaアラートのルーティング先などの変数を定義します。
victorops.cfgをIcingaの設定ディレクトリに移動します:
mv /opt/victorops/nagios_plugin/nagios_conf/victorops.cfg /usr/local/nagios/etc
victorops.cfgファイルを開き、VictorOps_Contact_Settings(~行20)の連絡先とVictorOps_Service_Settings(~行40)のサービスオブジェクト定義の両方で、以下の必要な値を構成します。
必要なコンフィギュレーション設定:
設定
場所
説明
_VO_ORGANIZATION_IDVictorOps_Contact_Settingsのおよそ24行目とVictorOps_Service_Settingsの44行目Splunk On-call組織のスラグ。スラグを見つけるには、Splunk On-Callのタイムラインに移動してURLを見てください。
/client/に続く文字列が_VO_ORGANIZATION_IDです。_VO_ORGANIZATION_KEYVictorOps_Contact_Settingsのおよそ25行目と26行目インテグレーションをオンにしたときに作成されたAPIキー。
VictorOps_Service_Settingsのおよそ51行目この値は
VictorOps_Service_Settingsサービスオブジェクト定義にあります。Icingaに定義されているIcingaホストの名前です。ハートビートとコマンドチェックのサービスをオンにします。オプションのコンフィギュレーション設定:
設定
場所
説明
_VO_MONITOR_NAMEVictorOps_Contact_Settingsのおよそ24行目とVictorOps_Service_Settingsの46行目Splunk On-Callに対するIcingaインスタンスを識別するもので、空白の場合もあります。アーキテクチャで複数のIcingaサーバーを使用している場合は、このフィールドに一意のIDを指定して区別してください。
_VO_CONTACTEMAILVictorOps_Contact_Settingsのおよそ32行目アラート送信先のバックアップメールアドレス。プラグインがSplunk On-Callにアラートを中継できない場合、このアドレスにアラートメールが送信されます。このリストにemail-SMSゲートウェイを含めます。複数のアドレスを設定するには、たとえばスペースで区切って全体をシングルクォートで囲みます。例:
'me@mydomain.com you@mydomain.com him@mydomain.com 3035551212@vtext.com'_VO_MAX_SEND_DELAYVictorOps_Contact_Settingsのおよそ36行目アラートが連絡先メールに送信される前にキューに残っていることを許可されるアラートの最大時間(秒)。
CentOSシステムの場合、以下の行を/opt/victorops/nagios_plugin/bin/utilsに追加します。
DEBUG_FILE=/dev/null
追加サービスを設定する 🔗
これら4つのサービスは、IcingaサーバーのIcingaダッシュボードに表示されます。これらのサービスのアラートをオンにしたい場合は、victorops.cfgのサービス定義を編集してください。
Splunk On-Callアラートフォワーダー 🔗
これは長時間実行されるスクリプトのプロセスチェックです。このサービスがクリティカルになると、メールアラートが作成されます(このサービスがダウンしているときは、通常のアラート転送は機能しないため)。
Splunk On-Callハートビート 🔗
victorops.cfgファイルは、ハートビート情報をSplunk On-Callに送信するサービスを定義します。このサービスはデフォルトでオンになっています。このサービスは、Icingaからアラートが生成されなくても、プラグインが正しく動作しているかどうかを判断するのに役立ちます。
Splunk On-Callコマンドポール (応答を確認) 🔗
このサービスは、Icingaサーバー上で実行するコマンドをSplunk On-Callにポーリングします。このサービスはデフォルトではオフになっています。目的は、Splunk On-Callで発行されたコマンドを Icingaモニターに中継させることです。現時点では、このサービスで許可されているコマンドはホストとサービスの承認のみです。NagiosのAck-Back を参照してください。
Splunk On-Callステータスの再同期(手動/自動) 🔗
このサービスは、完全なIcingaステータスをSplunk On-Callに送信することができます。Splunk On-CallがIcingaシステムと同期していない場合に利用できます。例えば、Icingaの通知を一時的に無効にしていた場合などに発生する可能性があります。IcingaホストにcURLがインストールされている必要があります。manualとautoの2つのオプションがあります。manualオプションは、Icingaコンソールから手動で呼び出すことしかできません。autoオプションは自動的に実行されますが、デフォルトではオフにされ、コメントアウトされています。現時点では、これはプレビュー機能です。
インストールを確認する 🔗
プラグインをインストールして設定した後、Icingaを使用して定義したサービスのカスタム通知を送信することで機能を確認できます。アラートはSplunk On-Callによって受信され、会社のタイムラインに表示されるはずです。コンタクトスクリプトとアラートフォワーダーは/var/log/victoropsにログを書き込みます。プラグインが正しく動作していないようであれば、これらのログにエラーがないか確認してください。
複数のチームへのインシデントのルーティング 🔗
Splunk On-Call用のNagios/Icingaプラグインでは、Splunk On-Callに送信されるルーティングキーは、Splunk On-Callの連絡先を含む連絡先グループの名前になります。IcingaでさまざまなインシデントをSplunk On-Callの複数のチームにルーティングさせたい場合は、Splunk On-Callで使用したいルーティングキーごとに、一意のコンタクトと一意のコンタクトグループ(1のコンタクトを唯一のメンバーとして持つ)を作成する必要があります。ルーティングキーはSplunk On-Callで Settings、Alert Behavior、Routing Keys の順に移動してセットアップできます。
次の例では、Icingaからインシデントを受信したいSplunk On-Callのチームが3つあるとします。チームはDevOps、SRE、データベースです。
victorops.cfgで定義された
VictorOps_Contactsettings設定を使用して、各チームに連絡先を定義します。Devopsの連絡先:
define contact{
use            VictorOps_Contact
name           VictorOps_devops
contact_name   VictorOps_devops
alias          VictorOps_devops
}
SREの連絡先
define contact{
use            VictorOps_Contact
name           VictorOps_sre
contact_name   VictorOps_sre
alias          VictorOps_sre
}
データベースの連絡先
define contact{
use            VictorOps_Contact
name           VictorOps_database
contact_name   VictorOps_database
alias          VictorOps_database
}
上記で定義した連絡先ごとに一意の連絡先グループを定義し、それらの連絡先をそれぞれ唯一のメンバーとして追加します。Splunk On-Callへのアラートで使用される値は
contactgroup_nameに由来するため、これらの名前がSplunk On-Callで使用する値と一致していることを確認するか、Splunk On-Callのrouting_keysをここで定義した名前に一致するように変更してください。Devops連絡先グループ:
define contactgroup{
contactgroup_name         devops ## This is the routing_key value of the alert to Splunk On-Call
alias                     VictorOps DevOps contact group
members                   VictorOps_devops
}
SREの連絡先グループ:
define contactgroup{
contactgroup_name         sre ## This is the routing_key value of the alert to Splunk On-Call
alias                     VictorOps SRE contact group
members                   VictorOps_sre
}
データベースの連絡先グループ:
define contactgroup{
contactgroup_name         database ## This is the routing_key value of the alert to Splunk On-Call
alias                     VictorOps Database contact group
members                   VictorOps_database
}
連絡先グループを適切なチェックコマンドに追加して、正しいルーティングキー(contactgroup_name)で届くようにします。いくつでも好きなだけ多くのcontact_groupsにVictorOps連絡先を追加でき、特定のサービスにVictorOps連絡先を追加することもできます。
Centos 5のタイムアウトを回避する 🔗
timeoutコマンドをパス内のディレクトリにリンクさせる必要があります。
シンボリックリンクを作成します。
ln -s /usr/share/doc/bash-3.2/scripts/timeout /usr/bin/timeout
実行可能にします:
chmod 755 /usr/share/doc/bash-3.2/scripts/timeout
Icingaバージョン2の設定 🔗
Icinga (またはNagios。Splunk On-CallのNagios CoreとNagios XIインテグレーション を参照)のインストール手順を行った後、以下の手順でVictorOpsプラグインをIcinga 2インスタンスに追加します。
これらの手順は、/opt/victorops/nagios_plugin/icinga2_confのREADME.mdファイルにあります
victorops.confファイルのコピーを作成し、/opt/victorops/nagios_plugin/icinga2_confに追加し、新しい名前を付けます(例:victorops.myorg.conf)。
- 新しいファイルで以下の設定の詳細を編集します:
(必須)組織IDとサービスAPIキーをSplunk On-Call Icingaインテグレーションページに表示されている値に設定します。
const VictorOps_ORGANIZATION_ID = "my-org"
const VictorOps_ORGANIZATION_KEY = "5913e634-XXXX-XXXX-XXXX-a7500d926a44"
(必須)プラグインがSplunk On-Callに連絡できない場合に備えて、フォールバックのメールアドレスを少なくとも1つ設定します。
const VictorOps_CONTACTEMAIL = "alex@buttercupgames.com"
(オプション)「応答を確認」をオンにします。
const VictorOps_enable_cmd_poll = true
(オプション) Icinga 2ホストにSplunk On-Call用の個別の名前を付けます。複数のIcingaホストがある場合に必要です。
const VictorOps_MONITOR_NAME = “icinga2.myorg.com”
Icinga2設定ディレクターと新しい設定ファイルの間にシンボリックリンクを作成します:
ln -s /opt/victorops/nagios_plugin/icinga2_conf/victorops.myorg.conf/etc/icinga2/conf.d/victorops.myorg.conf
Icinga 2を再起動します。
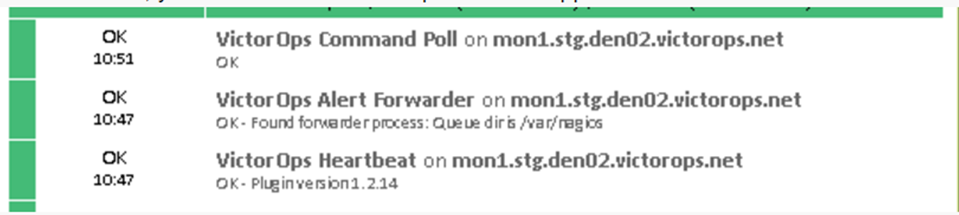
Icingaが再起動すると、以下の画像のように3つのVictorOpsサービスが表示されます。
Incingaバージョン2のルーティング設定 🔗
デフォルトのユーザーおよび通知適用設定では、すべてのホストおよびサービスアラートがSplunk On-Callユーザーを通じてSplunk On-Callに送信されます。Splunk On-Callのルーティングキーを使用する場合は、ルーティングキーごとにユーザーを作成し、そのユーザーに対する通知ルールを作成します。たとえば、ルーティングキー」devops」でSplunk On-Callにアラートを送信するには、」devops」という名前のユーザーオブジェクトを作成し、notifyvictorops テンプレートをインポートする通知ルールをそのユーザーに適用します:
ルーティングの設定例:
object User "devops" {
import "genericuser"
display_name = "devops"
}
apply Notification "notifydevopsservice" to Service {
import "notifyvictoropsservice"
users = ["devops"]
assign where match("*load*", service.name)
}
apply Notification "notifydevopshost" to Service {
import "notifyvictoropshost"
users = ["devops"]
assign where match("*.production.myorg.com", host.name)
}