Splunk On-CallのMailhopインテグレーション 🔗
Mailhopは自動的にメールをバックアップし、メールサーバーがオフラインの間はキューとして機能します。MailhopはSplunk On-Callにアラートを送信するように設定できます。
In Splunk On-Call 🔗
Splunk On-Callインターフェイスから、Settings を選択し、次に Alert Behavior を選択します。次に Integrations を選択します。
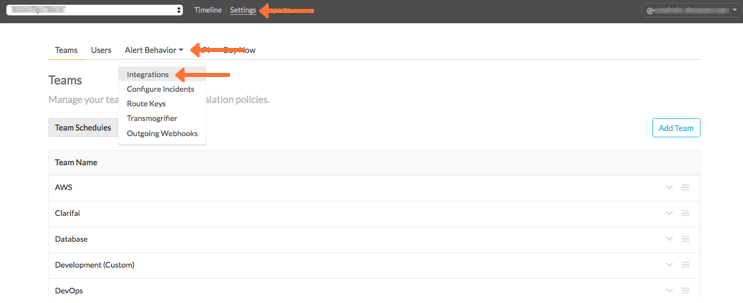
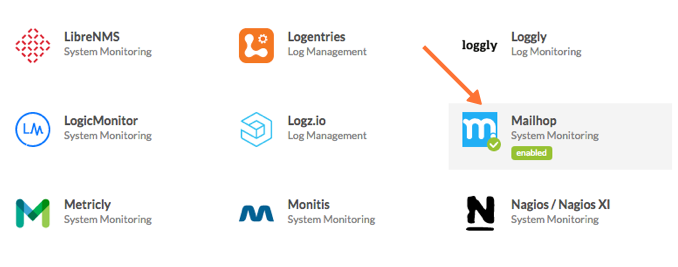
Mailhopインテグレーションを選択します。
Service API Key をクリップボードにコピーします。

In Mailhop 🔗
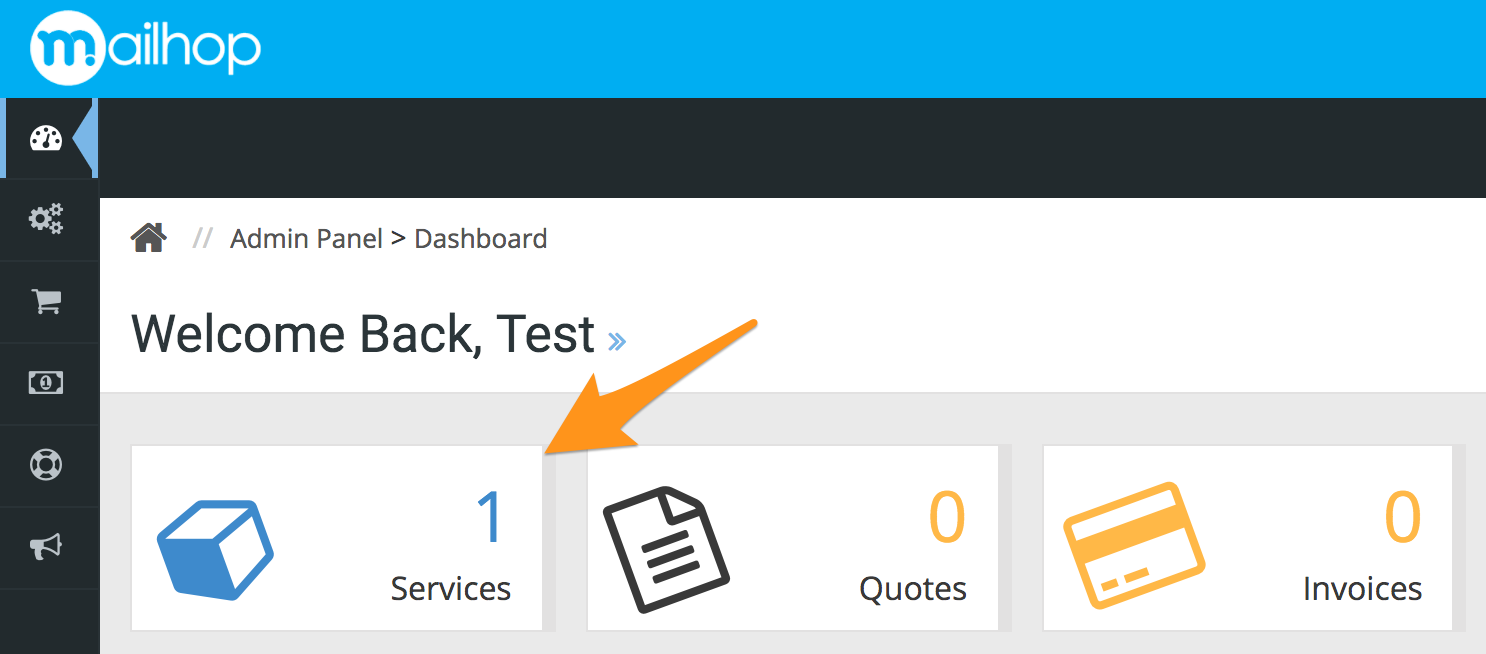
MailhopのWebインターフェイスに管理者としてログインします。

Mailhopのダッシュボードから、サービス をクリックします。
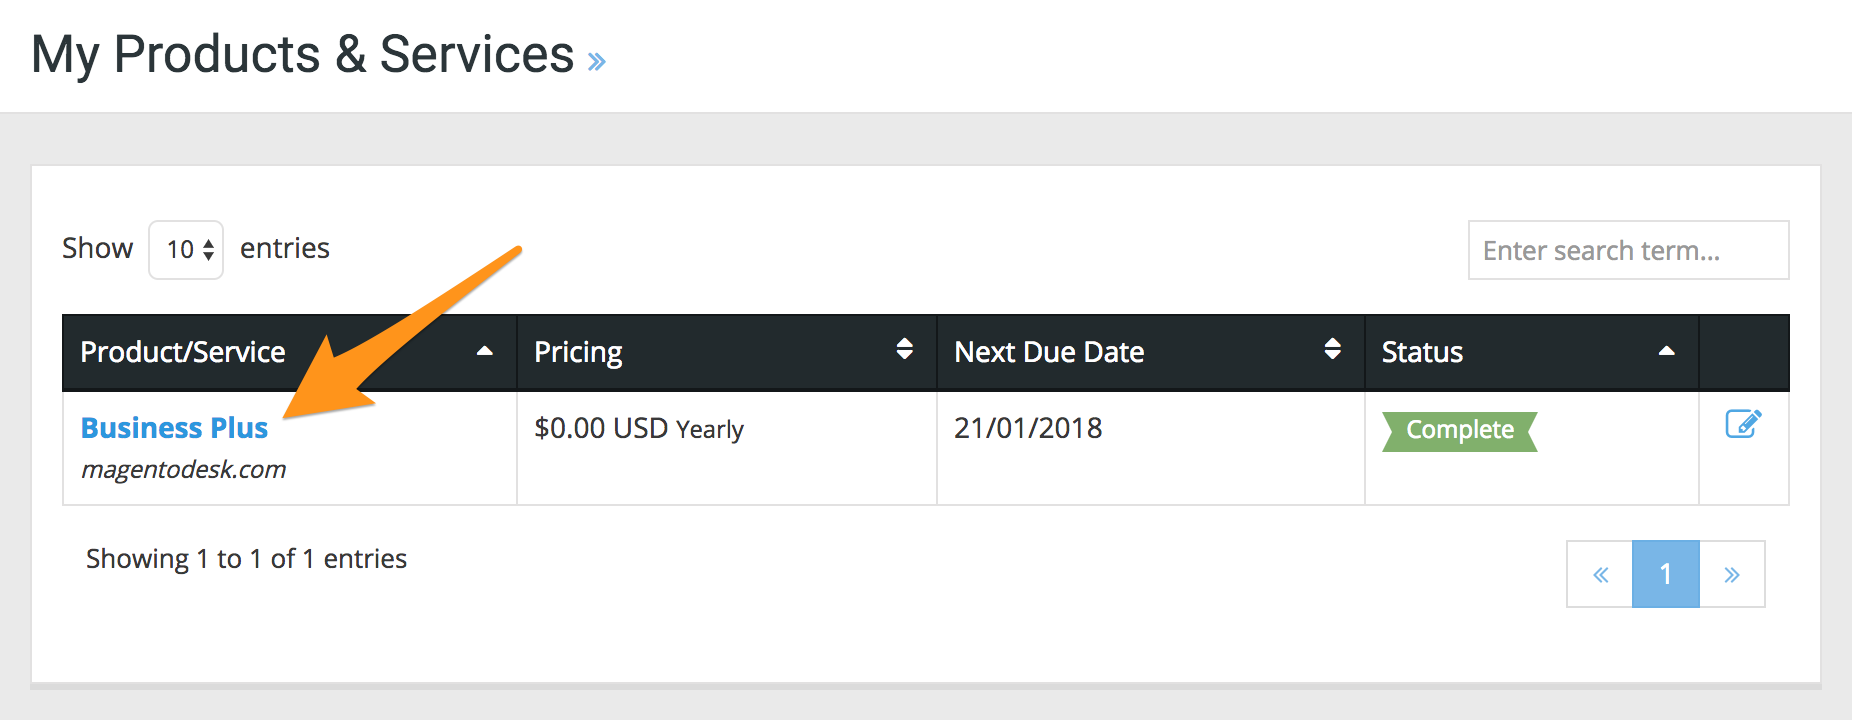
# 製品またはサービスを選択します。この例では、「guilabel`Business Plus`」を選択します。
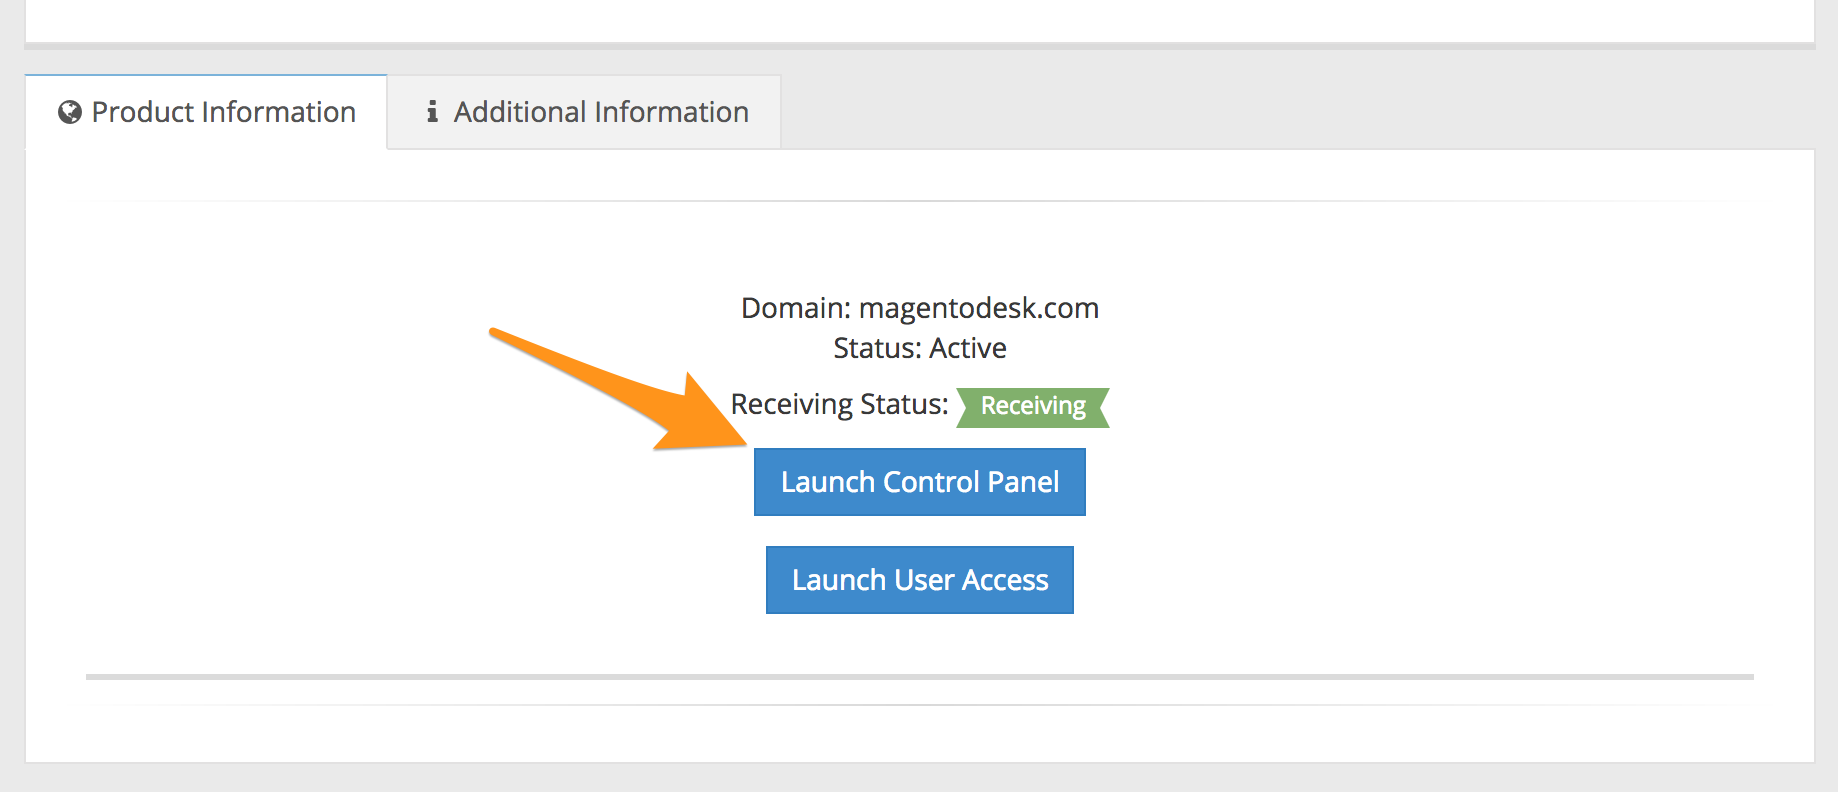
「製品の管理」ページを下にスクロールし、「製品情報」タブで「 Launch Control Panel 」を選択します。
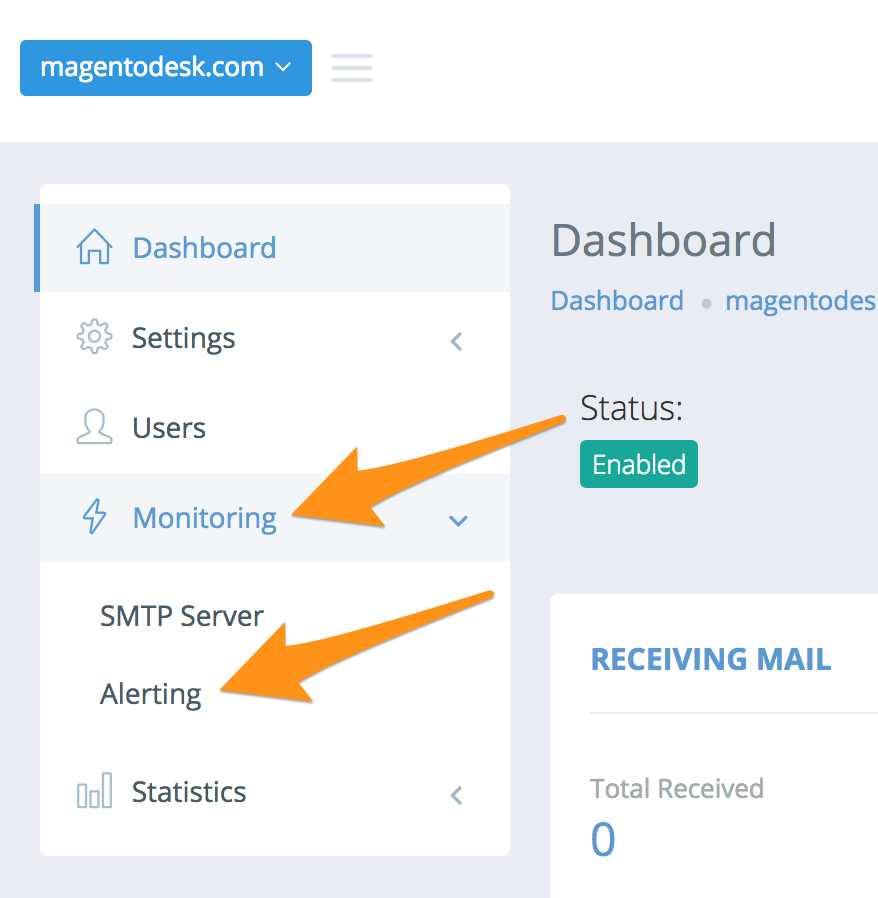
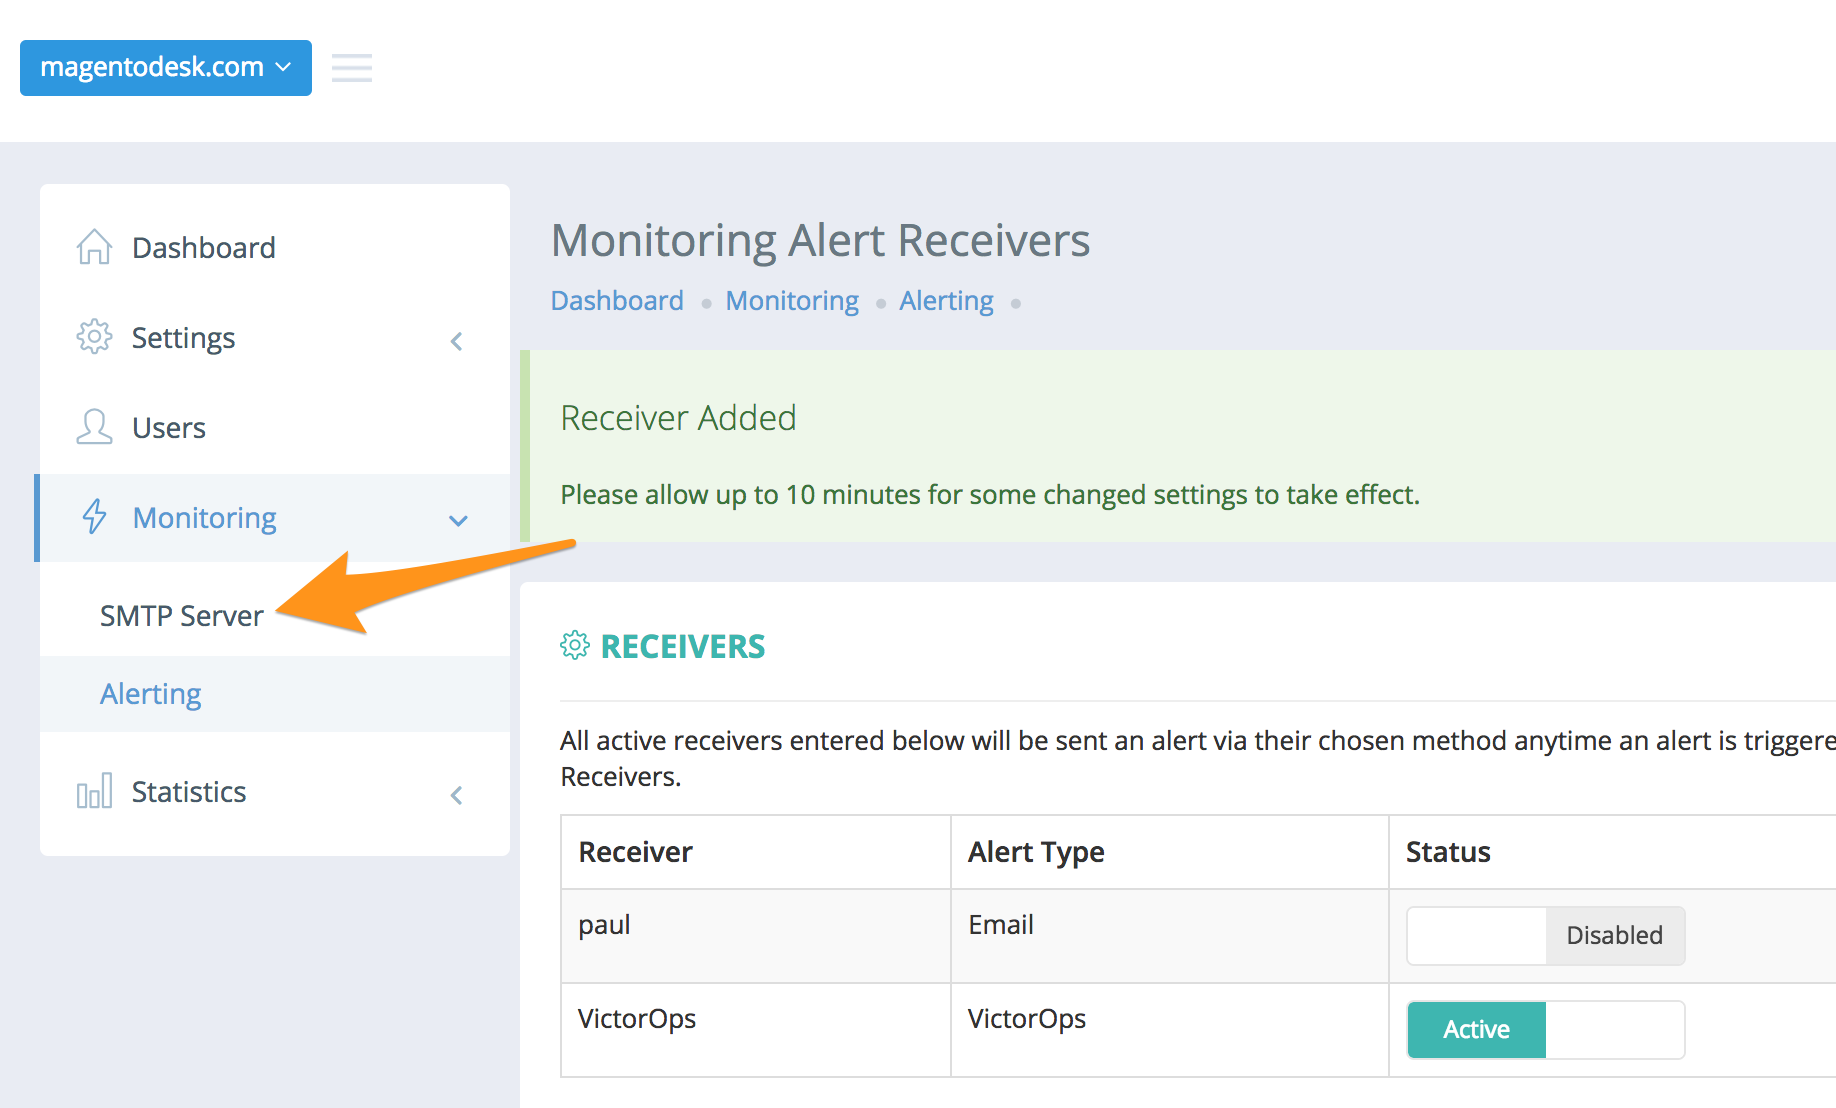
Mailhopコントロールパネルから、Monitoring を選択し、次に Alerting を選択します
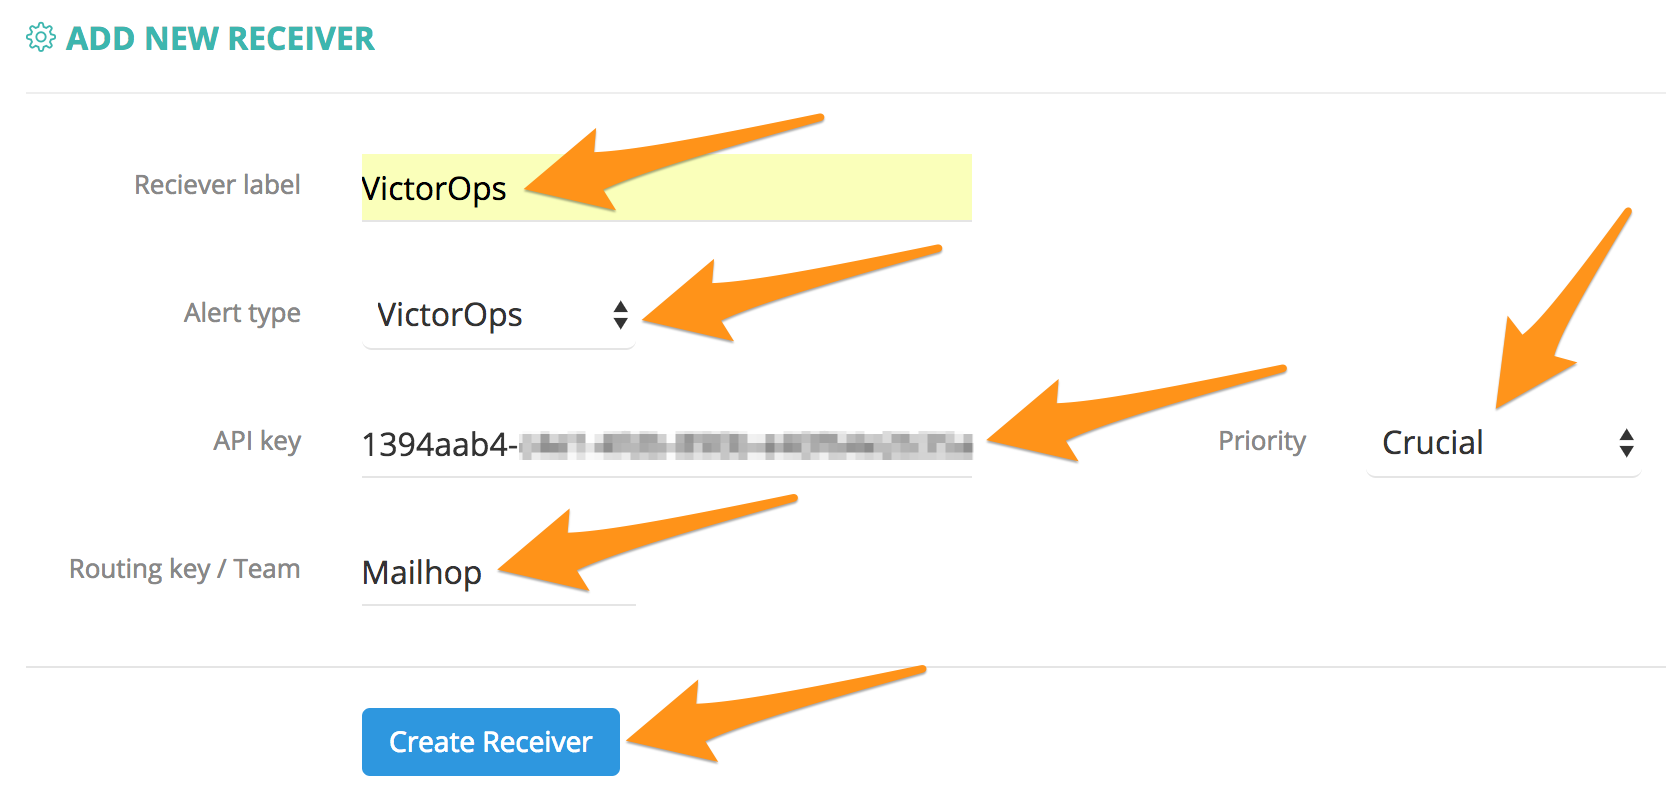
ADD NEW RECEIVER で、Alert type メニューからSplunk On-Call (旧VictorOps)を選択し、レシーバーラベルフィールドにアラートの名前を入力します。
次に、In Splunk On-CallセクションのAPIキーを API key field, then enter the routing key you want to use into the :guilabel ルーティングキー/チーム``フィールドに貼り付けます。
「優先順位」ドロップダウンメニューから必要なオプションを選択し、Create Receiver を選択します。
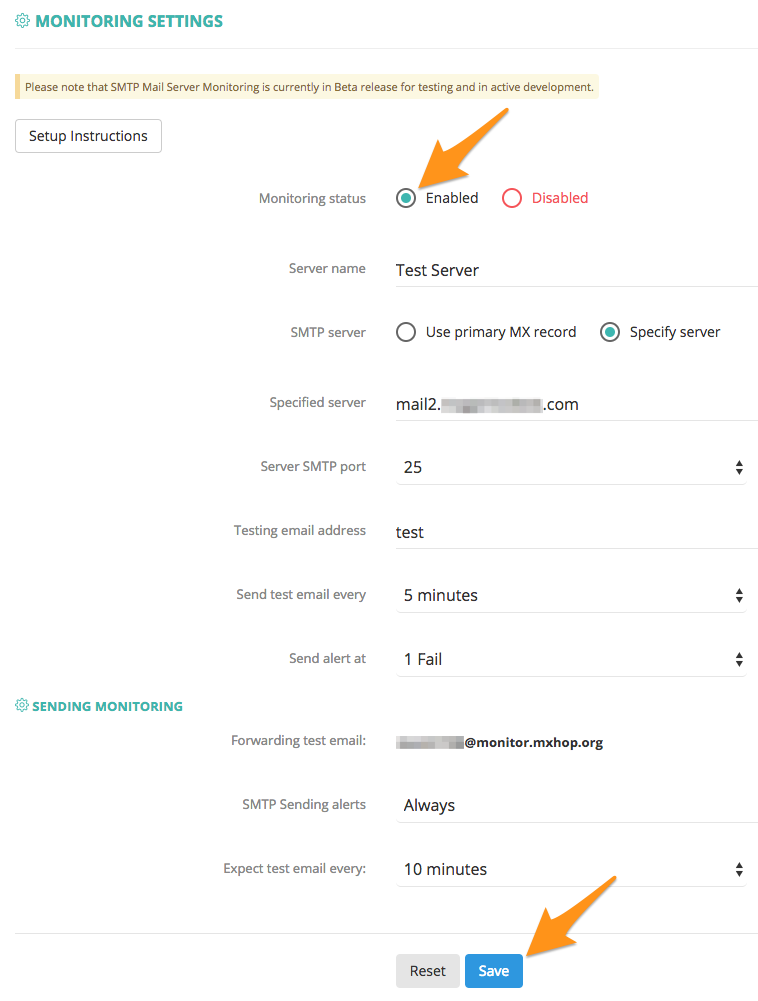
左のメニューから SNMP Server` を選択します。
Monitoring status を「有効」に設定し、Save を選択します。
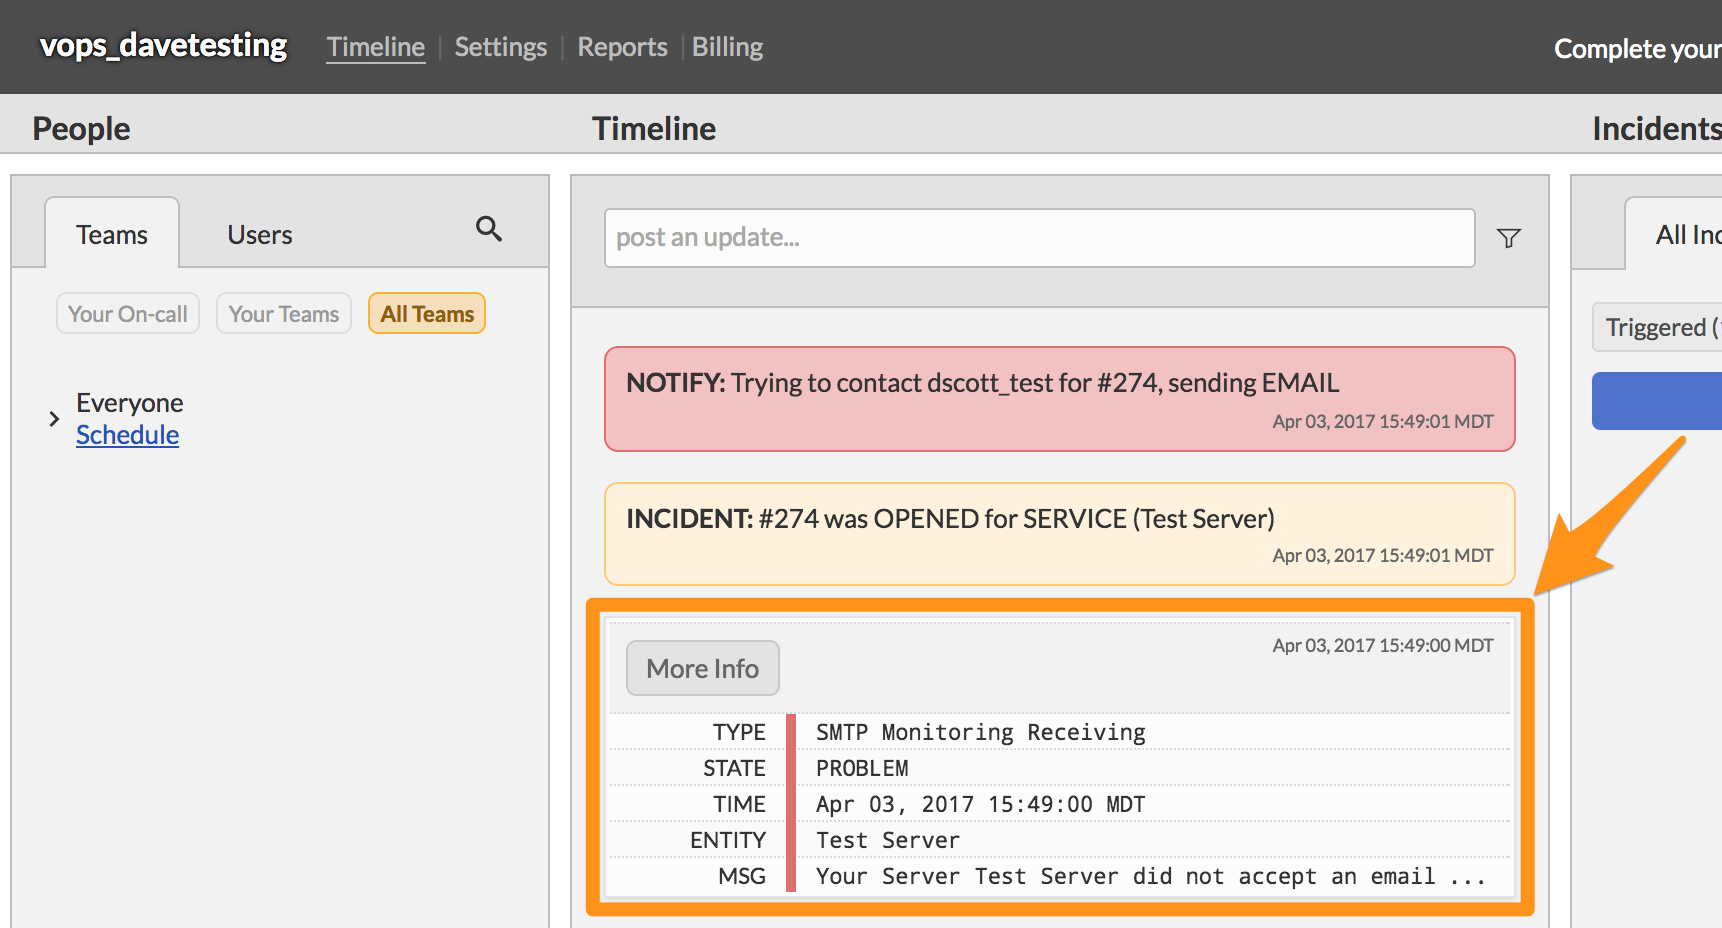
Mailhopアラートは、設定が有効になるまでに10~15分の遅延が発生した後、Splunk On-Callタイムラインに表示されるようになります。