Splunk On-CallのHP SiteScopeインテグレーション 🔗
SiteScopeは、重要な健全性とパフォーマンス特性について、100以上の異なるターゲットタイプを監視します。また、独自のモニタータイプを作成、または既存のモニターをカスタマイズすることで、モニタリング環境を拡張することもできます。以下のガイドでは、このインテグレーションについて説明します。
要件 🔗
このインテグレーションは以下のバージョンのSplunk On-Callと互換性があります:
Starter
Growth
エンタープライズ
Splunk On-Callの設定 🔗
Splunk On-Call Webポータルから、Integrations を選択します。表示されるインテグレーションオプションのリストから、HP SiteScope を選択します。
Service Email をクリップボードにコピーします。$routing_key の部分を必ず使用したいルーティングキーに置き換えてください。Splunk On-Callでルーティングキーを作成する を参照してください。
HP SiteScopeの設定 🔗
SiteScopeサーバーのtemplates.mailディレクトリに以下の名前と内容のファイルを3つ追加します。
ファイル名: Splunk On-Call_CRITICAL
[Subject: <siteScopeHost>/<groupID>/<name>/<alert::name> CRITICAL]

This alert is from SiteScope at <newSiteScopeURL>

Monitor: <groupID>:<name>
Tags: <tag>
Group: <group>
Status: <state>
Sample #: <sample>

Time: <time>

---------------------- Detail ----------------------

<mainParameters>

<mainStateProperties>
ファイル名: Splunk On-Call_WARNING
[Subject: <siteScopeHost>/<groupID>/<name>/<alert::name> WARNING]

This alert is from SiteScope at <newSiteScopeURL>

Monitor: <groupID>:<name>
Tags: <tag>
Group: <group>
Status: <state>
Sample #: <sample>

Time: <time>

---------------------- Detail ----------------------

<mainParameters>

<mainStateProperties>
ファイル名: Splunk On-Call_RECOVERY
[Subject: <siteScopeHost>/<groupID>/<name>/<alert::name> RECOVERY]

This alert is from SiteScope at <newSiteScopeURL>

Monitor: <groupID>:<name>
Tags: <tag>
Group: <group>
Status: <state>
Sample #: <sample>

Time: <time>

---------------------- Detail ----------------------

<mainParameters>

<mainStateProperties>
アラートアクションを設定する 🔗
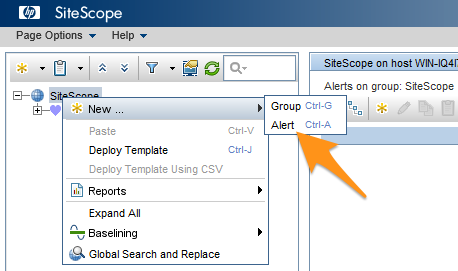
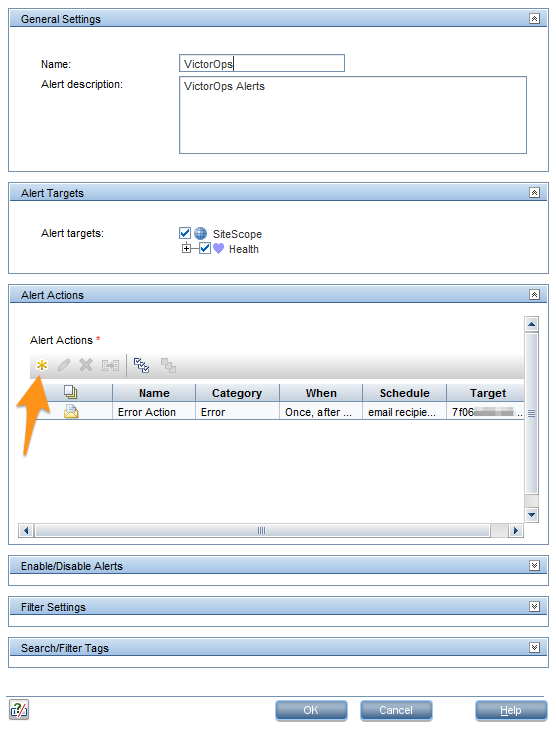
HP SiteScope Webインターフェイスから、コンテキストツリーを右クリックし、New、Alert を選択します。
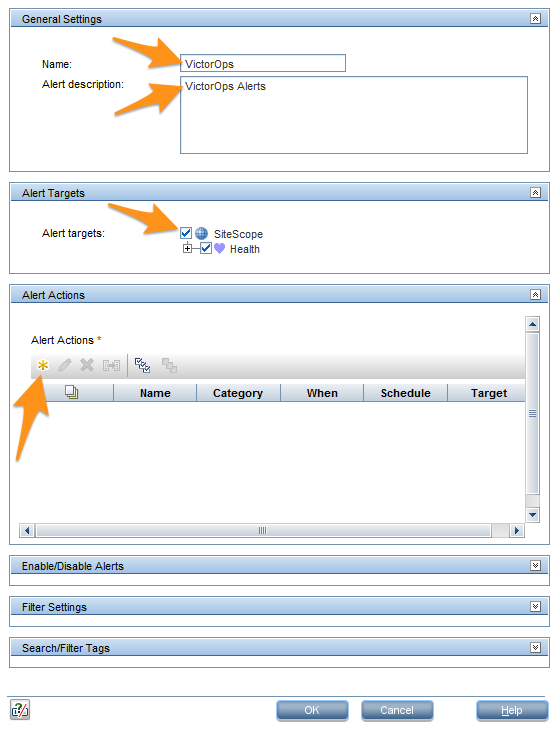
名前 フィールドに Splunk On-Call と入力し、アラートの説明 フィールドに Splunk On-Callアラート と入力します。
guilabel:アラートターゲット セクションの SiteScope をチェックします。 Alert Actions セクションで、New Alert Action を選択します。
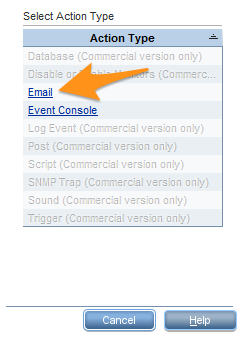
Email を Action Type リストで選択します。
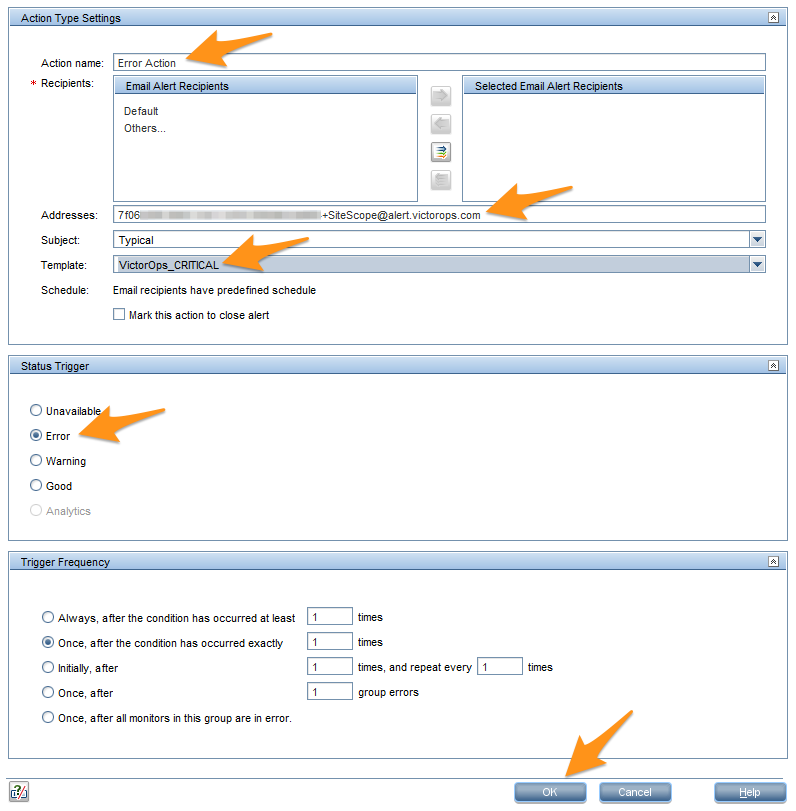
Action name フィールドに**Error Action**と入力します。Addresses フィールドにメールアドレスを貼り付けます。
テンプレートメニューから Splunk On-Call_CRITICAL を選択し、ステータストリガーのセクションで Error を選択し、次に OK を選択します。
警告アクションを設定する 🔗
Alert Actions セクションで、New Alert Action を選択します。
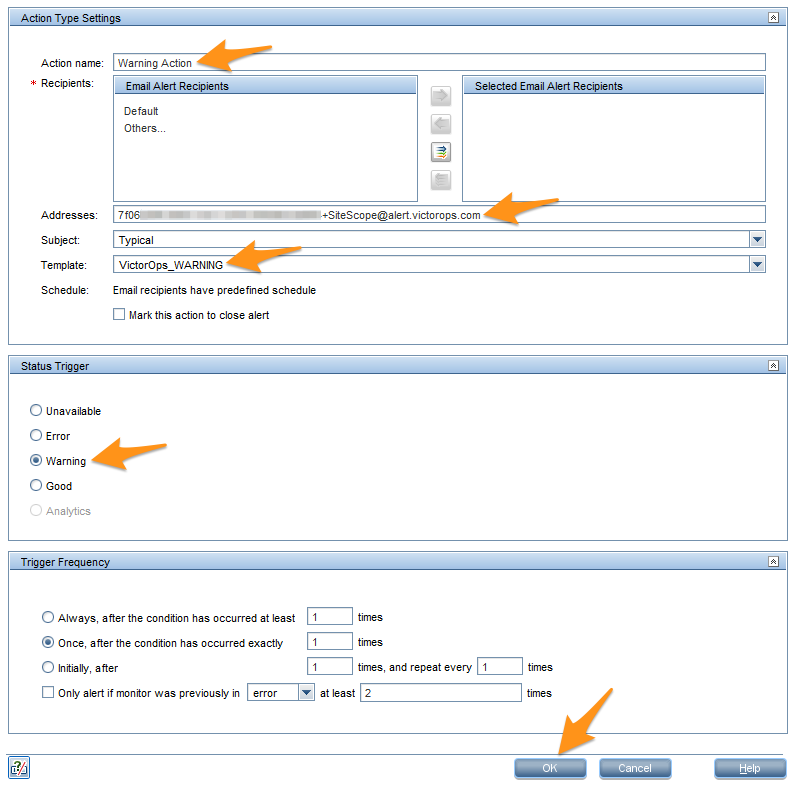
Email を Action Type リストで選択します。
Action name フィールドに Warning Action と入力します。メールアドレスを Addresses フィールドに貼り付けます。
テンプレートメニューから Splunk On-Call_WARNING を選択し、 Status Trigger のセクションで Warning を選択し、OK を選択します。
リカバリアクションを設定する 🔗
Alert Actions セクションで、New Alert Action を選択します。

Email を Action Type リストで選択します。
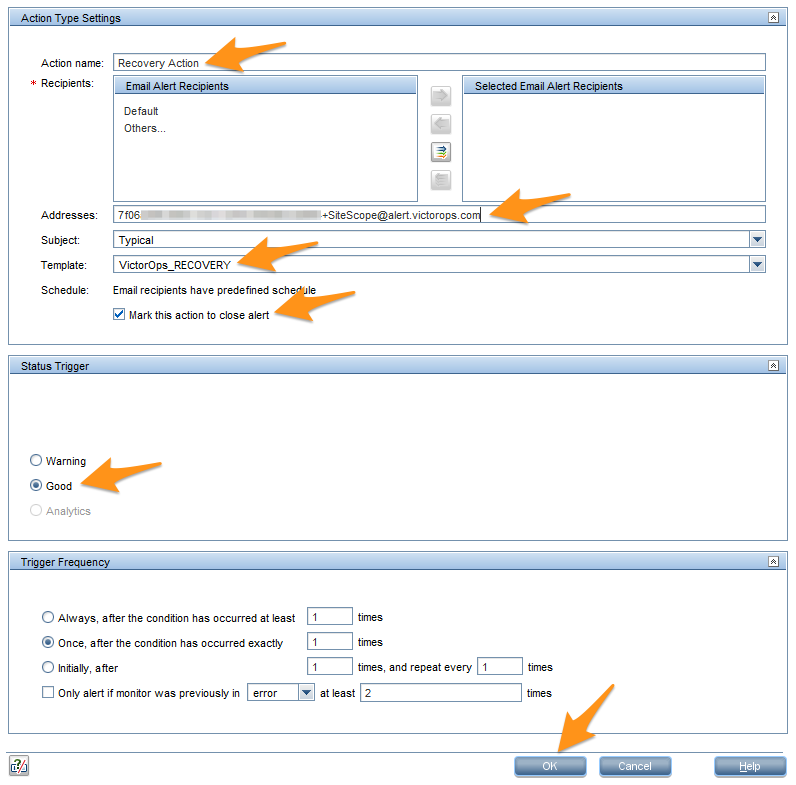
Action name フィールドに Recovery Action と入力します。メールアドレスを Addresses フィールドに貼り付けます。
テンプレートメニューから Splunk On-Call_RECOVERY を選択し、Mark this action to close alert をチェックします。
Status Trigger セクションで Good を選択し、次に OK を選択します。
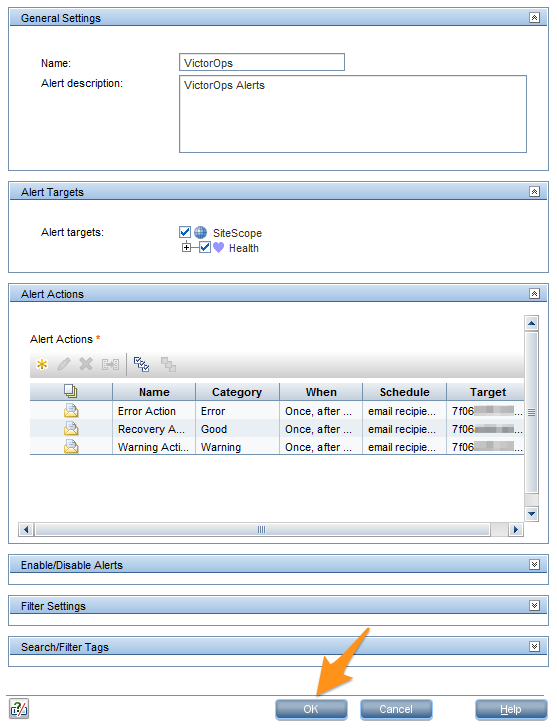
OK を選択します。
インテグレーションのテスト 🔗
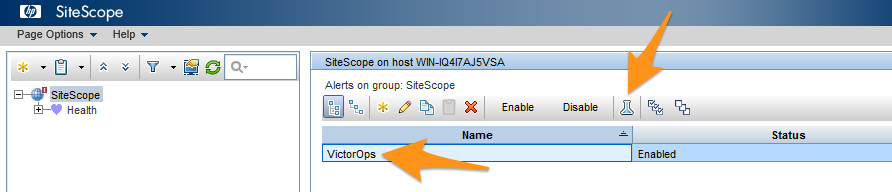
アラートリストから Splunk On-Call を選択し、次に Test を選択します。
OK を選択します。

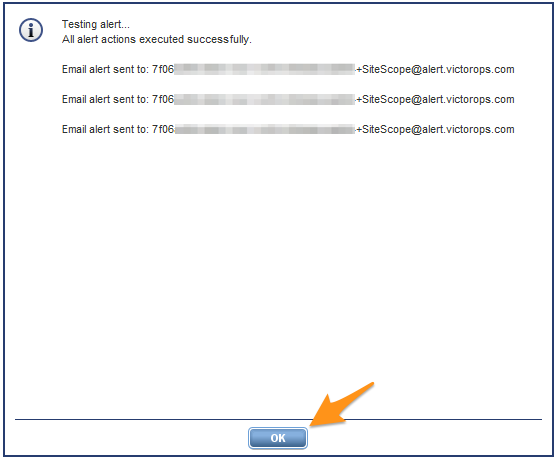
メールアラートがSplunk On-Callのメールアドレスに正常に送信されたことを確認するメッセージが表示されます。OK を選択して確認します。
アラートがSplunk On-Callタイムラインに表示されるようになりました。