Splunk On-CallのJira Appインテグレーション 🔗
要件 🔗
必須Jiraバージョン:Jira Server 7.7.0 - 8.22.6、Jira Cloud
必須Splunk On-Callバージョン:Starter、Growth、またはエンタープライズ
Splunk On-Callの設定にはグローバル管理者権限が必要です。
Splunk On-Callで設定する 🔗
Splunk On-Callで、Integrations、API の順にアクセスします。
New Key を選択します。
キーに説明を付け、結果のAPIキーとAPI IDをコピーします。
JiraでSplunk On-Callアドオンをインストールする 🔗
Jira管理者としてログインし、Jira管理の歯車アイコンを選択して、Manage apps を選択し、Atlassian Marketplaceに移動します。
サイドバーで、Atlassian Marketplaceヘッダーの下にある Find new apps を選択します。
Jira Serverを使用している場合は、「Splunk On-Call for Jira Server」アプリを検索してください。Jira Cloudを使用している場合は、「VictorOps for Jira Cloud」を検索してください。適切なアプリを見つけたら、Install を選択します。
インストールが完了したら、Configure を選択します。
アプリケーション設定の構成 🔗
VictorOps for Jira Server Configurationページの Connect to your VictorOps Organization の下にある API Key フィールドに、VictorOpsで生成したAPIキーを入力します。
同じセクションの API ID フィールドに、前述のSplunk On-Callの設定ステップで対処したAPI IDを挿入します。
VictorOps URLに表示されているSplunk On-Call org IDをコピーします。org IDはログインに使用するURLの最後にあります:
https://portal.victorops.com/client/<Org_ID>。Jiraの Organization ID フィールドにorg IDを貼り付けます。Connect を選択します。
Connected VictorOps Organizationsセクションに、緑色のVALIDフラグが付いた新しいエントリが表示されます。

Jiraプロジェクト設定を設定する 🔗
Splunk On-Callアドオンは、関連付けたいJiraプロジェクトごとに有効化し、設定する必要があります。複数のプロジェクトを同じSplunk On-Call組織に接続することはできますが、プロジェクトで同じデフォルトチームエスカレーションポリシーを共有することはできません。
Jiraで、Projects を選択します。
Splunk On-Callアドオンで有効化したいプロジェクトの Project settings にアクセスします。
VictorOps Settings を選択します。
Enable VictorOps for this Project を選択します。
このページには、設定可能なフィールドのリストが表示されます。
デフォルトのインシデント設定 🔗
VictorOps Instance で、このプロジェクトに関連付けるSplunk On-Call組織を選択します。
Default Team Escalation Policy で、JiraインシデントがSplunk On-Callでインシデントを作成するときに表示するSplunk On-Callエスカレーションポリシーを選択します。このエスカレーションポリシーに割り当てられたVictorOpsインシデントは、Jiraプロジェクトでインシデントを作成できる唯一のインシデントです。
Default User で、Splunk On-Callインシデントの受信によって生成された問題のレポーターとして指定するJiraユーザーを選択します。
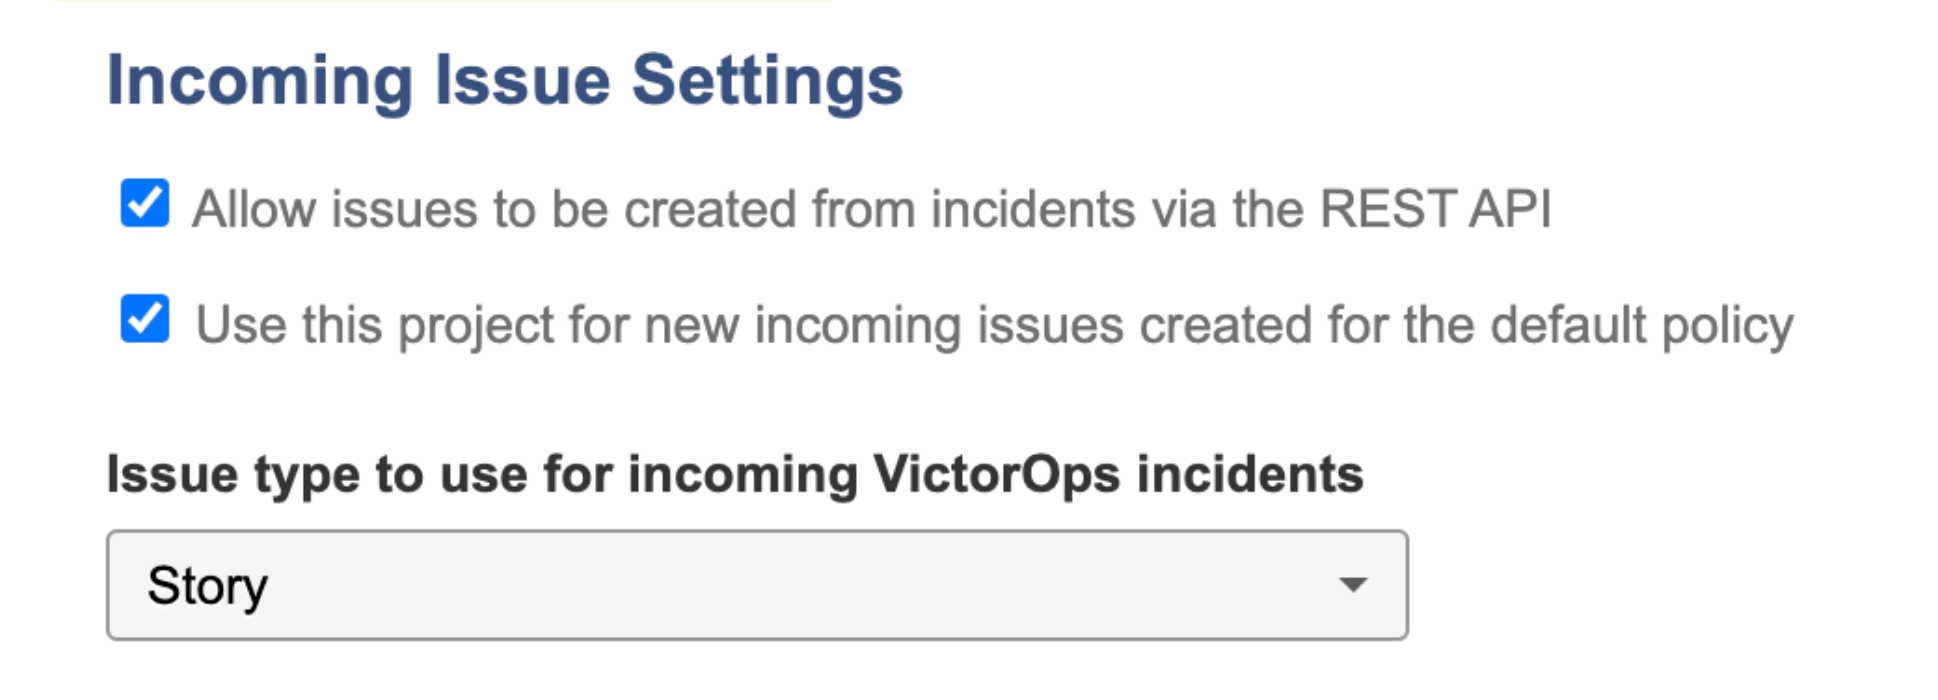
着信問題の設定 🔗
プロジェクトのデフォルトチームエスカレーションポリシーで作成されたSplunk On-Callインシデントは、自動的にJiraの問題を生成します。このような問題のデフォルトタイプ(バグ、エピック、ストーリー、タスク)は、Issue type to use for incoming VictorOps incidents ドロップダウンメニューから希望のオプションを選択して設定します。
このような問題の作成を無効にしたい場合は、Allow issues to be created from incidents via the REST API のチェックボックスの選択を解除してください。
Jiraの状態設定 🔗
ステートマッピングを定義して、インシデントがVictorOpsのライフサイクルを通過する際に、Jiraの問題が同期された状態を維持することができます。

JiraでSplunk On-Callインシデントを作成する 🔗
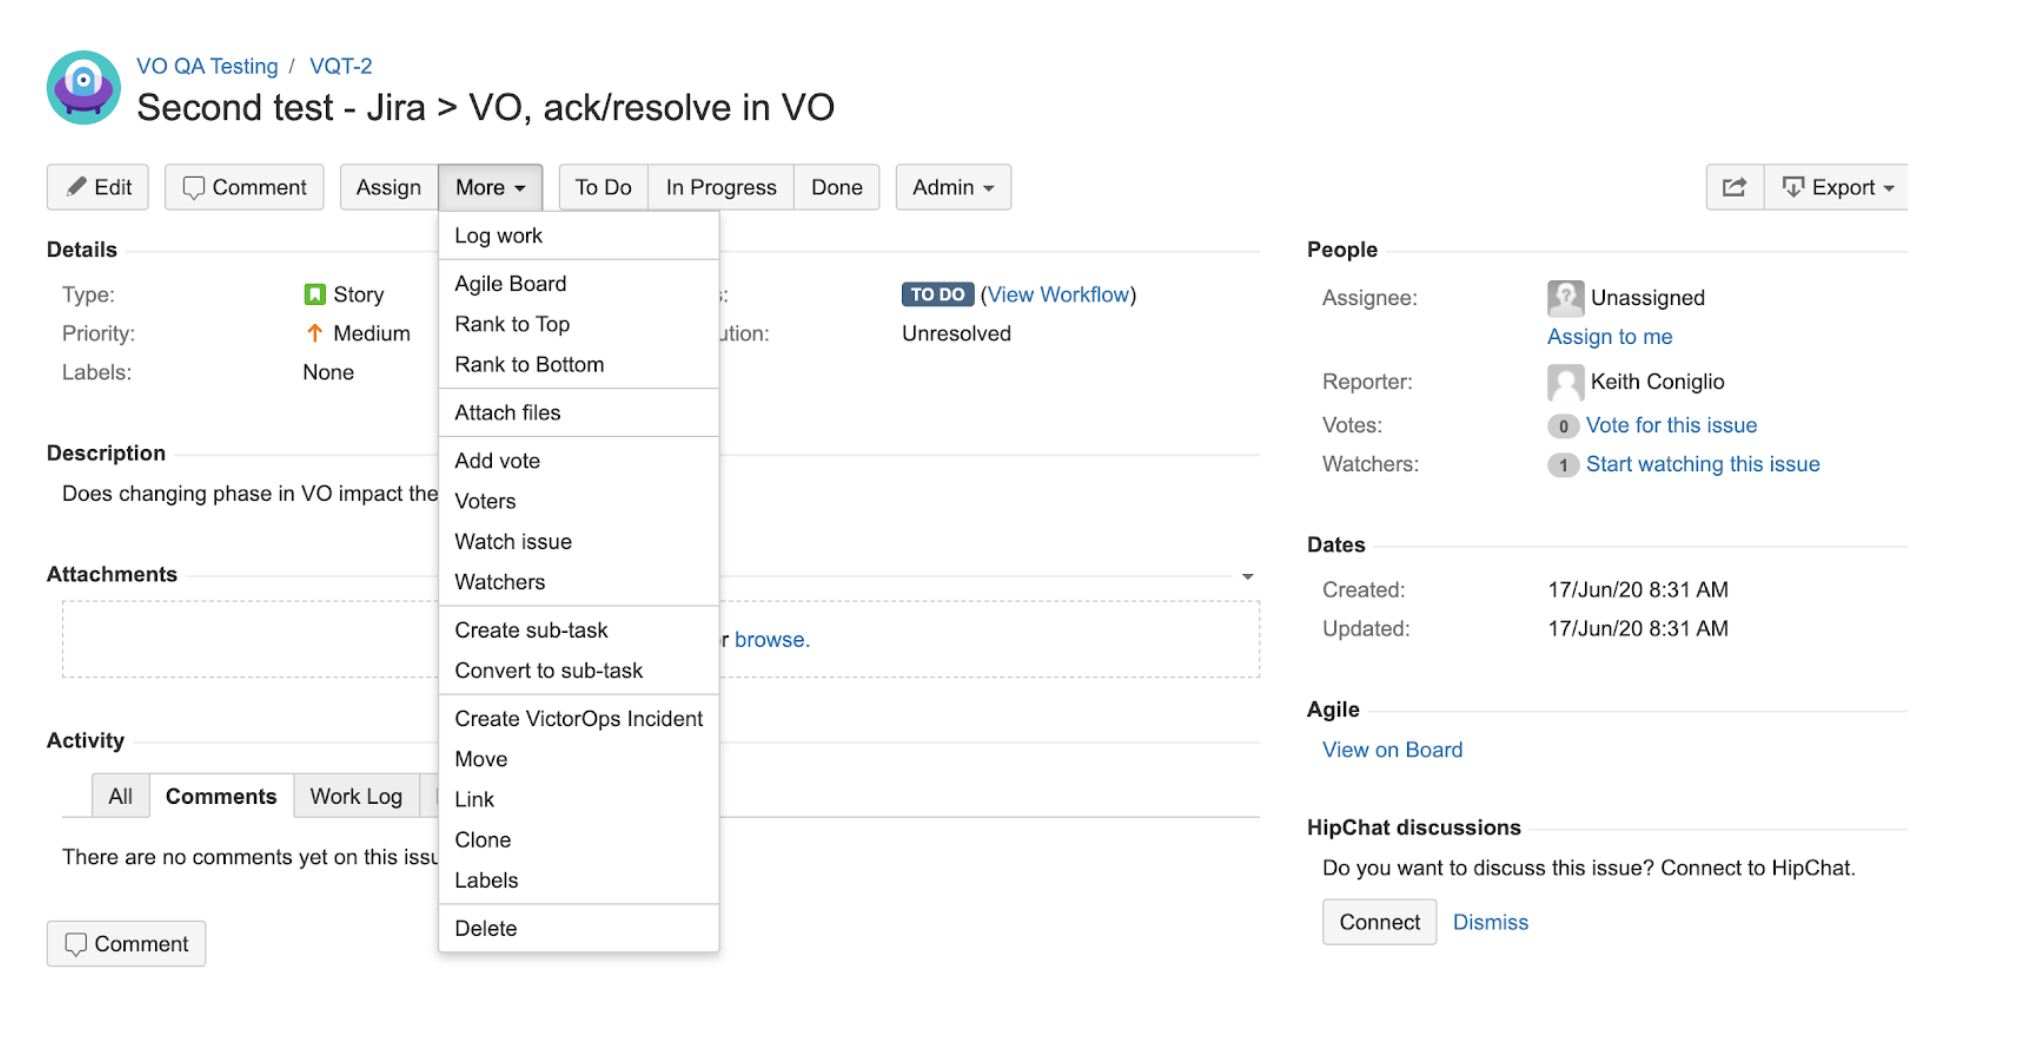
Splunk On-CallインシデントはJiraの問題ビューからのみ作成できます。
More を選択し、次に Create VictorOps Incident を選択します。
プロジェクトのデフォルトチームエスカレーションポリシーを使用して、Splunk On-Callインシデントカードのプレビューが表示されます。
(オプション) VictorOps Team Escalation Policy ドロップダウンメニューから別のエスカレーションポリシーを選択します。
(オプション) Additional Users ドロップダウンメニューを使用して、対応するユーザーを追加します。インシデントにユーザーを追加しても、Splunk On-Callで複数対応インシデントは作成されません。
Create Incident を選択してSplunk On-Callインシデントを生成します。トリガーされたSplunk On-Callインシデントカードは、問題ビューのVictorOpsセクションの下に表示されます。
Splunk On-Callのインシデントカードで Incident Details を選択すると、新しいブラウザタブにインシデントが表示されます。