Splunk On-CallのHipChatインテグレーション 🔗
HipChatとSplunk On-Callの双方向インテグレーションを利用すれば、どちらのプラットフォームからでも、滞りなく攻撃に対処することができます。アラート、オンコールの変更、エスカレーション、チャットなど、Splunk On-Callのタイムラインに入力されたメッセージはすべてHipChatルームにも表示され、その逆も同様です。
要件 🔗
Splunk On-Callが必要なバージョン:シングルルームの場合はStarterまたはGrowth、マルチルームの場合はEnterprise
これらのステップバイステップの手順を使用して、シングルルームまたはマルチルーム構成のインテグレーションを設定します。
シングルルーム 🔗
In Splunk On-Call 🔗
Splunk On-Callで、Integrations、Hipchat の順に選択します。
インテグレーションがまだ有効になっていない場合は、インテグレーションを有効にする ボタンをクリックして、エンドポイントURLを生成します。必ず、」$routing_key」セクションを使用する実際のルーティングキーに置き換えてください。(VictorOpsでルートキーを表示または設定するには、アラート動作 >> ルートキー をクリックします)
インテグレーションを有効にすることで生成される*アドオン機能URL*をコピーします。
In HipChat 🔗
オンラインHipChatホームページから、インテグレーション を選択します。

アルファベット順のリストを下にスクロールし、VictorOpsを検索してください。製品名がSplunk On-Callに変わっても、HipChat内のインテグレーションはまだVictorOpsと呼ばれています: 
VictorOpsのインテグレーションメニューから、Install an integration from a descriptor url オプションを選択します:
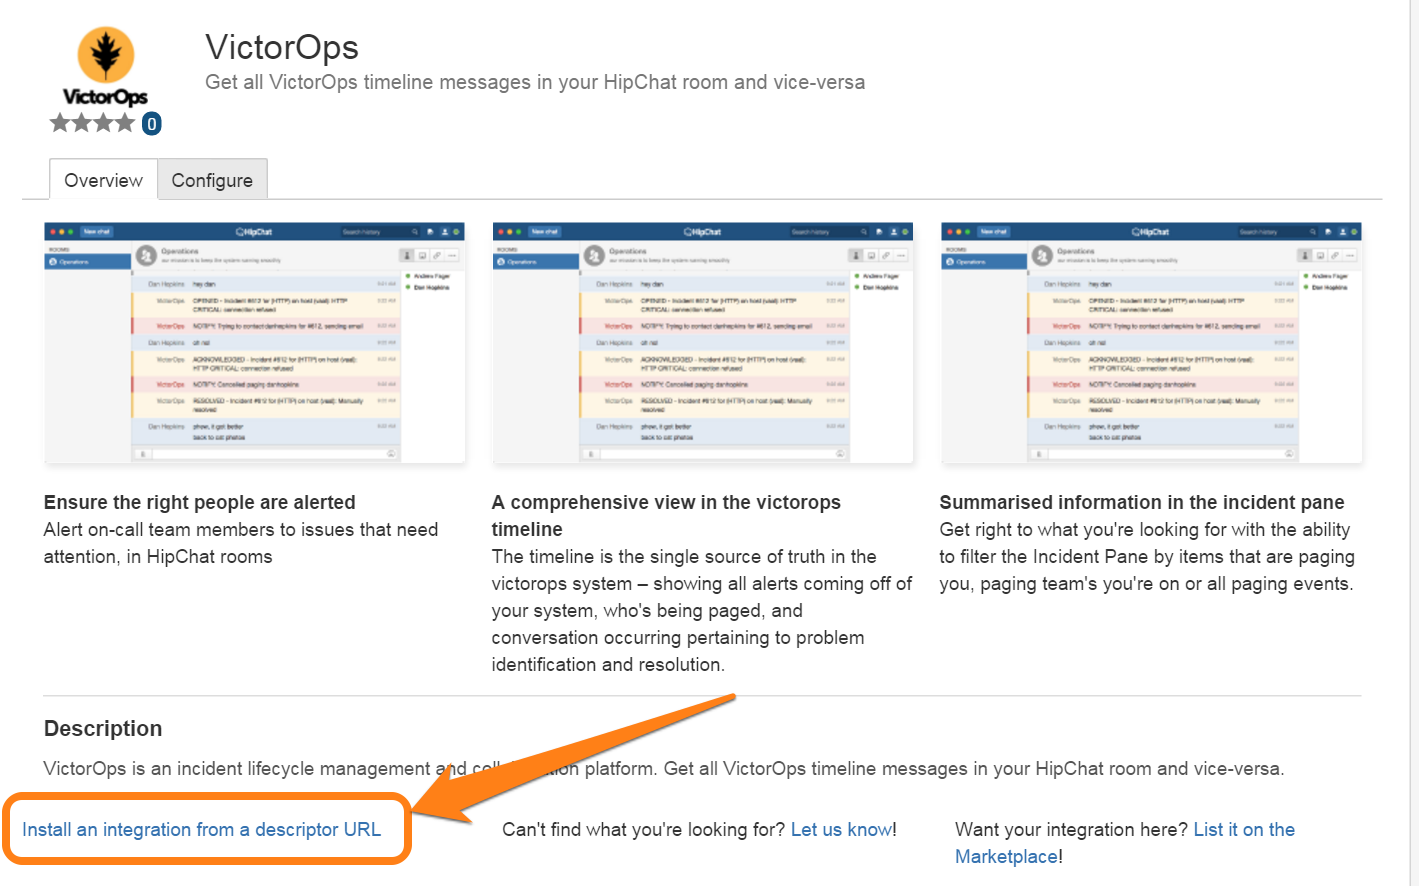
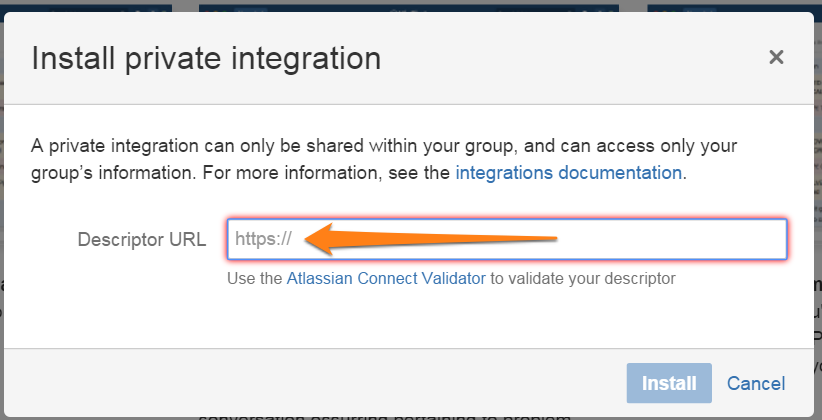
Splunk On-Call HipChatインテグレーションページから取得した アドオン機能URL を 記述子URL ボックスに貼り付け、インストール をクリックします。
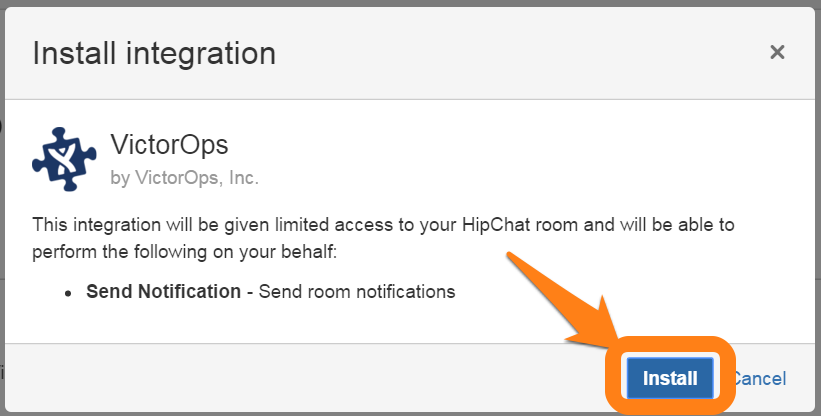
次に、VictorOps / Splunk On-Callに関連付けられるチャットルーム: hip8 を選択します
最後に、インストール をクリックします:
そのとおりです!
最後のステップは、選択したHipChatルームにエントリを投稿し、それがSplunk On-Callのタイムラインに表示されることを確認して、インテグレーションをテストすることです。
Multi-Room 🔗
マルチルーム版のHipChatインテグレーションは、シングルルームHipChat設定で達成可能なものをベースに構築されます。これは、エンタープライズレベルの機能である、ルールエンジンとカスタム発信Webhookの活用によって実現されます。
In HipChat 🔗
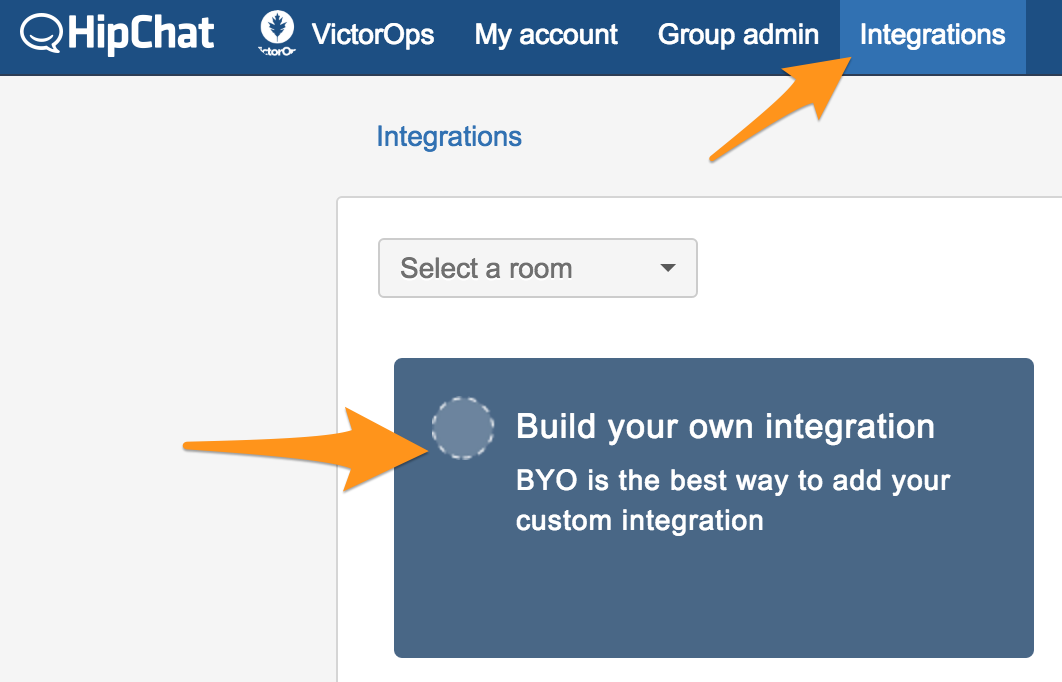
カスタムインテグレーションを作成することから始めましょう。Integrations を選択し、次に Build your own integration を選択します。
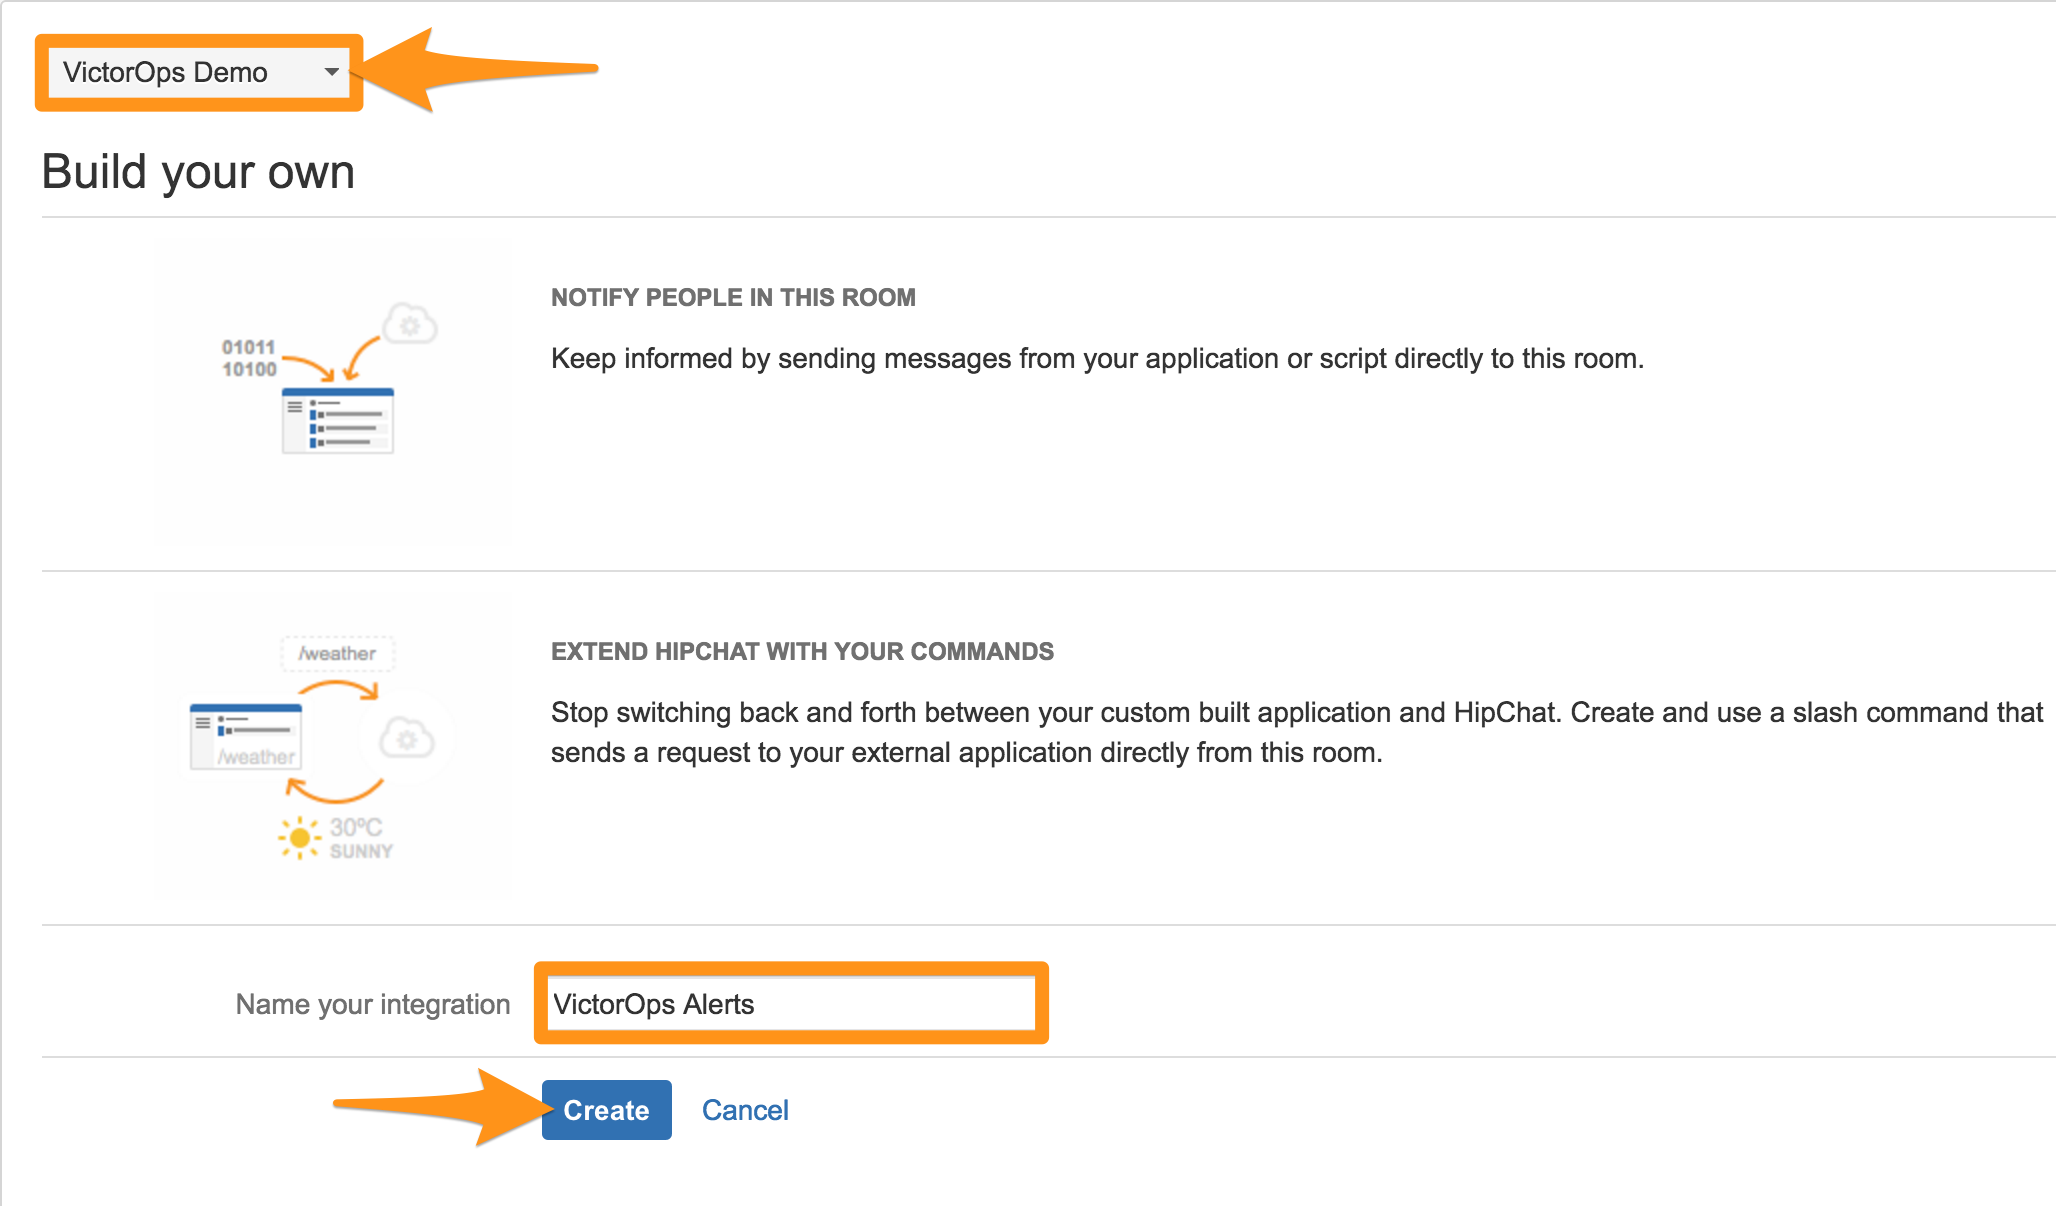
インテグレーションを作成したいルームを選択し、インテグレーションの名前を付けます。
「このURLに投稿して、このルームにメッセージを送る」ことができるURLが生成されます。このURLをクリップボードにコピーしてください。このURLには、この記事の後半で使用する2つの項目、ルームIDと認証トークンが含まれています。URLの太字はこちらです:
https://YOUR_DOMAIN.hipchat.com/v2/room/ROOM_ID/notification?auth_token=AUTH_TOKEN_HERE
新しいカスタムインテグレーションを保存します。
In Splunk On-Call 🔗
まず、ルームIDと認証トークンを、指定したルームに送信するアラートに追加するルールエンジンを設定します。この例では、」devops」というルーティングキーにマッチしたときに、room_idフィールドとauth_tokenフィールドを設定しています。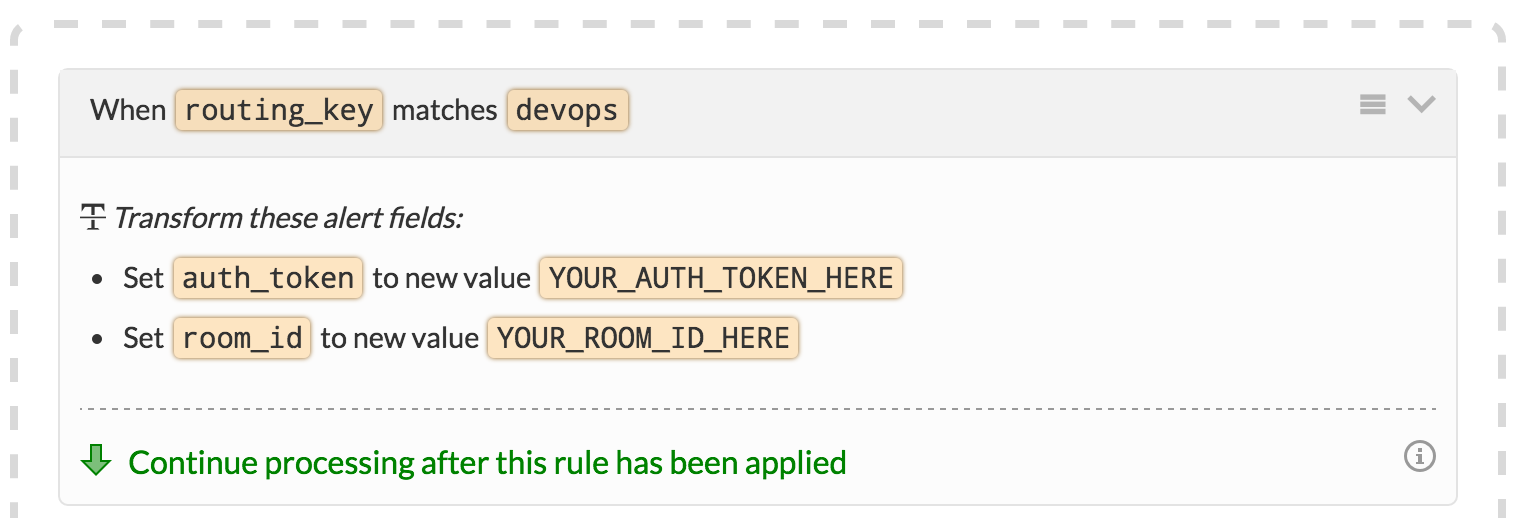
これにより、アラートのタイプに応じてroom_idとauth_tokenを変更することができます。この例では、」devops」というルーティングキーでマッチングしていますが、どのアラートフィールドでもマッチングすることができます。
次に、アウトバウンドWebhookをセットアップして、Splunk On-Call情報をHipChatルームに送信する必要があります。手順は Splunk On-CallのカスタムアウトバウンドWebhook を参照してください。
Splunk On-Callのタイムラインから、インテグレーション > 発信Webhook >> * Webhookを追加する*を選択します。
HipChatに転送したい「イベント」を選択します。この例では、インシデントがトリガーされるたびにメッセージを送信します。
メソッド を 「POST 「に設定します。
コンテンツタイプ を」application/json」に設定します。
宛先アドレスには、HipChatルームエンドポイントを貼り付けます。アラートタイプに基づいて複数のルームに送信する場合は、」room id」と」auth token」変数をルールエンジンで作成したアラートフィールドに置き換える必要があります。例:
https://YOUR_DOMAIN.hipchat.com/v2/room/ \({{ALERT.room\_id}}/notification?auth\_token=\) {{ALERT.auth_token}}
ペイロードセクションでは、さまざまな変数を追加できます。詳細はHipChatのドキュメントを参照してください。この例では、」entity_display_name」フィールドで見つかったアラート情報を含む、シンプルな色のメッセージを送信します。
{ “color”: “red”, “message”: “${{ALERT.entity_display_name}}”, “notify”: true, “message_format”: “text” }
最終的な結果は次のようになるはずです:
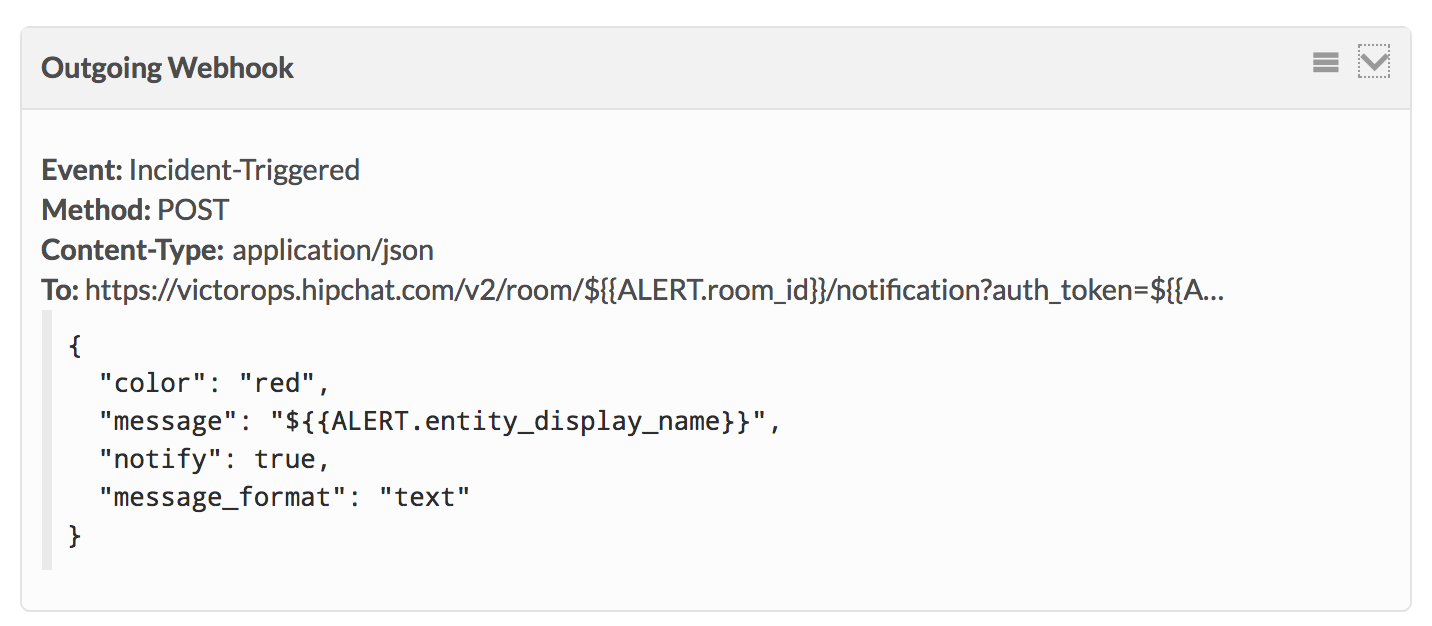
Splunk On-Callシステムの他のイベントに対しても、追加のWebhookを作成できます。ご不明な点がございましたら、Splunk On-Callサポートまでお問い合わせください。