Splunk On-CallのAppDynamicsインテグレーション 🔗
AppDynamicsとSplunk On-Callのインテグレーションを使用すると、AppDynamics内でSplunk On-Callをアラート拡張機能として利用できます。このアラート拡張機能により、AppDynamicsはイベントやカスタムアラートをSplunk On-Callのタイムラインに投稿できるようになります。アラートのペイロードには、イベントの詳細な診断のためのAppDynamicsへのリンクなど、アラートに関連する情報が含まれます。
要件 🔗
サポートされているAppDynamicsのバージョン:オンプレミスバージョンとSaaSバージョン
必須Splunk On-Callバージョン:Starter、Growth、またはエンタープライズ
Splunk On-Callでインテグレーションを有効にする 🔗
Integrations、AppDynamics の順に移動します。
Enable Integration を選択します。
Service API Key をクリップボードにコピーします。

AppDynamicsオンプレミスバージョンを設定する 🔗
AppDynamics ExchangeからVictorOpsアラートエクステンションのzipをダウンロードします: http://community.appdynamics.com/t5/AppDynamics-eXchange/idb-p/extensions。
victorops-alert.zipファイルを<CONTROLLER_HOME_DIR>/custom/actions/に解凍します。解凍すると、<CONTROLLER_HOME_DIR>/custom/actions/victorops-alertディレクトリが作成されます。
<CONTROLLER_HOME_DIR>/custom/actions/ディレクトリにあるcustom.xmlファイルのcustom actions要素に以下のXMLを追加します:
<custom-actions>
   victorops-alert
<!-- For Linux/Unix *.sh -->
   victorops-alert.sh
<!-- For windows *.bat -->
   <!--<executable>victorops-alert.bat</executable>-->
</custom-actions>
<CONTROLLER_HOME_DIR>/custom/actions/ディレクトリにcustom.xmlファイルが存在しない場合、以下のXMLでcustom.xmlファイルを作成してください:
<custom-actions>
   victorops-alert
<!-- For Linux/Unix *.sh -->
   victorops-alert.sh
<!-- For windows *.bat -->
   <!--victorops-alert.bat -->
</custom-actions>
<CONTROLLER_HOME_DIR>/custom/actions/victorops-alertにあるconfig.yamlファイルを、APIキー、ルーティングキー、プロトコル、Splunk On-Callホストで更新します。
#VictorOps Org Key
voOrganizationKey: "<YOUR_SERVICE_API_KEY>"

#VictorOps Routing Key
voRoutingKey: "<YOUR_ROUTING_KEY>"

#scheme used (http/https)
protocol: "https"

#VictorOps host
voAlertHost: "<alert.victorops.com>"

#VictorOps url path
voAlertUrlPath: "</integrations/generic/20131114/alert>"

#http timeouts
connectTimeout: 10000
socketTimeout: 10000

#control level of details in VO alert
showDetails: false
カスタムアクションを作成するには、まずAppDynamicsドキュメントの以下のトピックを参照してください:
このエクステンションをカスタムアクションとして使用するには:
AppDynamicsで、Alert & Respond、Actions の順に移動します。
Create Action を選択します。
Custom Action を選択し、次に OK を選択します。
ドロップダウンメニューの中に、victorops-alertというアクションがあります。
AppDynamics SaaSバージョンを設定する 🔗
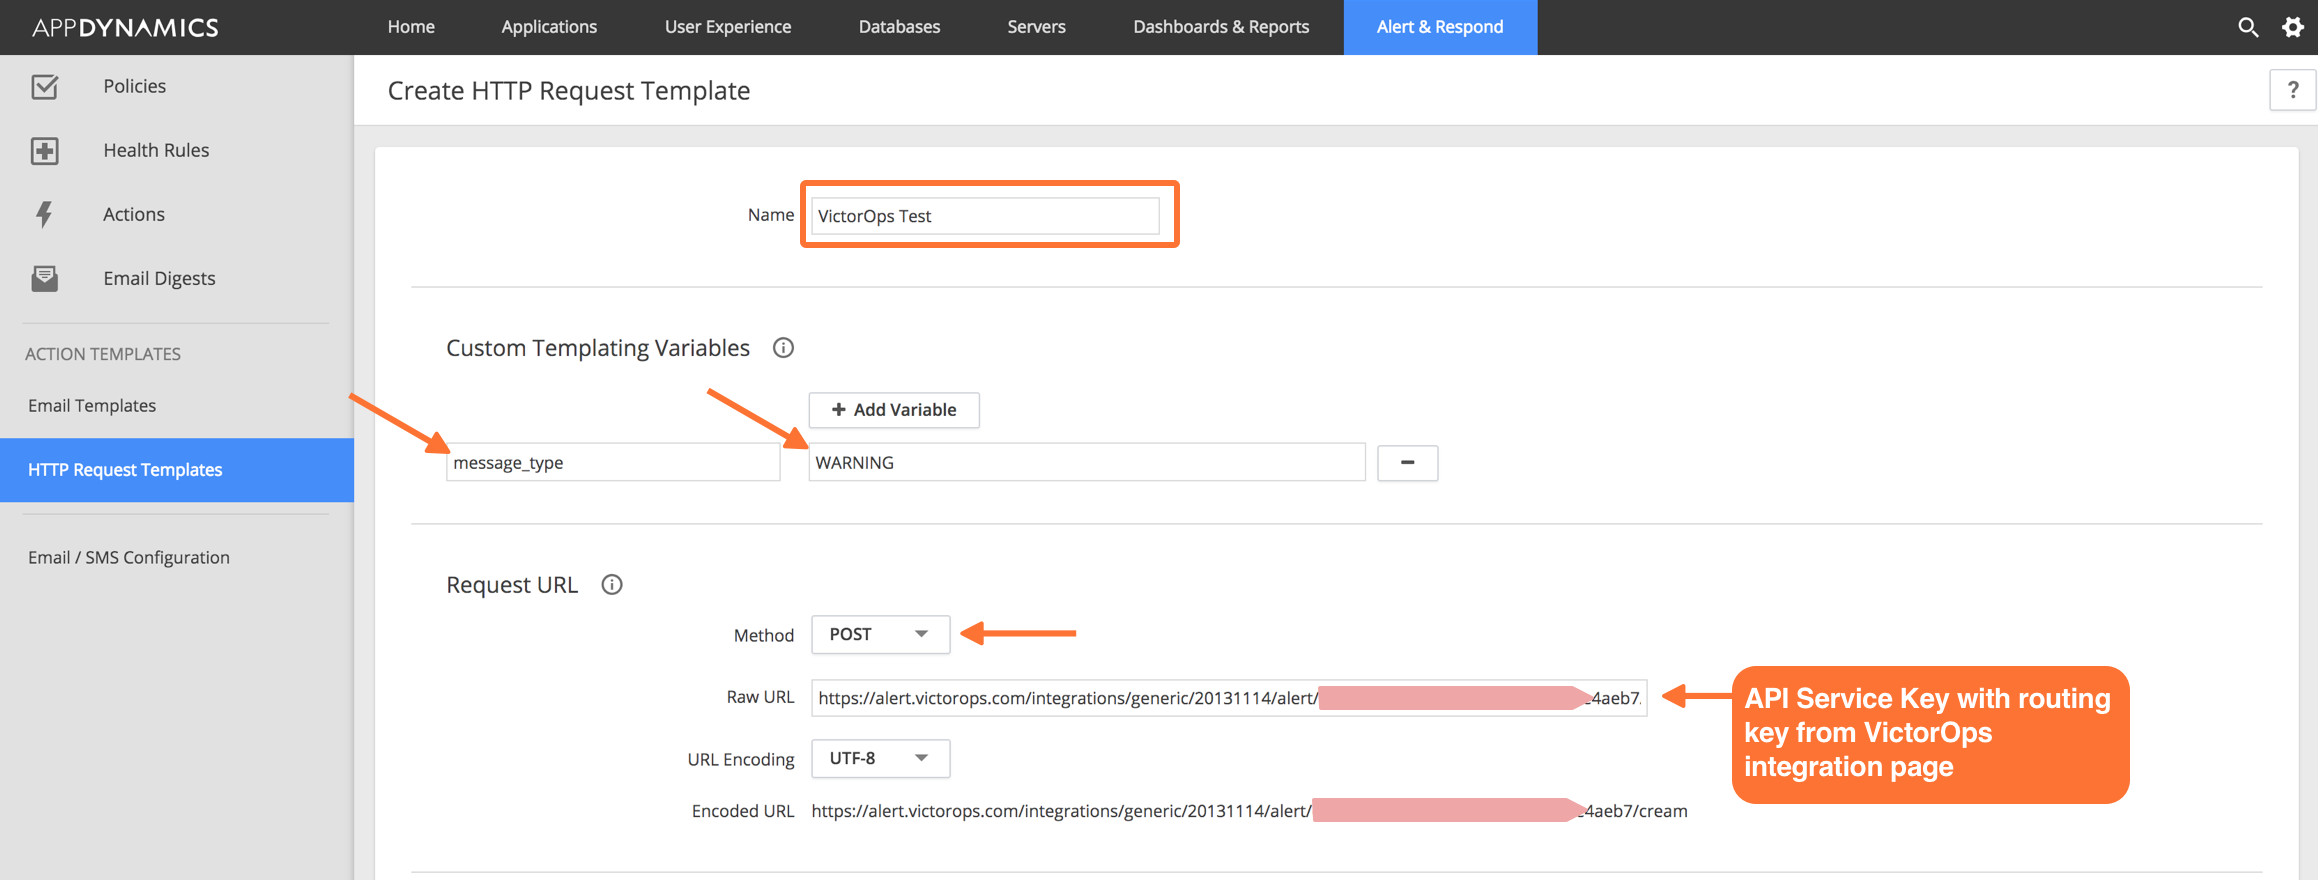
AppDynamicsで、Alert & Respond、HTTP Request Templates、New の順に選択します。

テンプレートに名前を付けます。たとえば、Splunk On-Call Test。
フィールド名message_type、値WARNINGのカスタムテンプレート作成変数を設定します。
Request URL で、「メソッド」を「POST」に設定します。
Raw URL フィールドに入力します。以下の形式を使用します:
https://alert.victorops.com/integrations/generic/20131114/alert/<YOUR_SERVICE_API_KEY>/<YOUR_ROUTING_KEY>
カスタムヘッダーは必要ありません。
Payload で、
application/jsonのMIME Typeを選択し、以下のペイロードを貼り付けます。このペイロードには、デフォルトのAppDynamicsアラートペイロードが含まれています。このペイロードは、コメントアウトされており、Splunk On-Callへの正常な取り込みに必要なJSONのみが許可されています:#foreach(${eventList} in ${fullEventsByTypeMap.values()}) #foreach(${event} in ${eventList}) #if ($event.eventType == "POLICY_OPEN_CRITICAL") #set ( $message_type = "CRITICAL" ) #elseif ($event.eventType == "POLICY_UPGRADED") #set ( $message_type = "CRITICAL" ) #elseif ($event.eventType == "ERROR") #set ( $message_type = "CRITICAL" ) #elseif ($event.eventType == "APPLICATION_ERROR") #set ( $message_type = "CRITICAL" ) #elseif ($event.eventType == "POLICY_CLOSE_WARNING") #set ( $message_type = "RECOVERY" ) #elseif ($event.eventType == "POLICY_CLOSE_CRITICAL") #set ( $message_type = "RECOVERY" ) #elseif ($event.eventType == "POLICY_CANCELED_CRITICAL") #set ( $message_type = "RECOVERY" ) #else #set ( $message_type = "WARNING" ) #end { "message_type":"${message_type}", #latestEvent.incident.id is the AppDynamics incident ID for the health rule. 1 incident can include multiple events. "entity_id":"${latestEvent.incident.id}", #latestEvent.id is the AppDynamics event ID for the triggering HTTP action. "event_id":"${latestEvent.id}", "state_message":"${event.eventMessage}", "alert_url":"${event.deepLink}", "ad_event_type":"${event.eventType}", "monitoring_tool":"AppDynamics" } #end #end
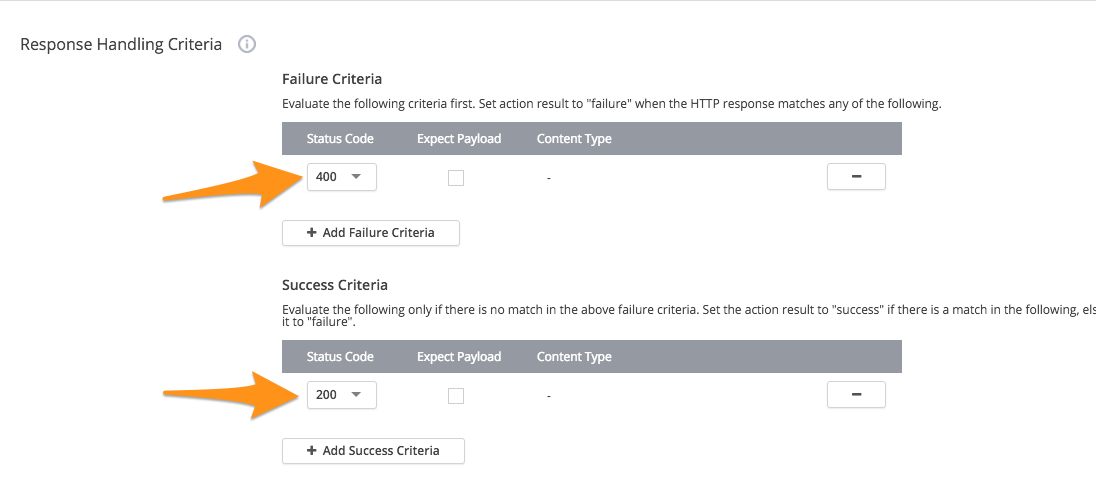
Response Handling Criteria で、Failure Criteria ステータスコードを400に、Success Criteria ステータスコードを200に設定します。
失敗基準と成功基準の両方で Expected Payload のチェックを外します。

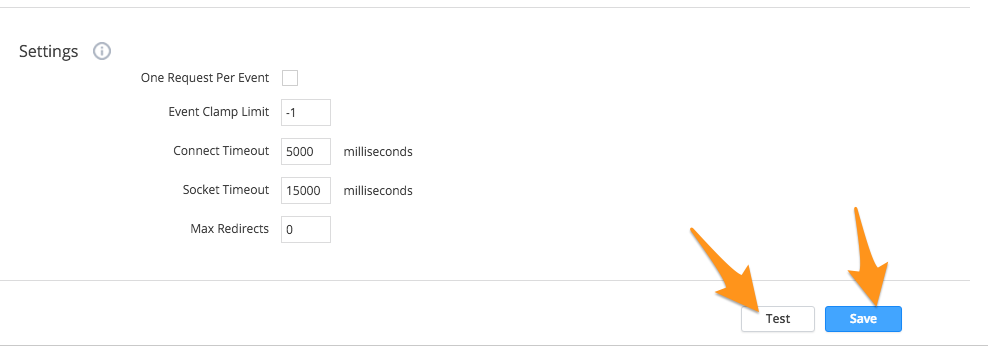
ページの下部で、設定を変更し、Save と`テスト`を選択します。

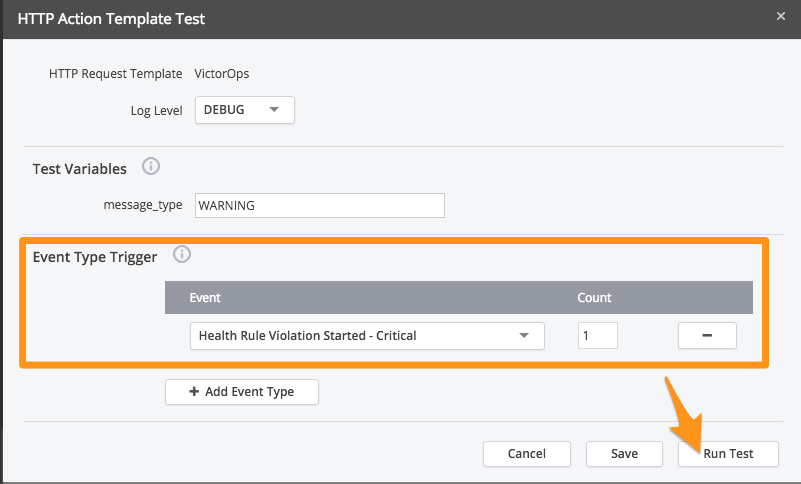
テストするには、カウント1のイベントタイプトリガーを追加し、Run Test を選択します。

関連するアラートについてSplunk On-Callタイムラインを確認してください。

AppDynamicsのアラートでSplunk On-Call HTTPリクエストテンプレートを使用できるようになりました。